As you can see, short-form content is everywhere. Three popular platforms get all the attention – TikTok, Instagram, and YouTube.
But what TikTok isn’t telling you is that it compresses your video. This means the video quality will suffer if you export your TikToks with incorrect settings.
Knowing the best settings for your next video in DaVinci Resolve is important to ensure your videos look crisp on TikTok.
In this step-by-step tutorial, I will cover the technical requirements for short-form content, the best project settings for TikToks in DaVinci Resolve, and the best export settings.
Technical Requirements for TikTok
It is important to follow these requirements to ensure that your video maintains optimal quality after TikTok’s optimization process.
- Video Length: up to 10 minutes
- Frame Rate: 30 fps
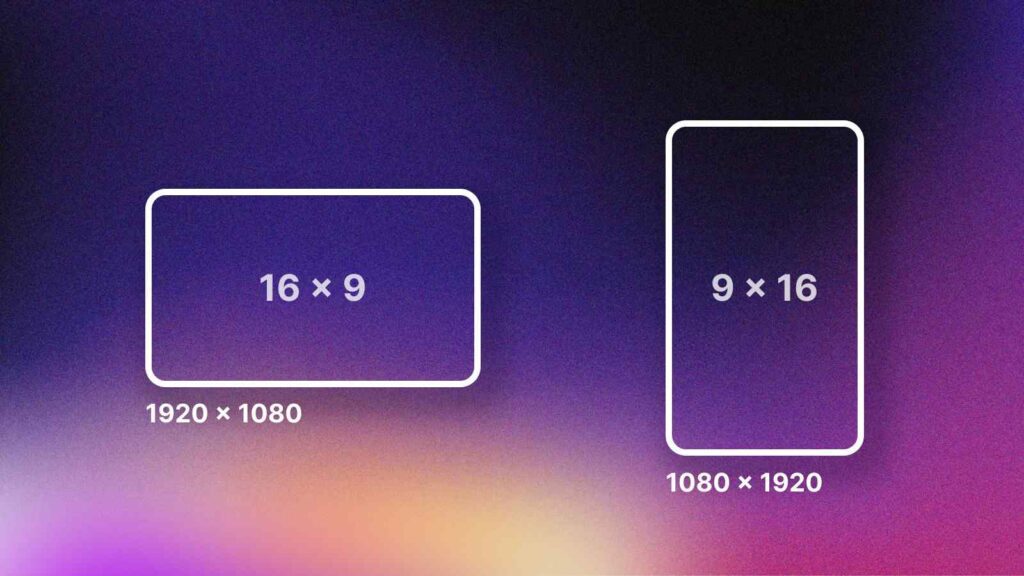
- Resolution: 1080 x 1920
- Codec: H.264
Part I: Change Project Settings
Step 1: Go to File > Project Settings.
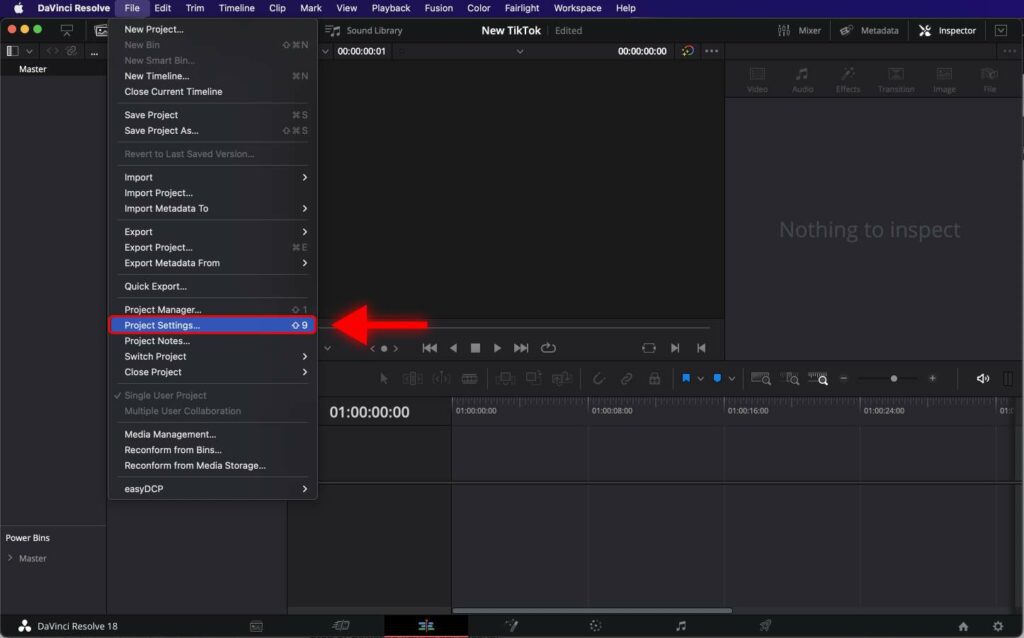
Alternatively, you can open Project Setting with the shortcut Shift + 9.
Step 2: Change Timeline Resolution to 1080 x 1920.
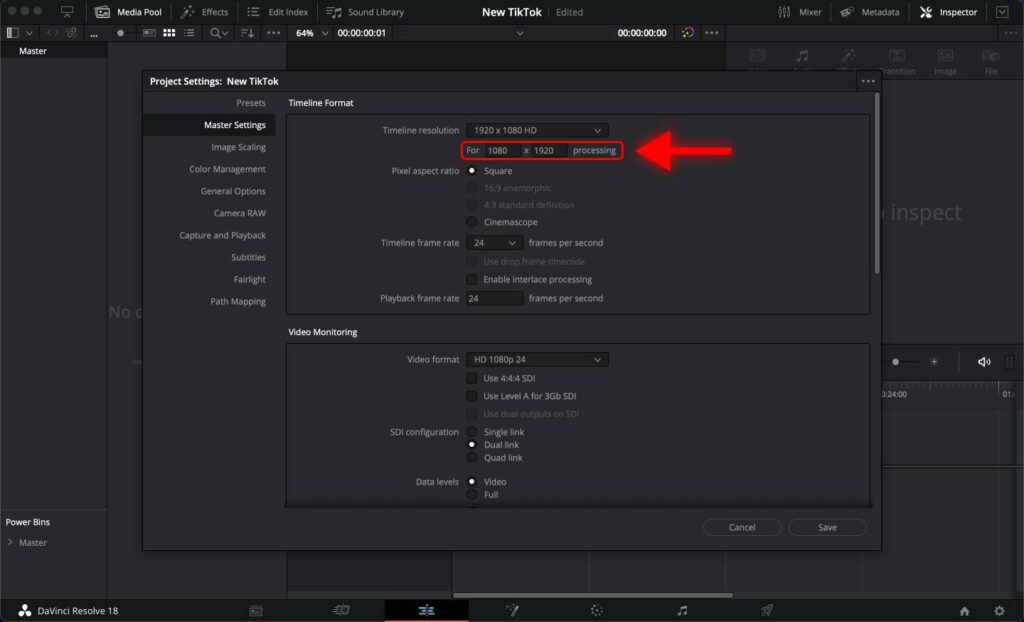
Step 3: Select 30 frames per second and click Save.
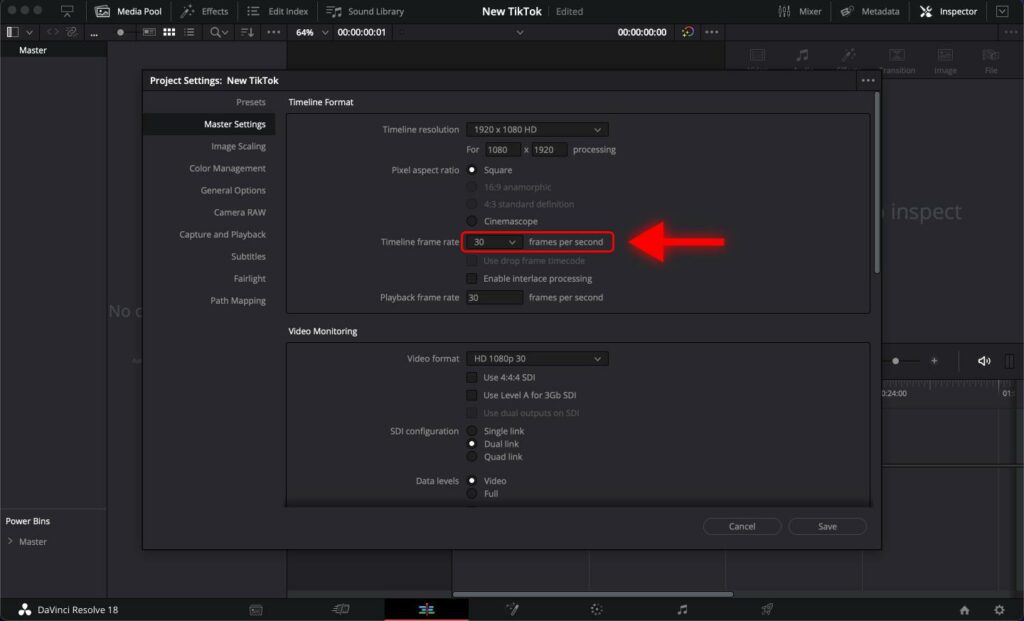
It’s recommended that videos should have at least 30 FPS and a resolution of at least 720 pixels.
Now you can start editing your video.
Once your video is ready, you will need to export it.
Now, let’s get into the best render/export settings for short-form content in DaVinci Resolve.
Part II: Export Settings
Step 1: Go to the Delivery page.
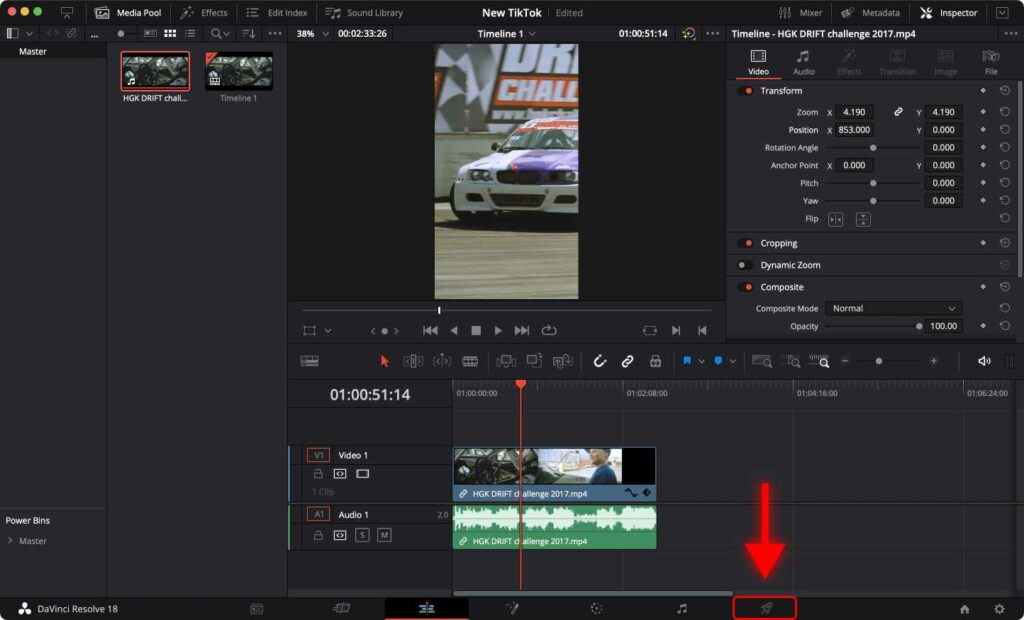
Alternatively, you can open the Delivery page with the shortcut Shift + 8.
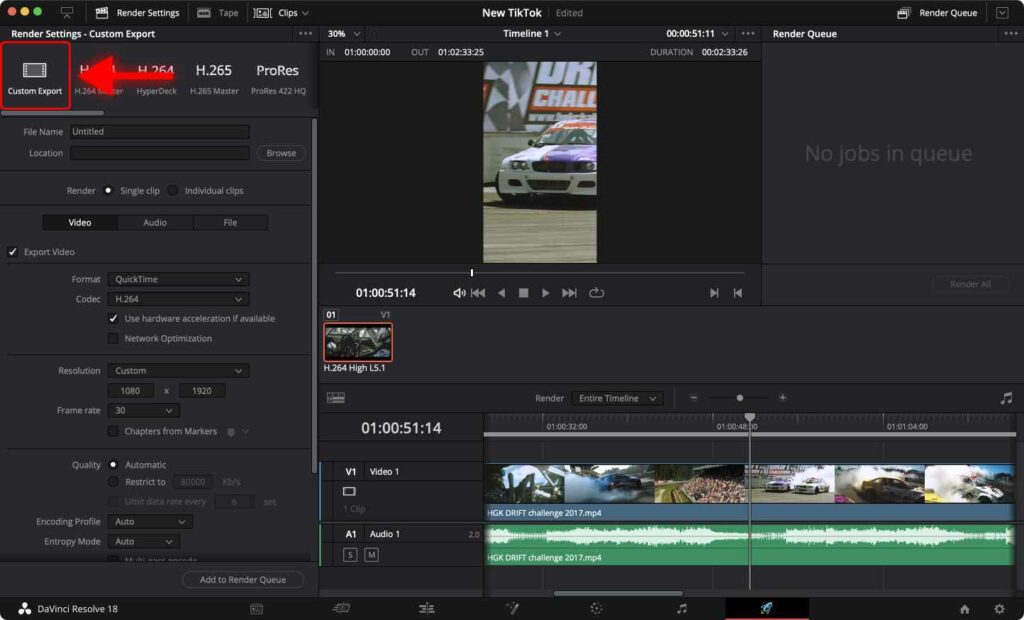
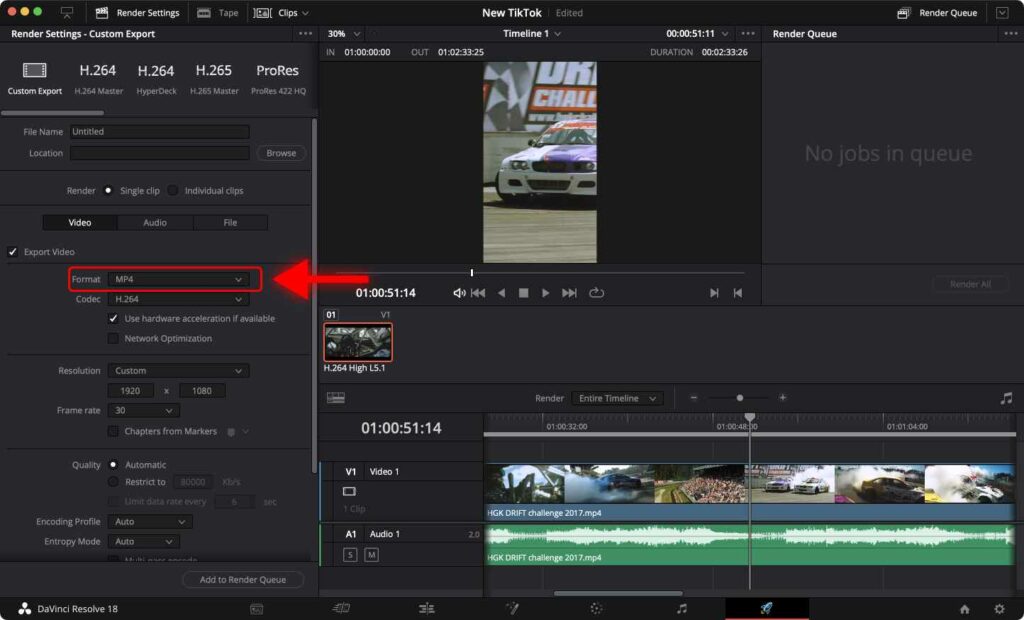
Step 2: Select Custom Export
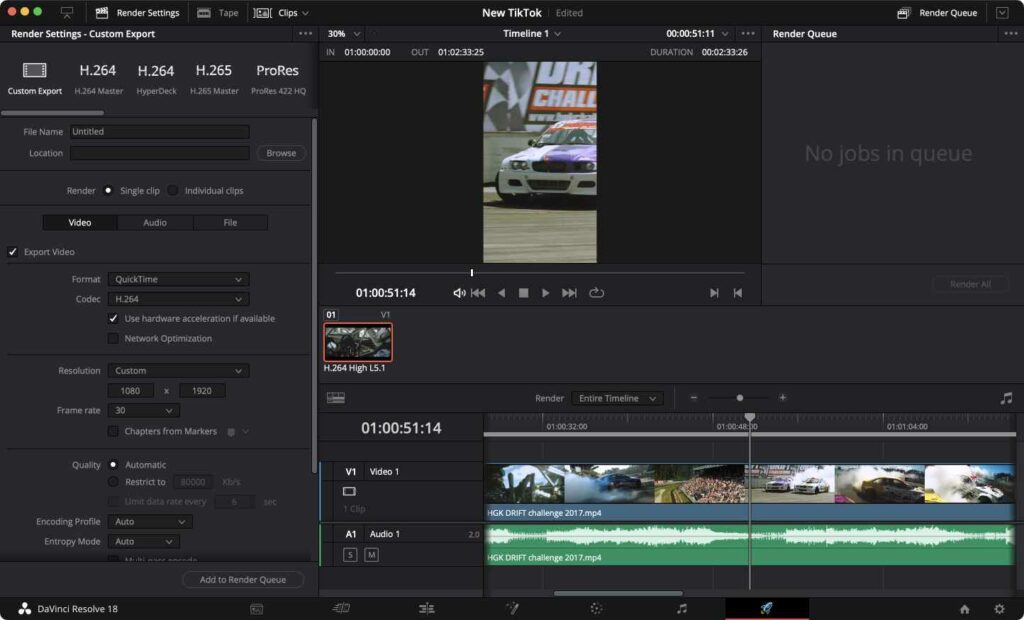
Step 3: For the Format, select MP4
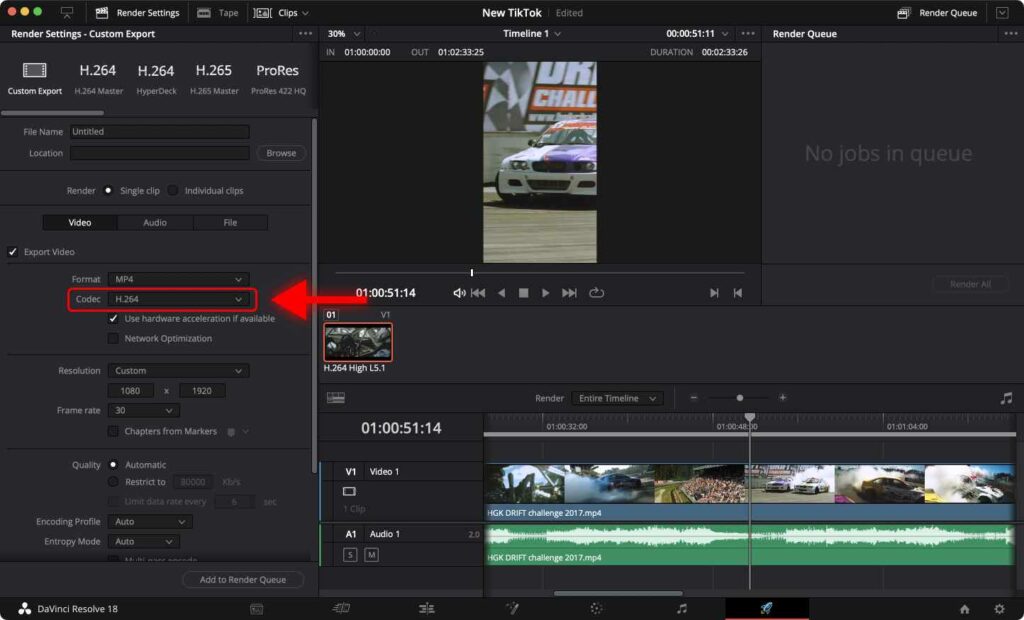
Step 4: For the Codec, select H.264
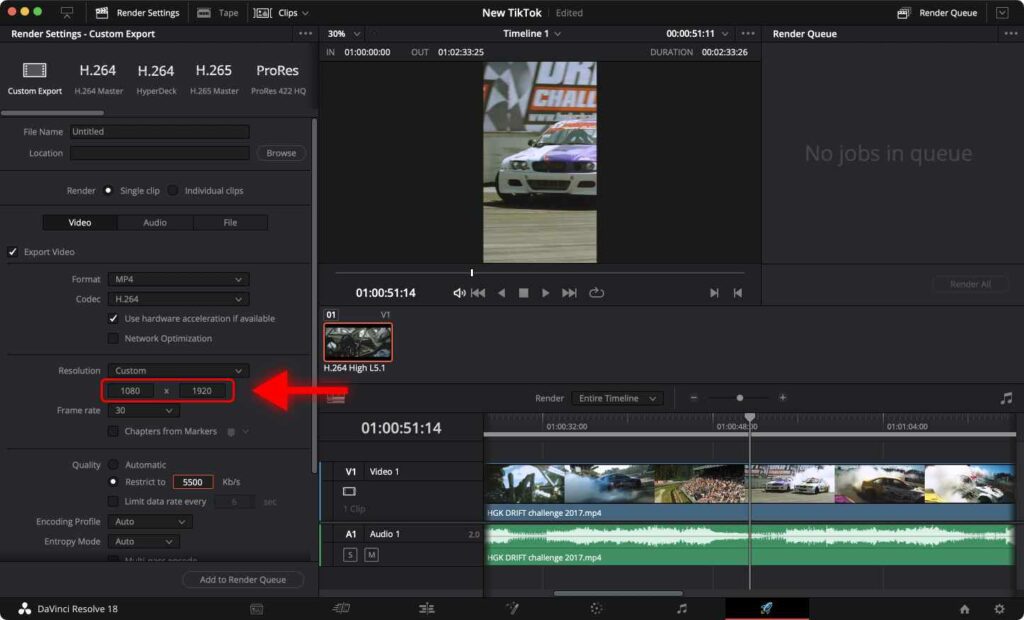
Step 5: Set the Resolution to 1080 by 1920.
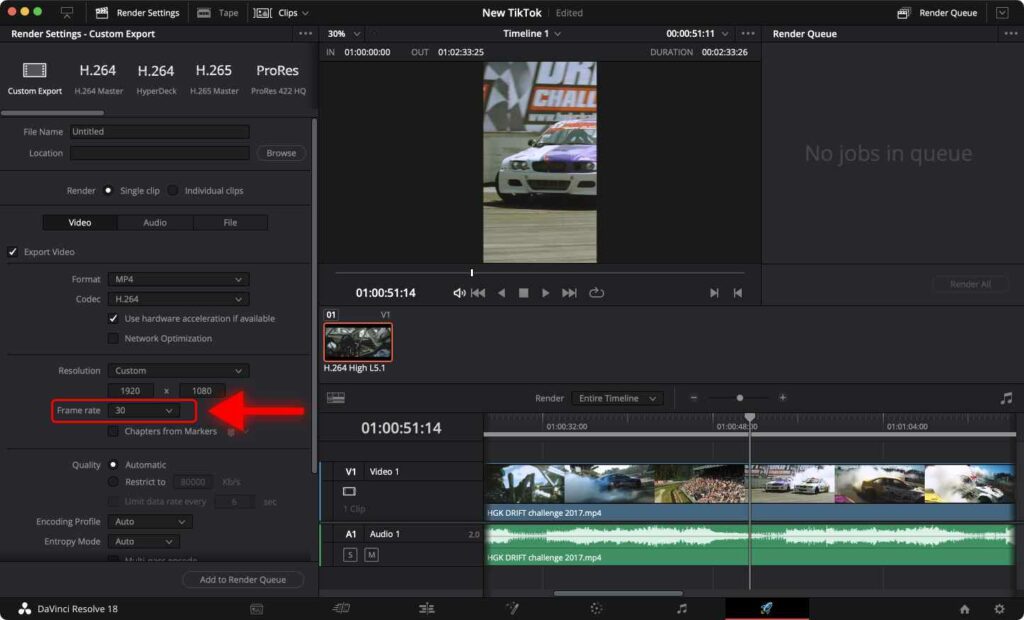
Step 6: Set the frame rate to 30 fps or higher.
Step 7: Set Bitrate to 5500 kb/s.
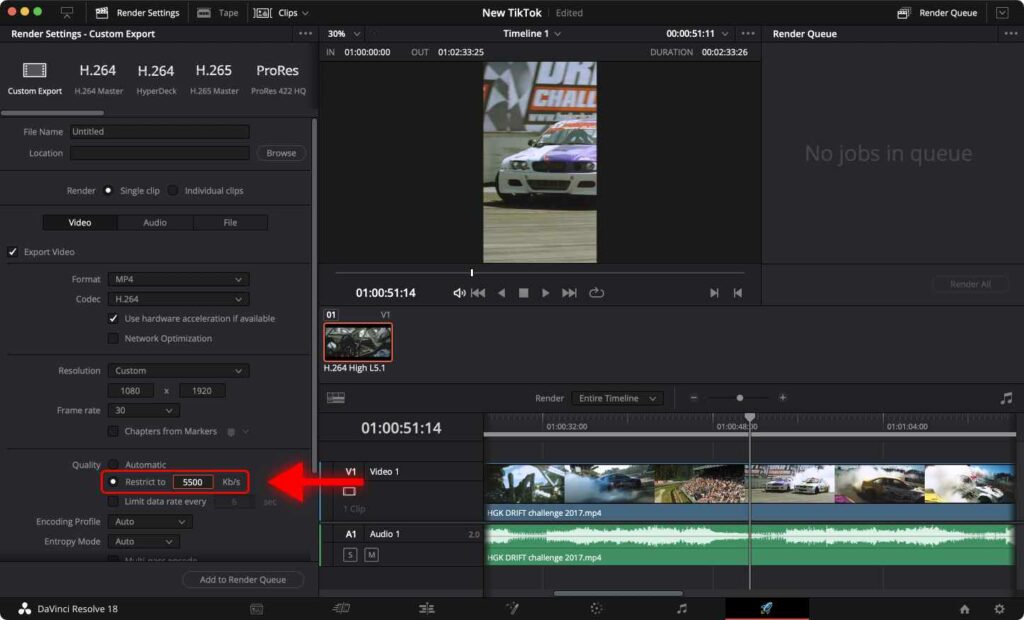
The bitrate is one of the most important settings as it determines the sharpness of your video once uploaded to the platform.
If your video has a different resolution or higher frame rate, you must increase the bitrate.
In the table below, identify the appropriate bitrate for your video.
| Frame Rate | Bitrate |
|---|---|
| 60 fps | 6200 kb/s |
| 30 fps | 5500 kb/s |
| 25 fps | 5000 kb/s |
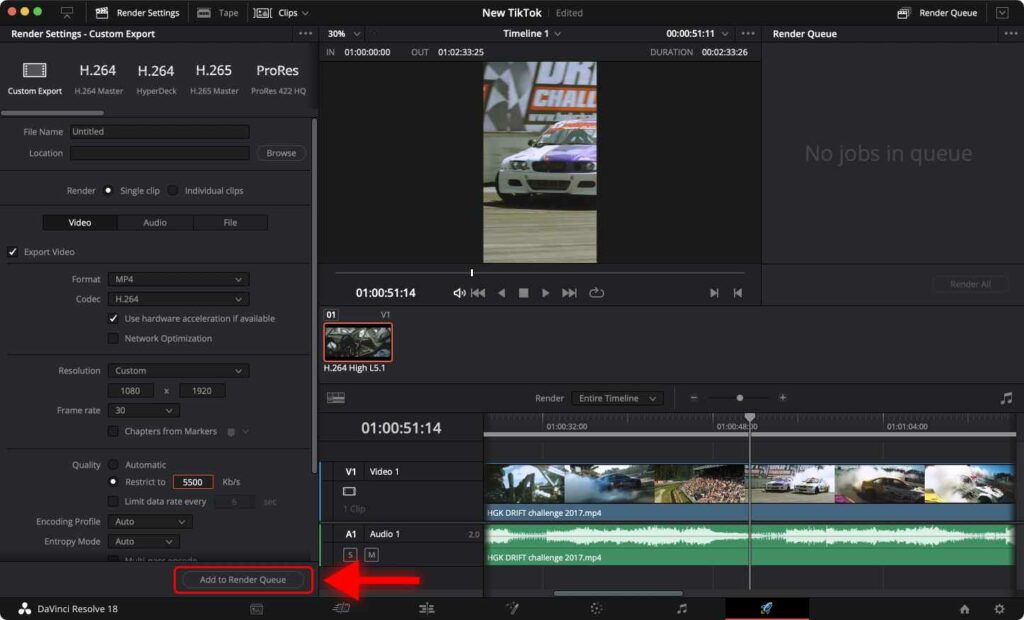
Step 8: Click Add to Render Queue. Select where you want your video to be saved.
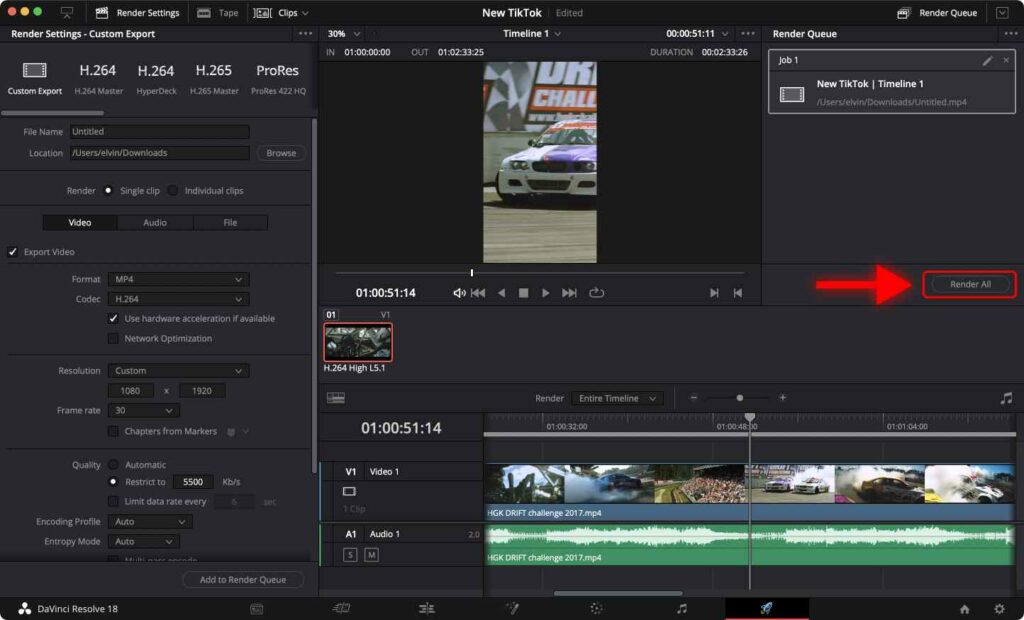
Step 9: Click Render All.
Knowing the best settings for TikTok in DaVinci Resolve is crucial. Usually, big platforms like TikTok compress videos to fit their technical requirements, thus, making your video look worse if it doesn’t have proper settings.
By following this step-by-step tutorial, you can be sure that your videos are optimized for each platform’s technical requirements.
Remember to set the appropriate resolution I discussed earlier, frame rate, codec, and adjust the bitrate.
A potential problem that may arise is a difference in color between the rendered video and the video in the timeline.
You can fix this issue by following my Export Settings to Match Colors in DaVinci Resolve Timeline guide.
Frequently Asked Questions
What resolution do I need to use for TikTok?
TikTok limits the video resolution to 1080×1920 pixels for all uploaded videos, even if you upload a 4K video. Therefore, to prevent TikTok from compressing your video, it’s recommended that you only upload videos in 1080×1920 pixels.
What is the best export format for TikTok?
The recommended format for TikTok videos is MP4 with H.264 codec. This format achieves a good balance between video quality and file size.
What is the maximum file size for TikTok?
The maximum file size for a TikTok video on iOS devices is 287.6 MB. On Android devices, the limit is 72 MB.
What is the recommended length for a TikTok video?
TikTok videos can be up to 10 minutes long. However, keeping your videos shorter can result in better engagement.