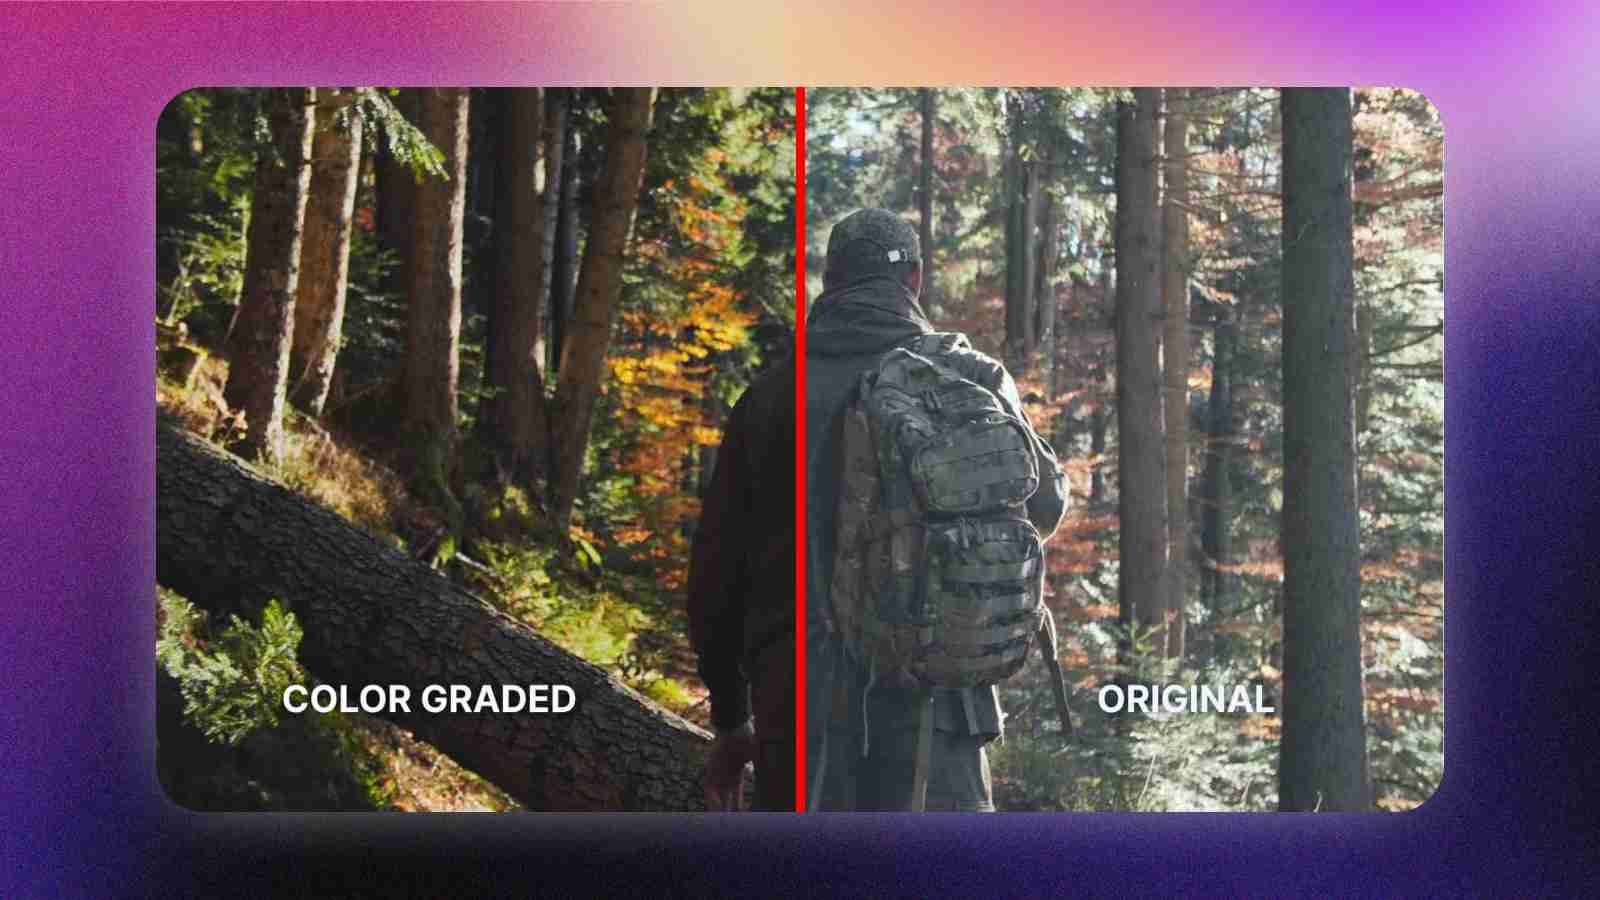
When you watch a movie, it evokes emotions. These emotions are often achieved by using certain colors. Color is a powerful tool to set the tone of a scene.
If you’ve clicked on this article, you probably want to add to your video a certain mood using DaVinci Resolve. The good news is that DaVinci Resolve is one of the best industry standard color adjustment tools used by huge film studios.
In this step-by-step tutorial, I will go through the process of creating a cinematic look using LUTs and color-grading the footage in DaVinci Resolve.
Feel free to experiment as you go through the tutorial, as it all comes down to personal preferences.
1: Create a Node Structure in DaVinci Resolve
Step 1: Click on the clip you want to color grade.
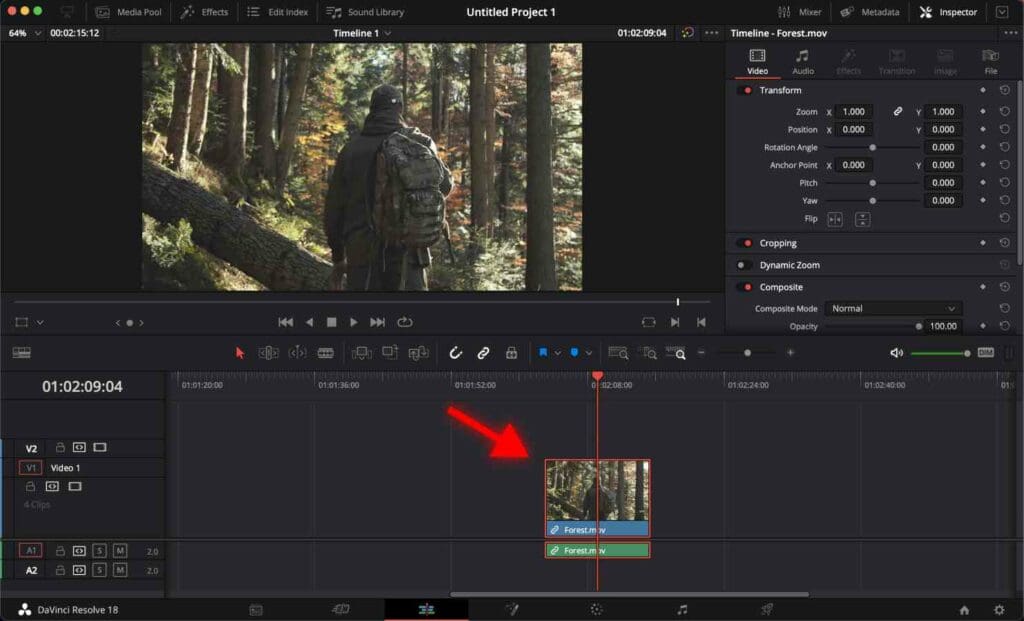
You should see the clip surrounded by a red frame, indicating that it is active.
You can zoom-in or zoom-out of the timeline to see the clips better.
Step 2: Go to the Color page.
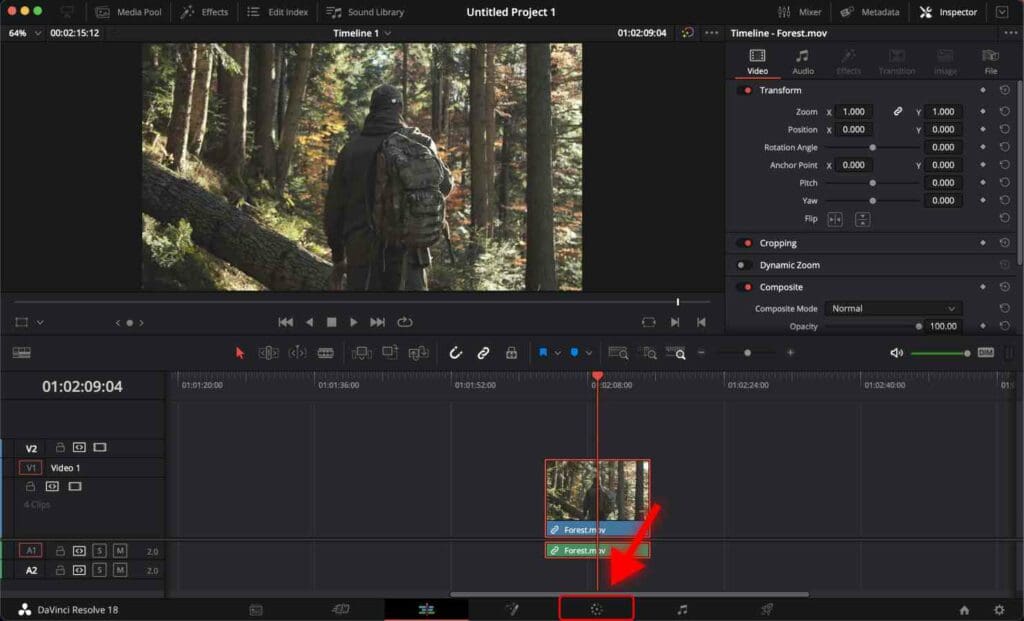
Alternatively, you can open the Fusion page with the shortcut Shift + 6.
Step 3: Click on the “Nodes” to see the node structure.

Nodes in DaVinci Resolve can be perceived as layers. Each node represents a different step in the video processing. They can be added, removed, and rearranged.
For example, a node can be used to adjust the brightness and contrast of a video clip, while another node might be used to add a specific effect.
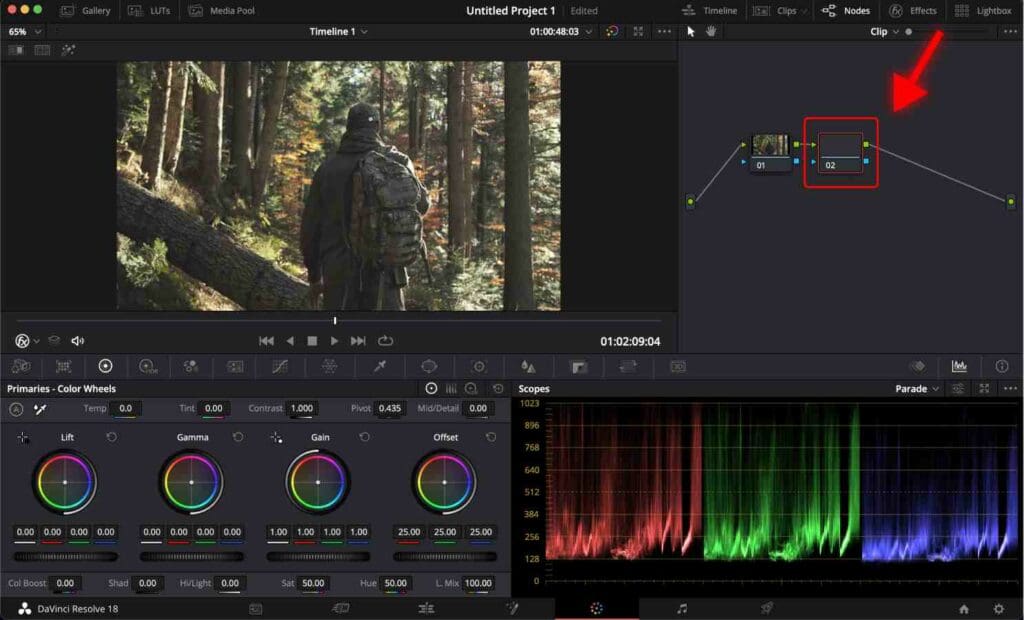
Step 4: Right-click on the only node and select Add Node > Add Serial.
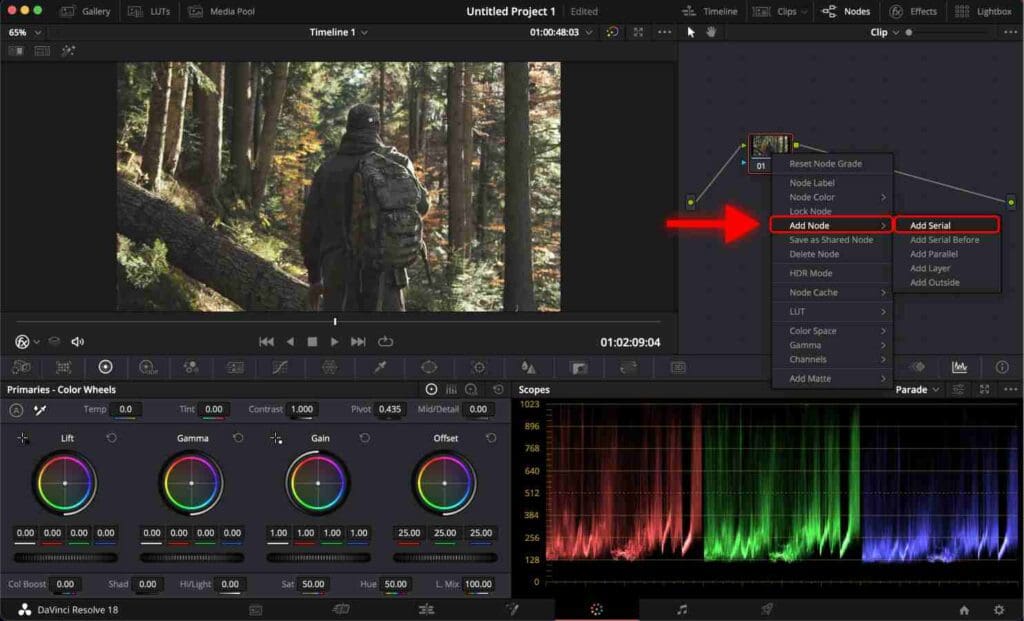
A new node must appear.
In the next part, I will apply a LUT to the video.
2: How to Apply LUTs in DaVinci Resolve
The cool thing about DaVinci Resolve is that it has some built-in film emulation LUTs that look awesome!
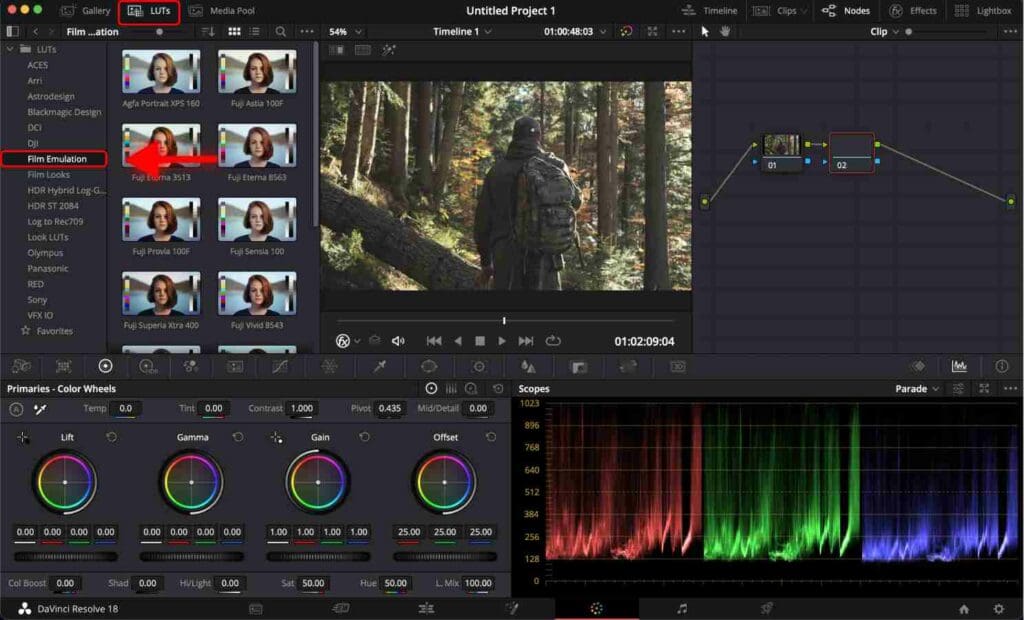
Step 1: Click on the second node.

Step 2: Go to the LUTs tab and select “Film Emulation” in the LUTs list.
Step 3: Hover over different LUTs and see which one suits best to your video. In this example, I will choose “Kodak Ektachrome 64” because it highlights green and yellow tones in my video clip.
Step 4: Click on the specific LUT and drag it over the second node.
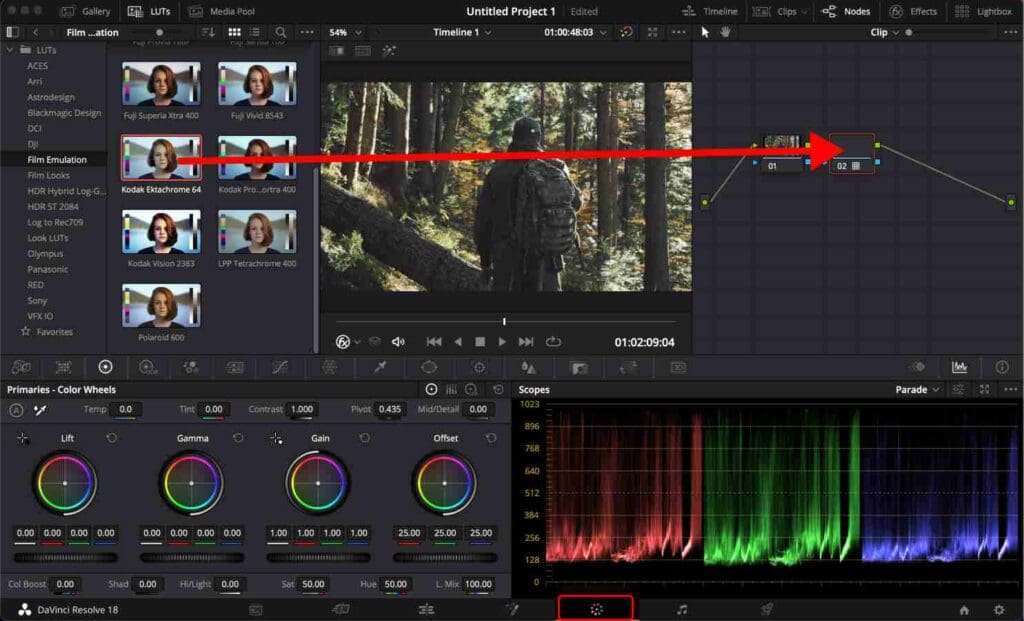
Now the LUT is applied to your video clip.
If the LUT brings a lot of unwanted changes to the image, for example, increased brightness, you can fix that. Go to the first node and adjust it by bringing down Gain and playing with Highlights.
Let me show you how to do that for this particular video clip.
3: How to Color Grade a Video Clip in DaVinci Resolve
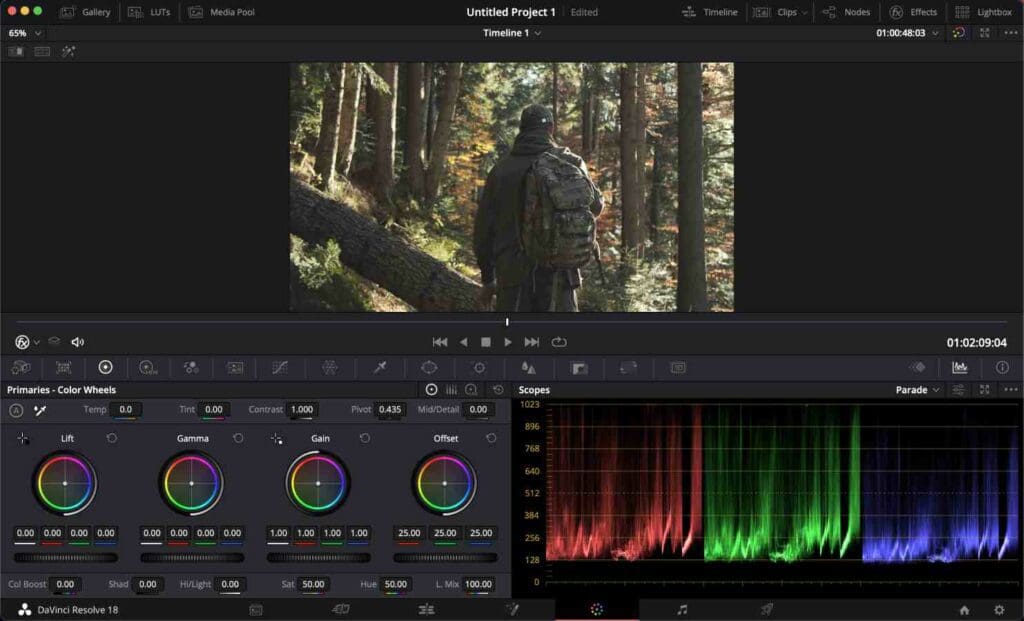
Step 1: Click on the first node.

Step 2: Find Color Wheels.
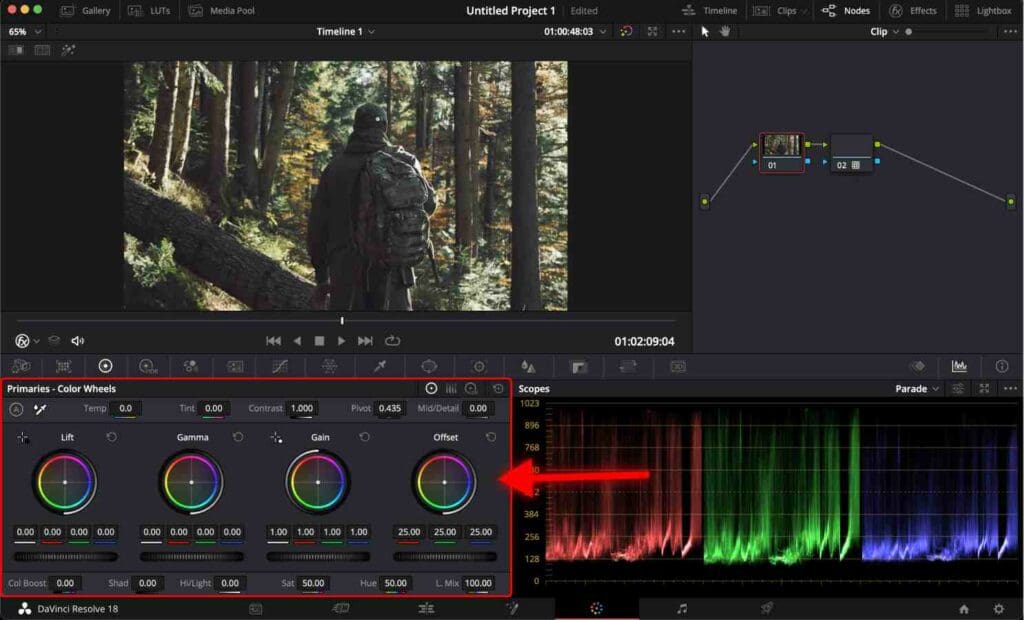
Color Wheels in DaVinci Resolve are a set of color correction controls used to adjust the video’s color balance.
There are four color wheels. Each is designed to adjust a specific aspect of the video.
- Lift – adjusts the darkest areas of the video.
- Gamma – adjusts the mid-tones of the video.
- Gain – adjusts the lightest areas of the video.
- Offset – adjusts the entire video to make a certain color prevail.
Each color wheel is represented as a circle with a center pivot point which can be dragged to adjust the color balance.
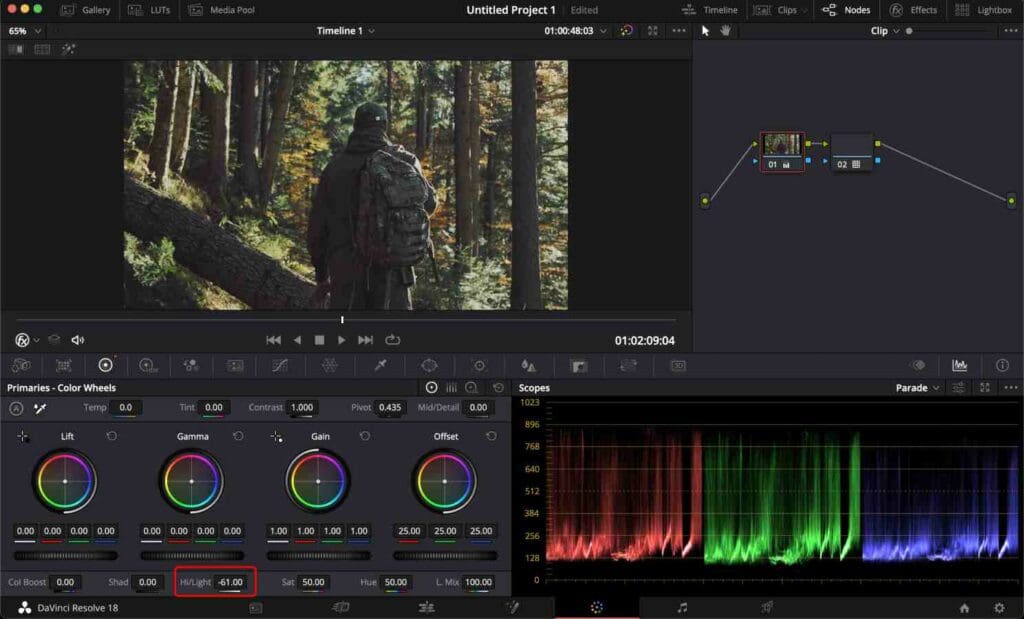
Highlights
First, let’s bring down the highlights. You can do that by clicking on its value and dragging the mouse to the left to decrease it.
Saturation
Bring up the saturation a little bit.

It’s important to realize that each video has unique lighting conditions. Thus, perceive my adjustments as a guide rather than strict instructions. Play with these settings and see what settings suit your footage best.
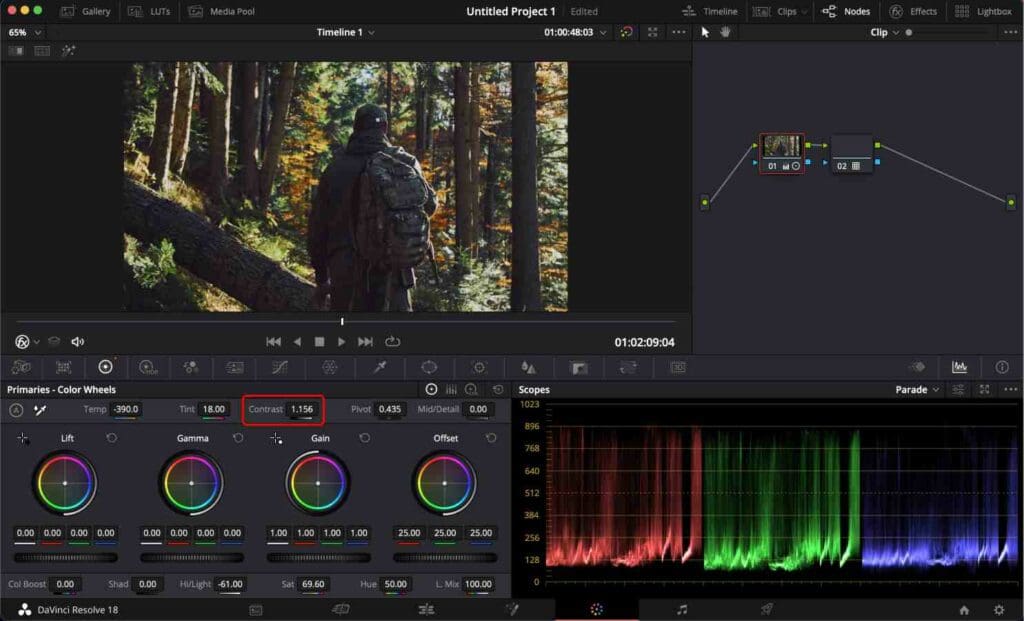
Temperature
I will slightly reduce the temperature value to make the video look colder.

Decreasing the value will make your video look colder, meaning it will have a blue tint. Increasing the value will warm the video, giving it an orange tint.
Tint
Increasing a little bit the tint to make the colors look natural.

Contract
Increasing the contrast value.
You can use a shortcut to disable your color adjustments and compare the colors to the original video.
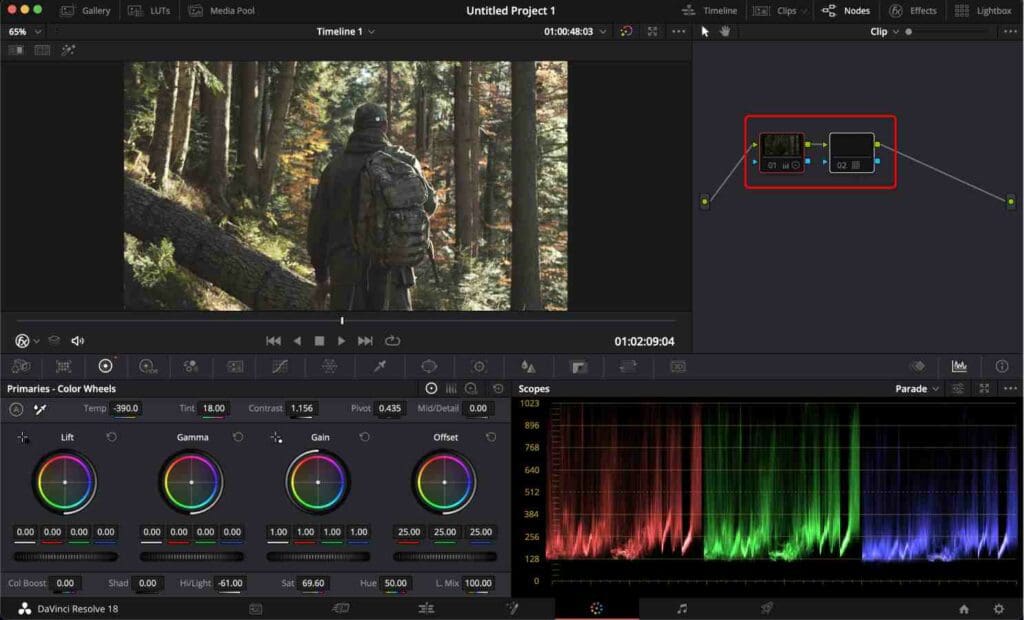
Select all nodes with the mouse and press “Command + D” on MacOS or “Control + D” on Windows to disable the nodes.
Congratulations! Now you know how to color grade your footage in DaVinci Resolve.
This is a creative process. Therefore, feel free to play with it.
A potential problem that may arise is a difference in color between the rendered video and the video in the timeline.
You can fix this issue with 2 Export Settings to Match Colors in DaVinci Resolve Timeline.
Frequently Asked Questions
How to color grade a video in Davinci Resolve?
DaVinci Resolve is known for its professional color grading abilities. Click on the “Color” tab to access the color grading tools. Use the color wheels to adjust the overall color balance of your footage. Additionally, you can apply built-in film emulation LUTs to your footage.
What is a LUT?
A LUT (Look Up Table) is a mathematical formula that transforms one set of colors into another. LUTs can be applied to video footage for a specific look or style.
How to apply LUTs in DaVinci Resolve?
Click on the second node. Go to the LUTs tab and select “Film Emulation” in the LUTs list. Click on the specific LUT and drag it over the second node.


