If you have an unstable or shaky video, it doesn’t mean you have to waste time re-shooting it. DaVinci Resolve has a set of tools that transform your shaky footage into a smooth professional-looking video.
In this step-by-step tutorial, I will show you how to stabilize your video and achieve your desired look in DaVinci Resolve.
How to Stabilize Video in DaVinci Resolve
Step 1: Select the clip that needs to be stabilized.
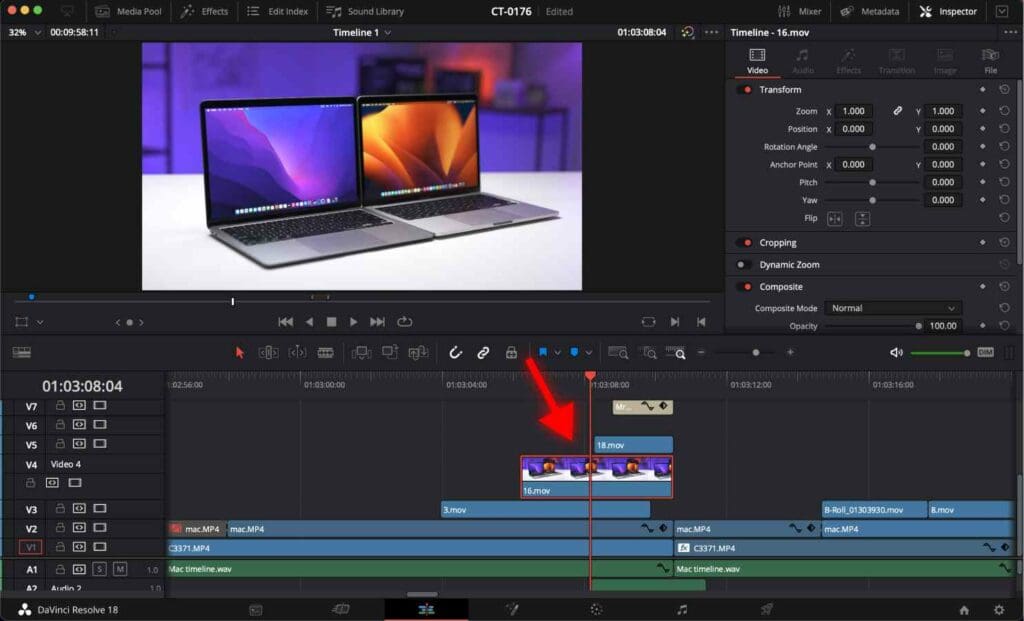
You can zoom-in or zoom-out of the timeline to see the clips better.
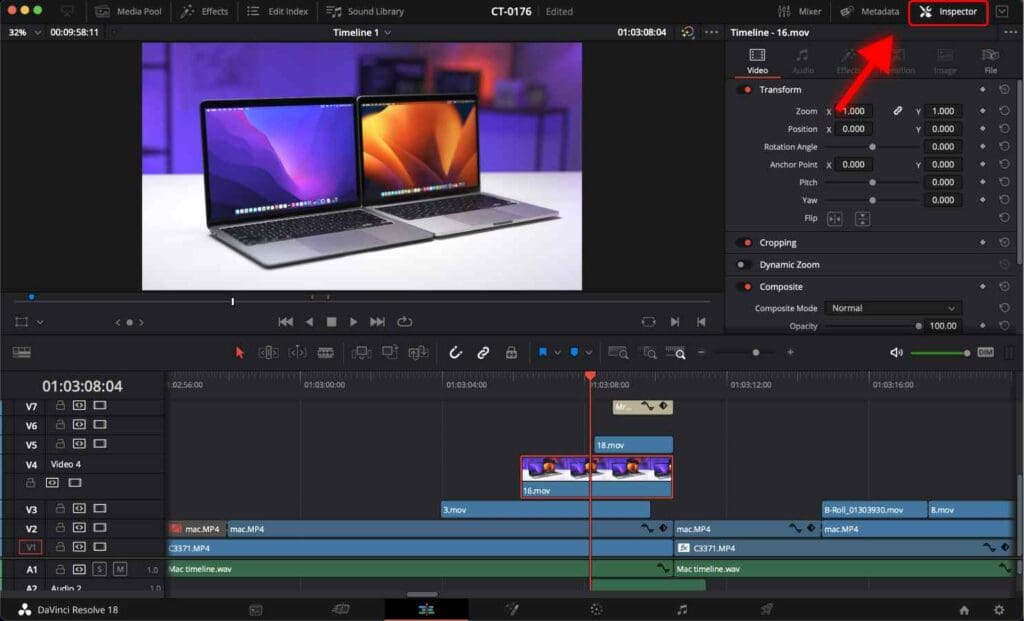
Step 2: Go to the Inspector tab.
Step 3: Scroll down to find the Stabilization section.

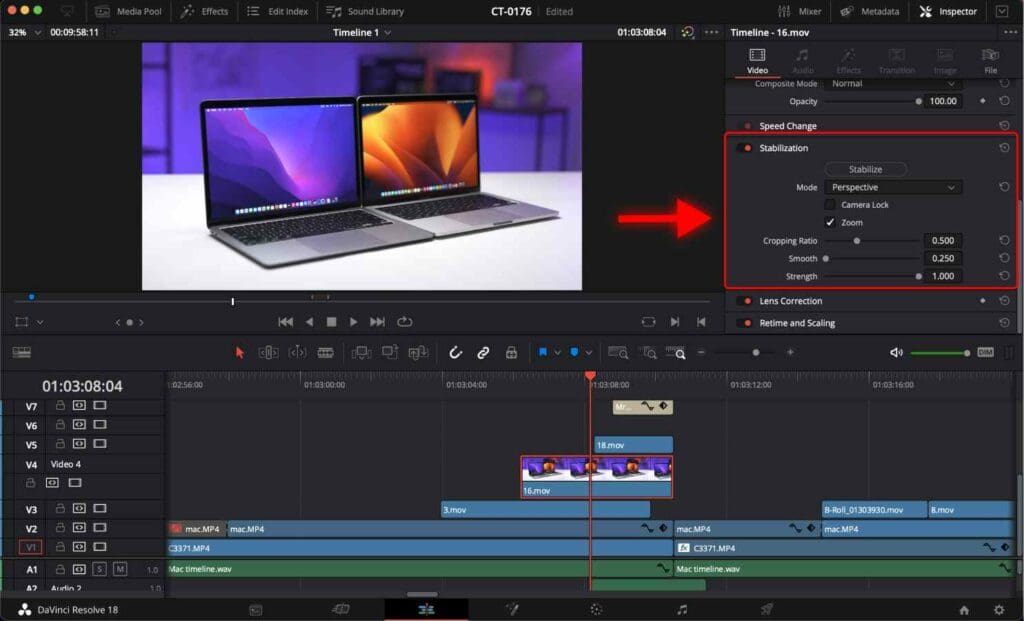
Now it’s time to select a stabilization mode.
There are three stabilization modes in DaVinci Resolve.
- Perspective: Enables perspective, pan, tilt, zoom, and rotation analysis and stabilization.
- Similarity: Enables the pan, tilt, zoom, and rotation analysis and stabilization for situations when perspective analysis results in unwanted movement and artifacts.
- Translation: Enables pan and tilt analysis and stabilization only for instances where X and Y stabilization gives you acceptable results.
For example, I use the “Similarity” mode to smooth out intentional camera movement in a video.
When I have a fixed video with slight shakiness, I use “Perspective” mode.
After you select the stabilization mode, click “Stabilize”.

If you notice distortion in the video after applying stabilization, you should reset the stabilization and try a different mode.
Later in this tutorial, I will show you how to reset the stabilization in DaVinci Resolve.
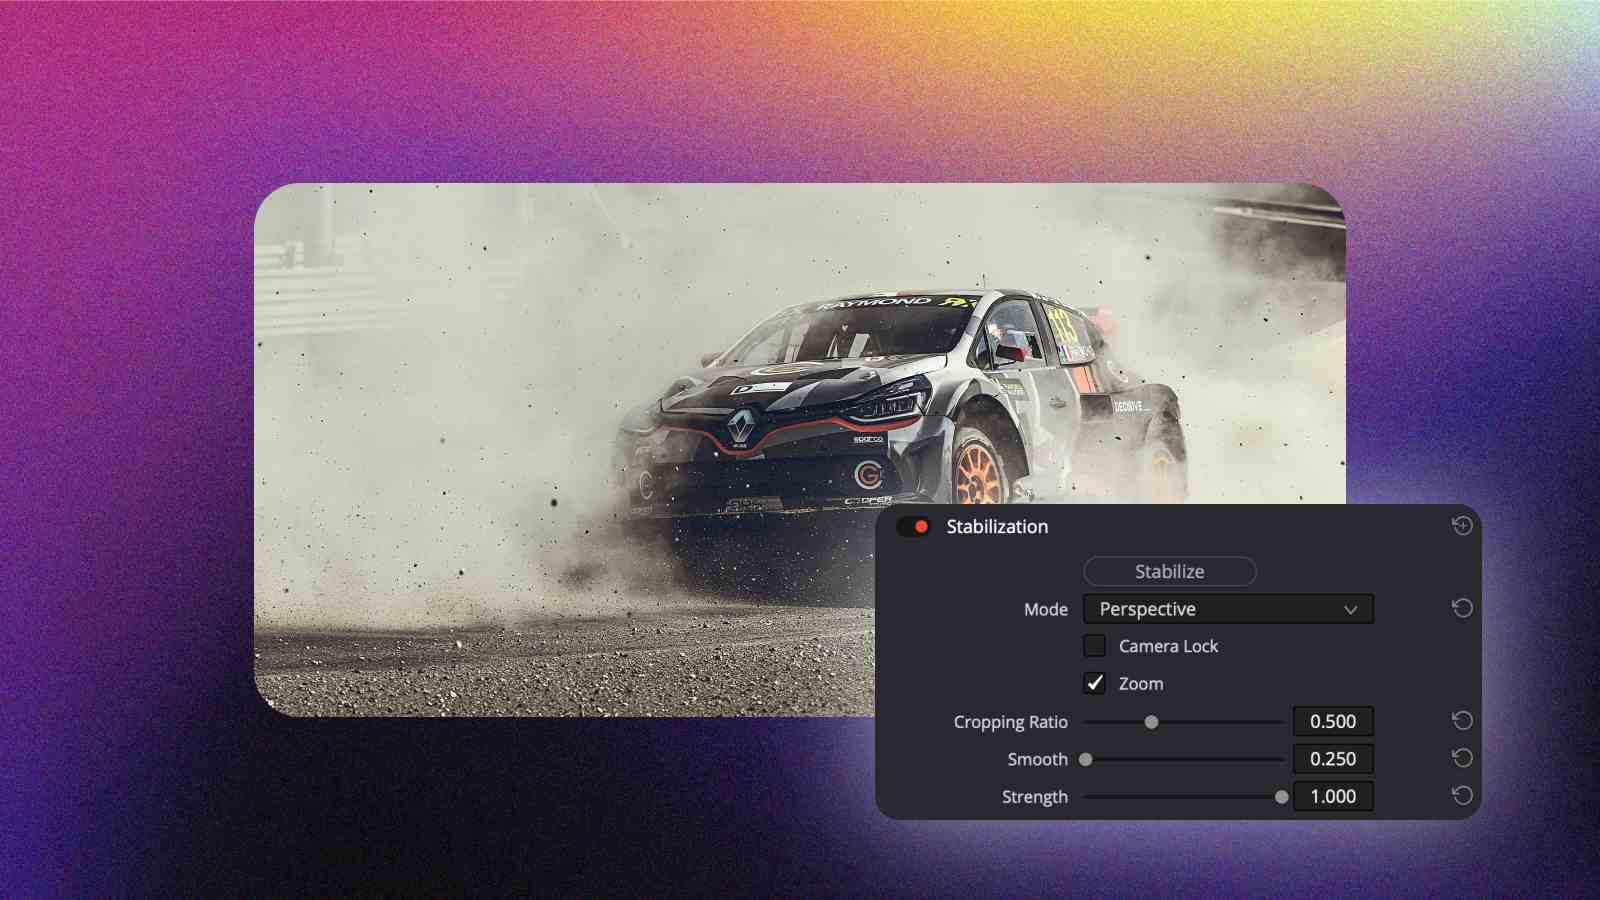
Stabilization Parameters in DaVinci Resolve
Camera Lock: If you are working with a video shot from a tripod but with some shakiness, you need to enable this parameter. It will lock the shot to eliminate any movement.
Zoom: If you want to hide any movement near the edges of your shot, you can use this option to zoom in.
Cropping Ratio: This setting determines the amount of cropping (zoom) applied to your footage after stabilization.
Smooth: This option is for large movements that you want to eliminate. However, this will result in additional zooming.
Strength: Determines how strong you want your stabilization to be.
Experimenting with different parameters takes just a few minutes to achieve the exact look you need.
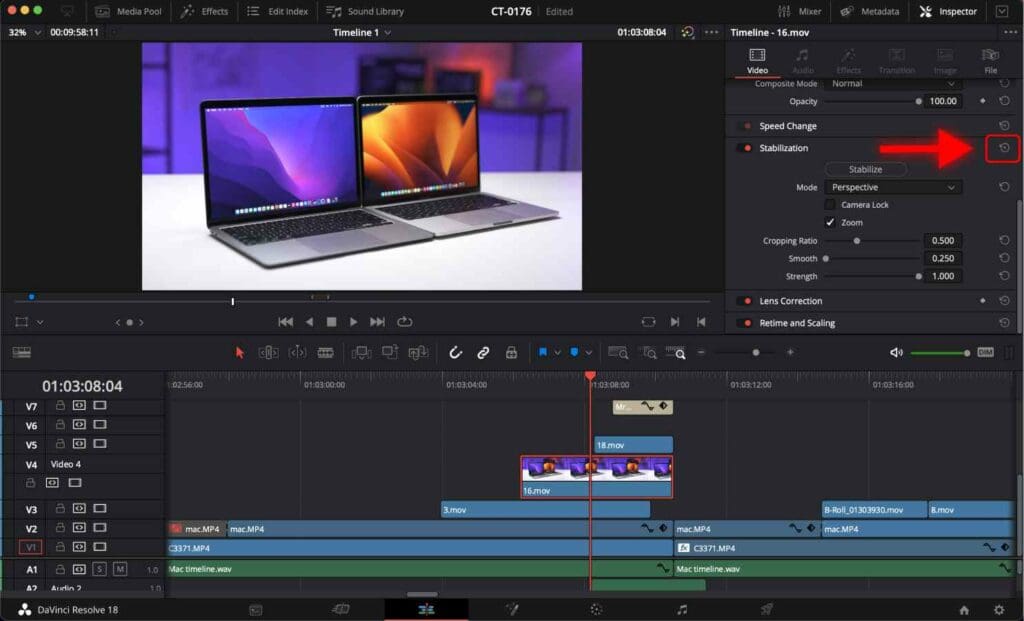
How to Reset The Stabilization in DaVinci Resolve
Click on this reset icon once to reset the stabilization.
Now you know how to stabilize different types of videos in DaVinci Resolve.
Once you are done editing your video project, it is time to render it.
Make sure you check out the best render settings for DaVinci Resolve.
Frequently Asked Questions
How to prevent shaky video footage?
As the saying goes – an ounce of prevention is worth a pound of cure. Try to stabilize your camera while recording if possible. Use a tripod, stand still while recording, or utilize any in-camera stabilization technology your particular camera may have. For example, many Sony cameras have something called “SteadyShot” that will greatly reduce shakiness and movement.
Best way to fix shaky video footage?
If your video footage is shaky, you can use tools within video editing programs to try and improve or even fix the shakiness. DaVinci Resolve is one such free program that offers a “Stabilization” feature.
How to stabilize footage in DaVinci Resolve?
Import your footage into the timeline, then select the video clip and go to the Inspector tab. Then, scroll down to the “Stabilization” section and turn it on (if it’s not already on), and click on it to open up additional settings. You can adjust these settings to your liking to remove as much camera shake as possible.


