When it’s time to share your work in Figma, you’ll need to understand how to use the export feature.
In this step-by-step tutorial, I will show you different ways to export images from Figma.
You will also discover different file formats in which you can export images from Figma and how to export a specific part of your design.
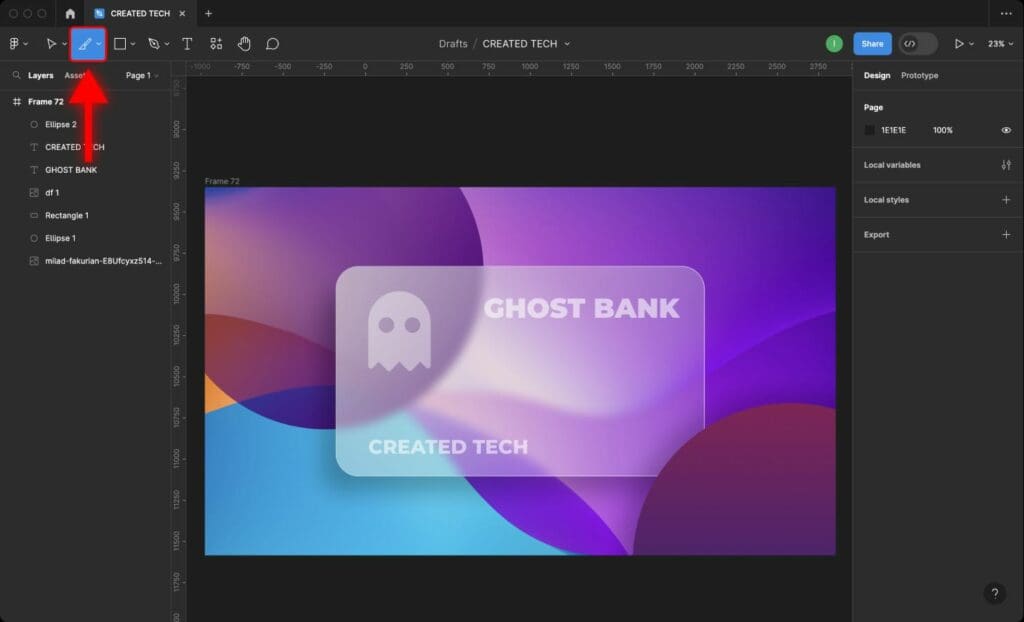
1. How to Select Content to Export
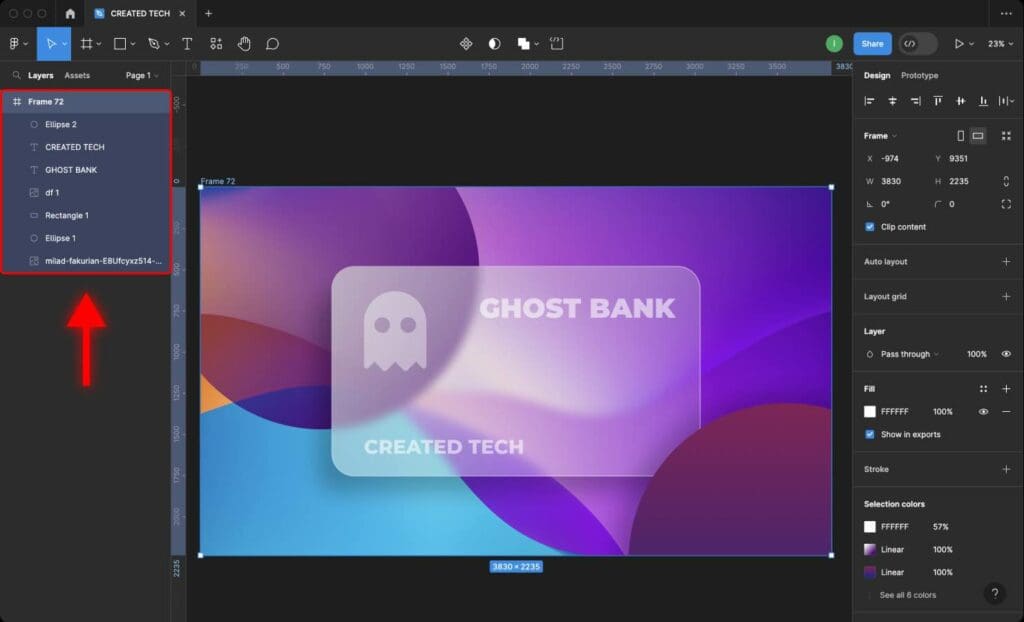
To begin, open your Figma project and select the frame or image layer you want to export. You can do this by clicking on the object or layer directly on the design canvas.

Alternatively, you can select the frame or image layer using the layers and assets panel on the left.
2. How to Export Images in Figma
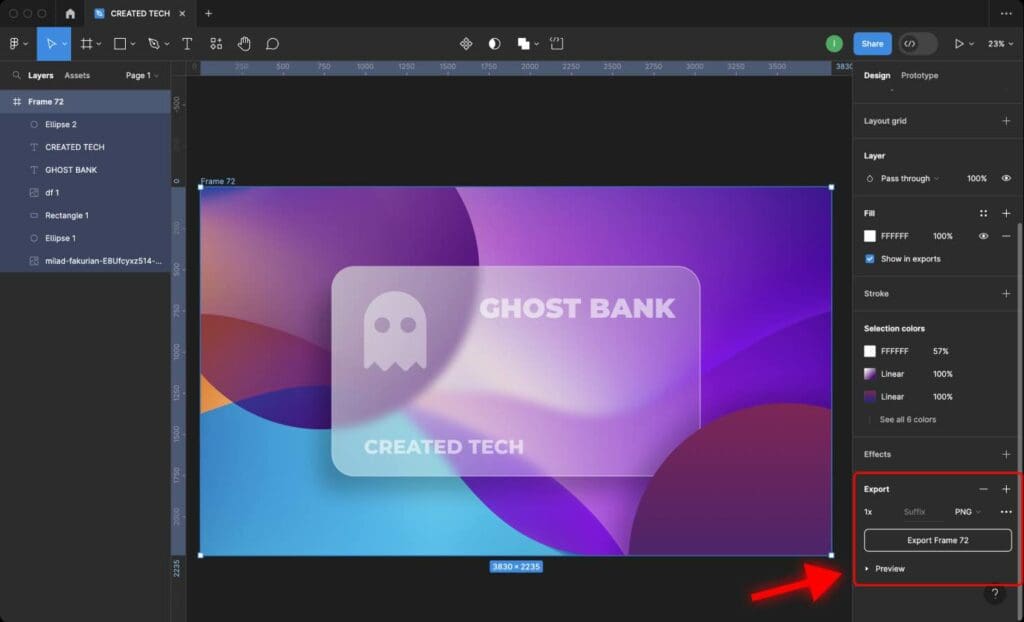
Once you selected the frame or image layer you want to export, follow these steps:
Step 1: In the right-hand sidebar, navigate to the “Export” section.
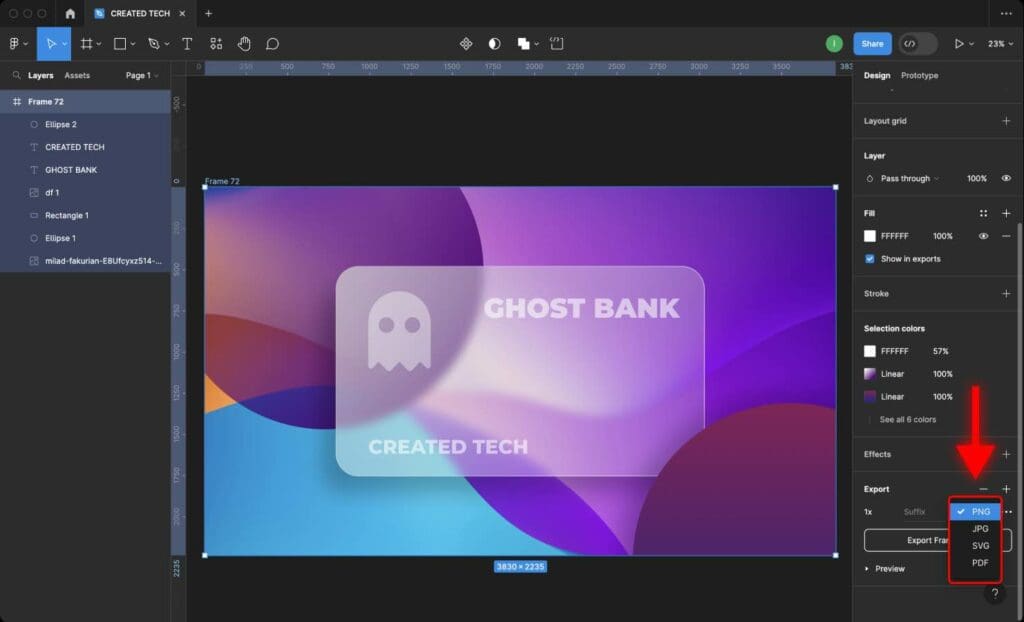
Step 2: Choose the export format (PNG, JPG, SVG, or PDF) for the image (more on file formats later in this tutorial).
Step 3: Click the “Export” button.

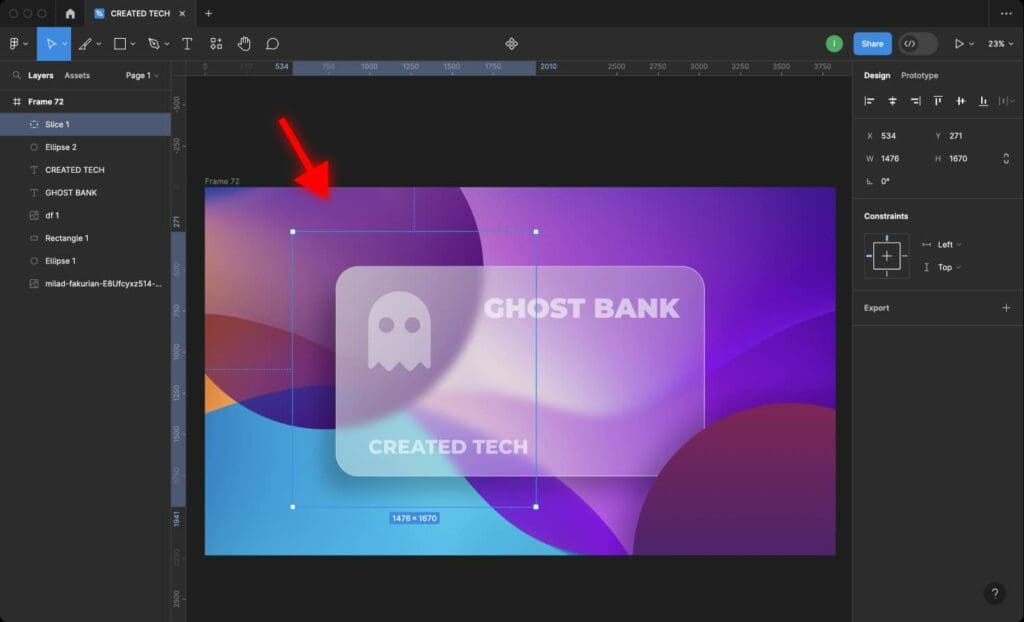
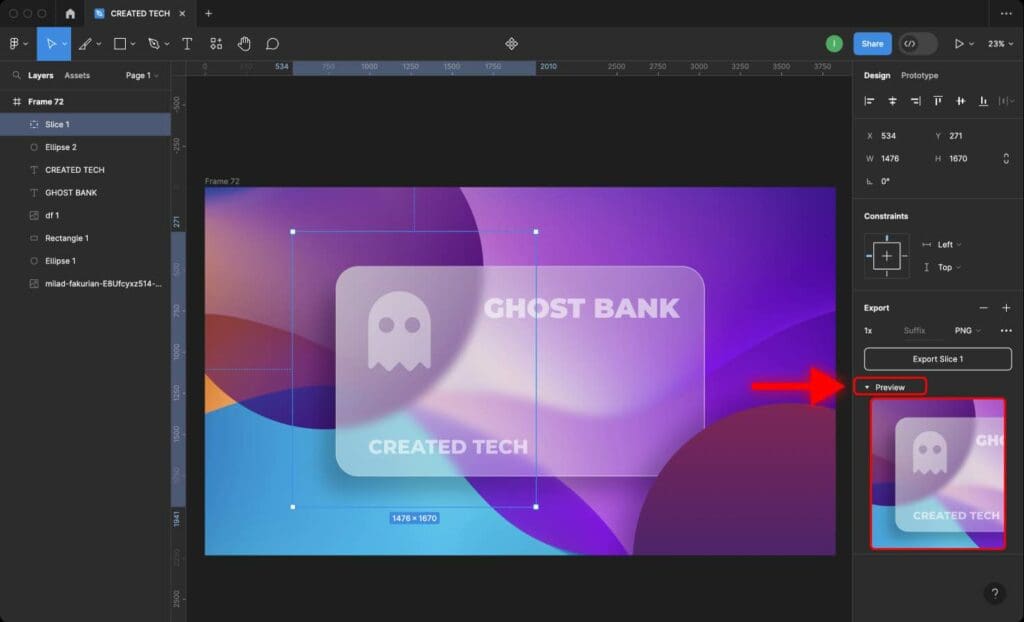
3. How to Export a Part of The Design in Figma (Slice Tool).
The Slice tool in Figma allows you to define specific areas of your design for export. To use the Slice tool, follow these steps:
Step 1: Select the Slice tool.
Step 2: Click and drag to select the part of the design you want to export.
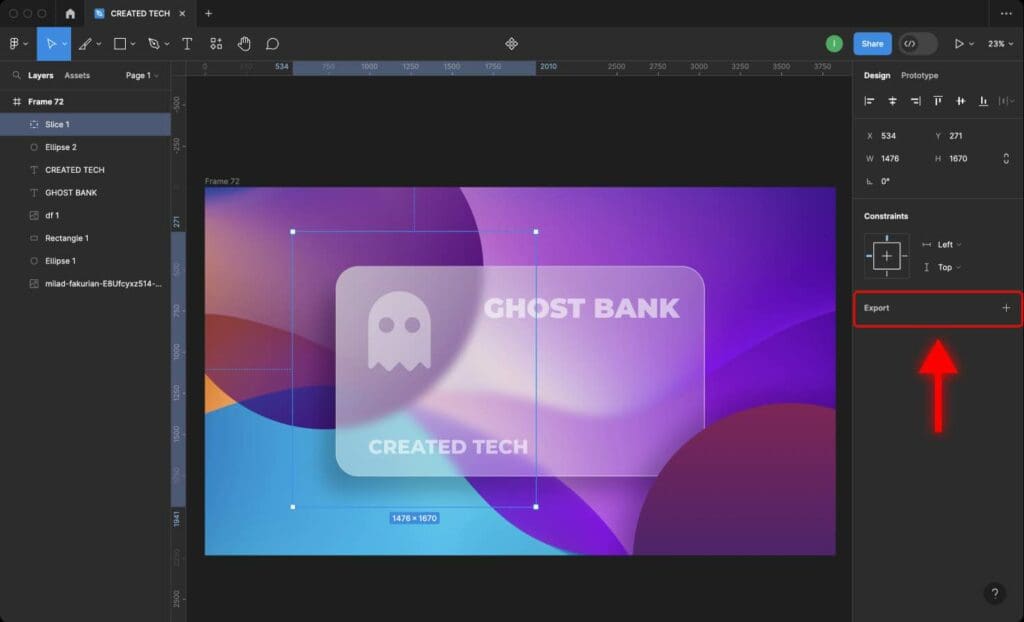
Step 3: In the right-hand sidebar, navigate to the “Export” section.
Step 4: Click the plus icon “+” to add a new export.
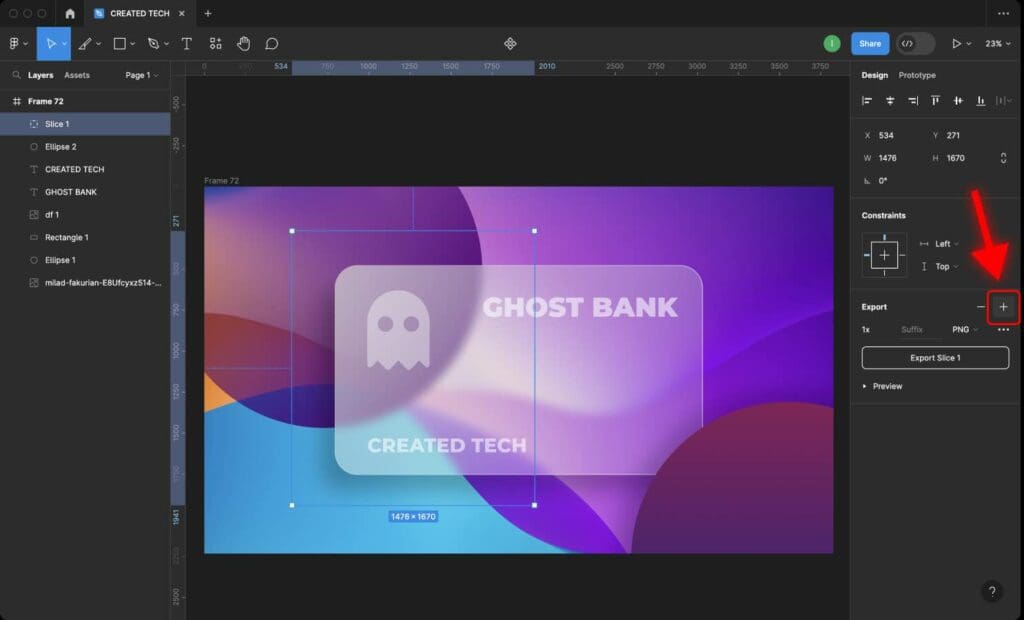
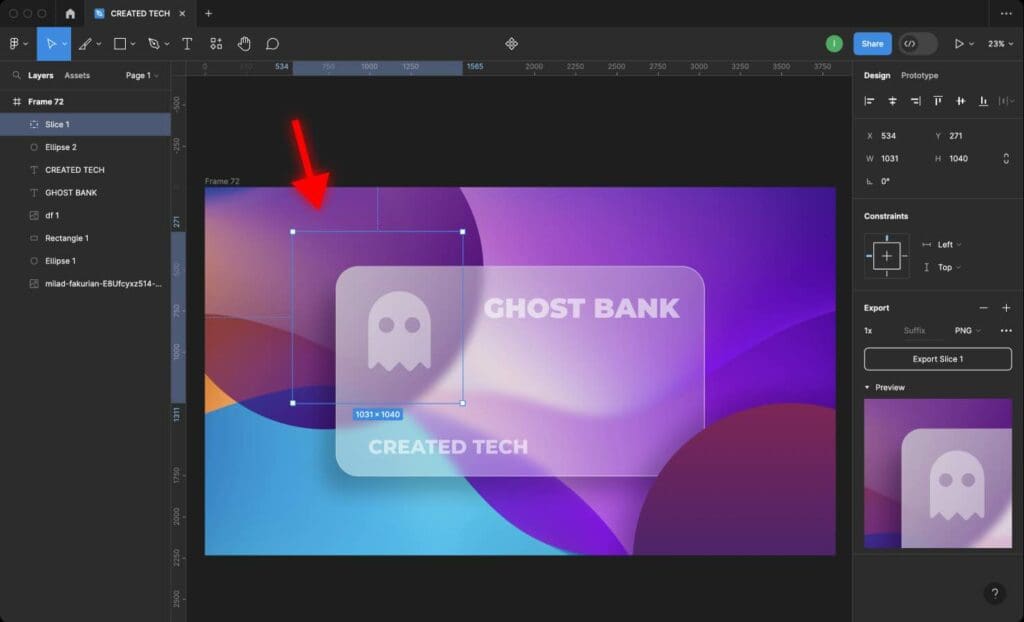
Step 5: You can preview the exported image by expanding the “Preview” window.
Step 6: Adjust the size and position of the slice by dragging the handles.
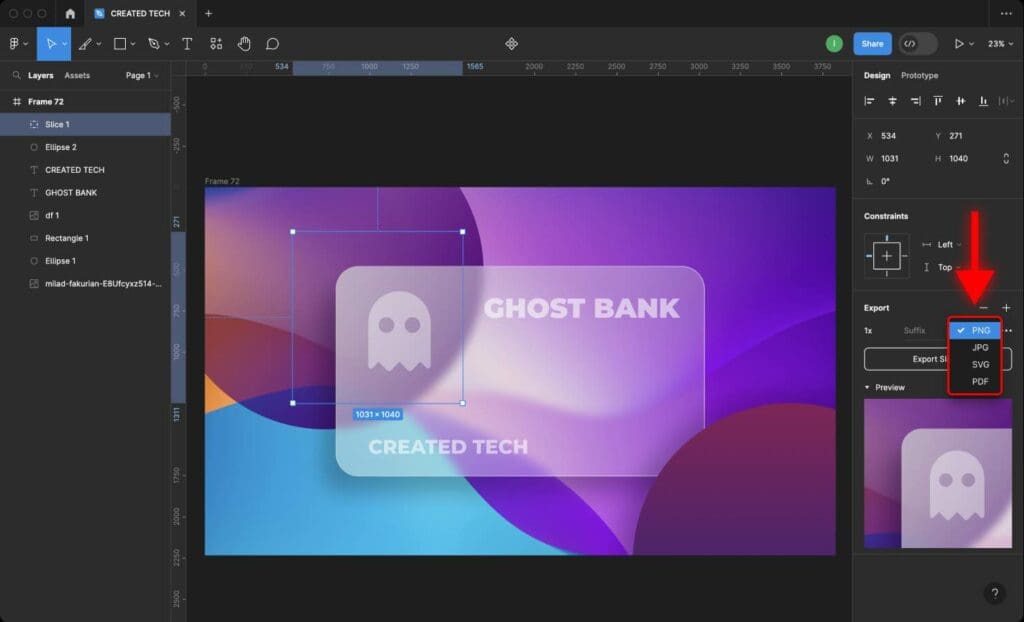
Step 7: Choose the export format (PNG, JPG, SVG, or PDF) for the slice (more on file formats later in this tutorial).
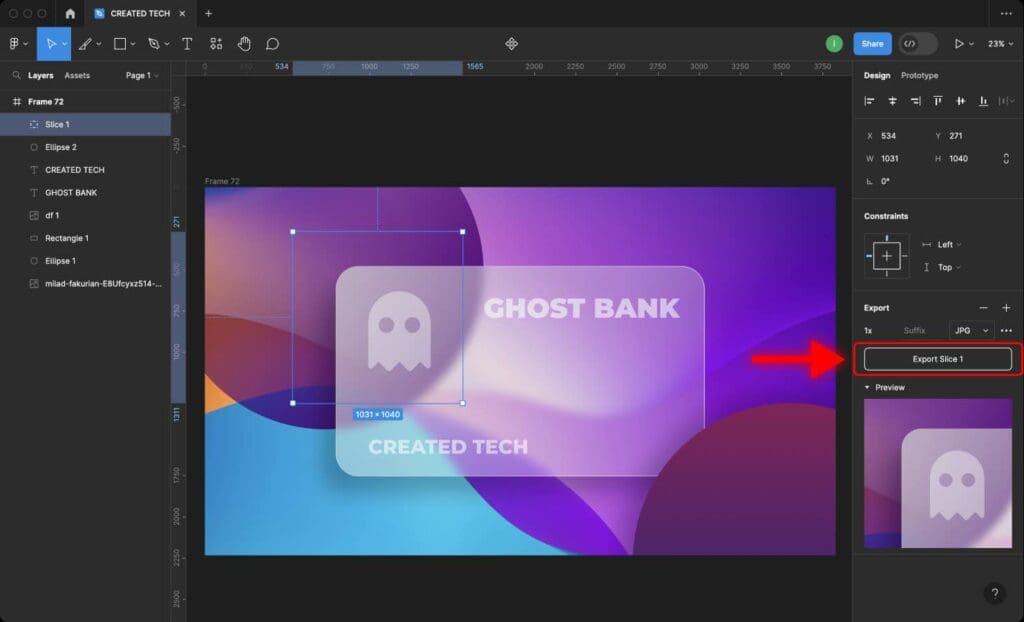
Step 8: Click the “Export” button.
4. Export File Formats in Figma
Figma allows exporting visuals in several file formats, including PNG, JPG, SVG, and PDF. Here’s a brief overview of each format and its differences.
PNG (Portable Network Graphics): PNG is a lossless image format that supports transparency. It is ideal for web graphics and designs that require a transparent background. The downside is that PNG images are larger than JPG.
PNG is used for web graphics, logos, icons, and text-based images.
JPG (Joint Photographic Group): JPG is a lossy image format that is commonly used for photographs and complex images. It supports a wide range of colors but does not support transparency.
SVG (Scalable Vector Graphics): SVG is a vector-based image format that is ideal for icons, logos, and other scalable graphics. It can be scaled to any size without losing quality.
PDF (Portable Document Format): PDF is a versatile document format that can contain both vector and raster graphics. It is commonly used for print and digital documents, such as brochures, posters, and presentations.
Learn How to Create a Color Gradient in Figma (For Text and Shapes).
Frequently Asked Questions
How to export multiple frames or images at once?
To export multiple frames or image layers simultaneously, hold down the “Shift” key and click on each object you want to include in the export. After that, click “Export” in the right-hand sidebar.
How to preview the exported image before saving it?
Locate the “Export” section in the right-hand sidebar. Toggle the “Preview” option to see a preview of your image. You are able to preview only if you export one object (image, frame, shape etc.)
Which file format to choose when exporting from Figma?
Choose the file format that best suits your specific needs, considering the trade-off between image quality and file size.
PNG file format is used for web graphics, logos, icons, and text-based images. PNG image usually has large file size.
JPG file format is used for social media and general use. JPG image usually has smaller size than PNG image.
SVG file format is used for logos, icons, and illustrations for web and mobile applications. Scalable without losing quality.
PDF file format is used for printing and sharing documents with complex layouts.


