
Working on a complex project always involves collaboration between multiple people. As a result, being able to share a Figma project with others is essential. The good news is that it’s relatively easy to do.
In this step-by-step tutorial, I will walk you through the different ways of sharing your Figma project and provide solutions to possible issues you may encounter.
How To Open The Figma Share Menu
To see the Share option follow these steps:
Step 1: Open a Figma file you want to share.
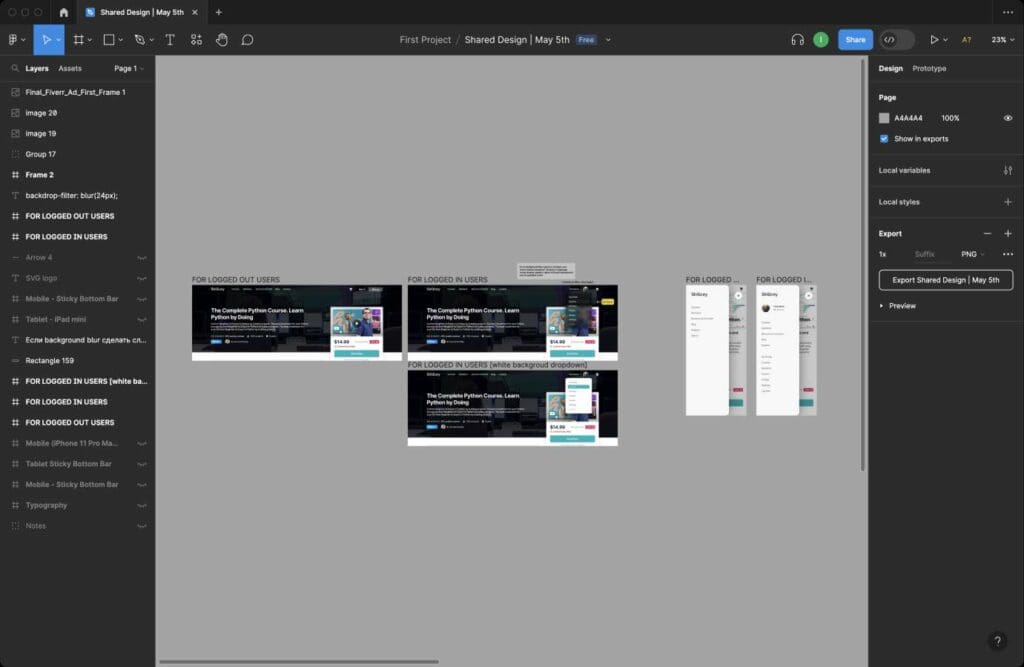
Step 2: Click the “Share” button on the toolbar.

You are presented with Share options. Let’s go through some of these options.
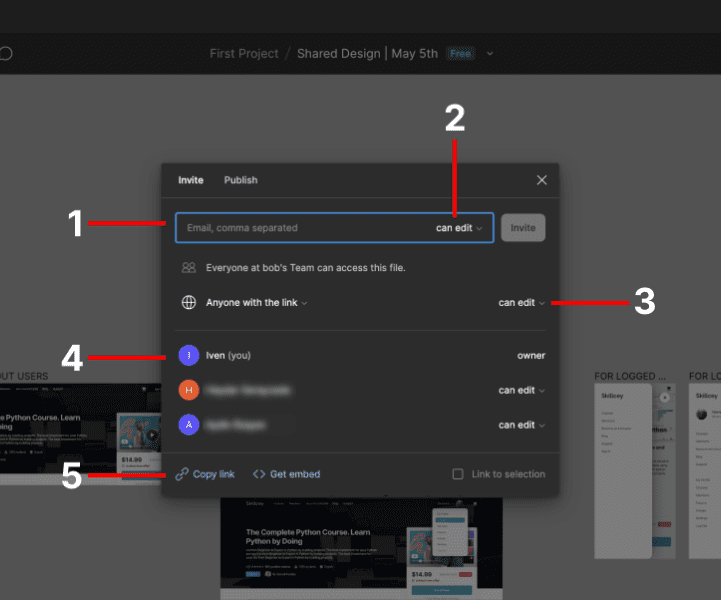
- Enter the email of the people you want to share access with.
- Set the permissions for invited members to “Can Edit” or “Can View”.
- Set the permissions for people who receive the link and how they can interact with the file.
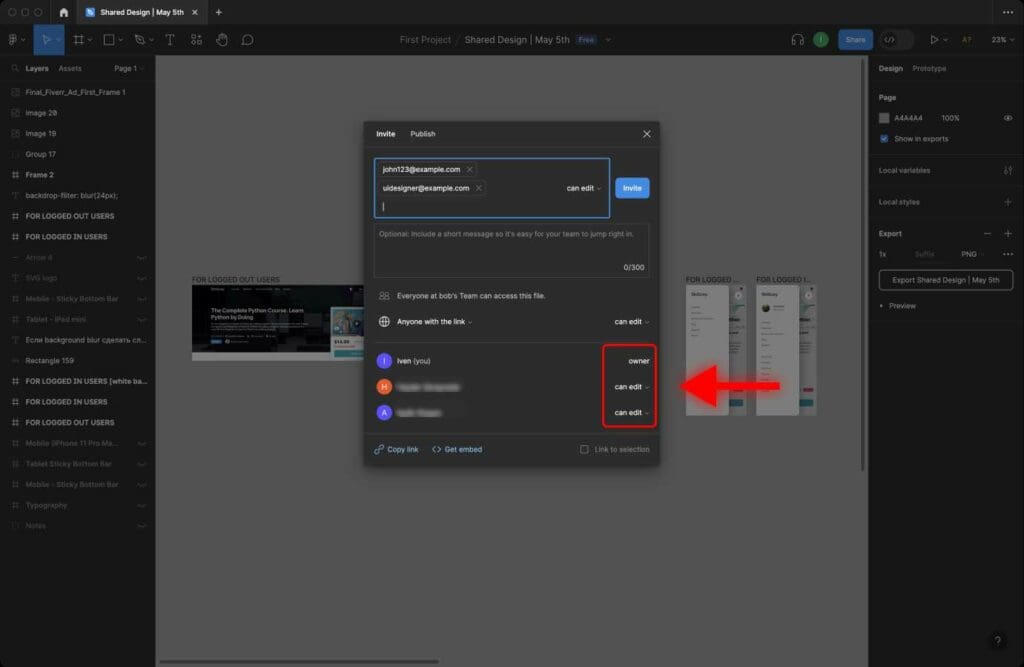
- List of people who already have access to the file and their permissions.
- Click to copy the link to this Figma file.
How To Send Figma Project Link
This is the easiest and most common way to share a Figma project.
To do this, follow these steps:
Step 1: Click the “Share” button in the top-right corner of your file.

Step 2: Set the permission for “Anyone who has a link” to “Can Edit” or “Can View”.
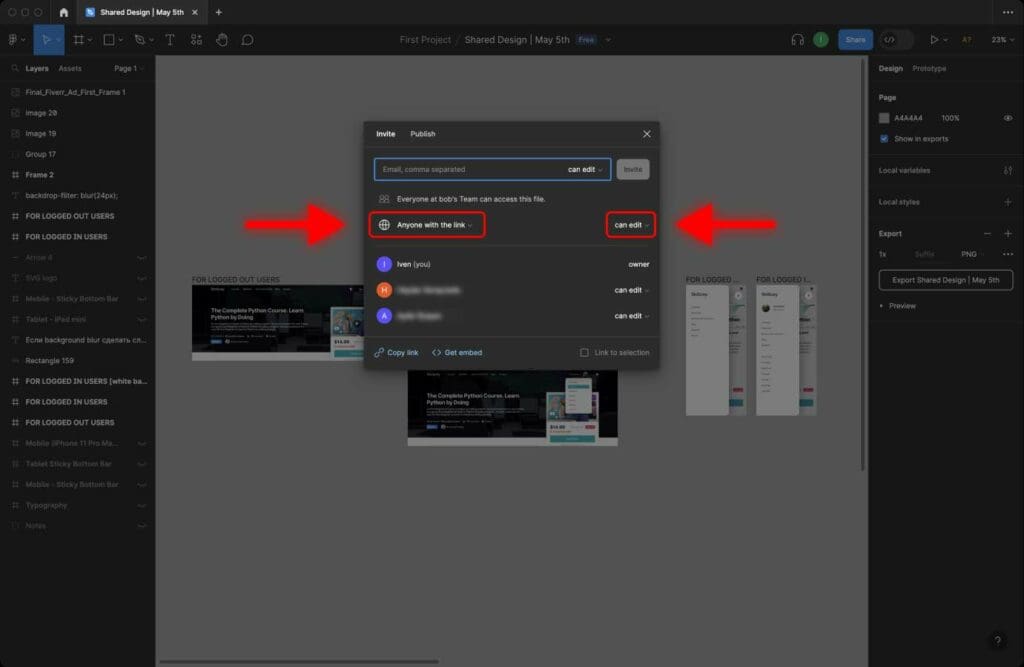
Note that if you share the link to your file with “Can View” permission, anyone with this link can only view the file. They will not be able to edit the file and make changes.
Step 2: In the share options box, click “Copy link” to generate a link to your Figma file.
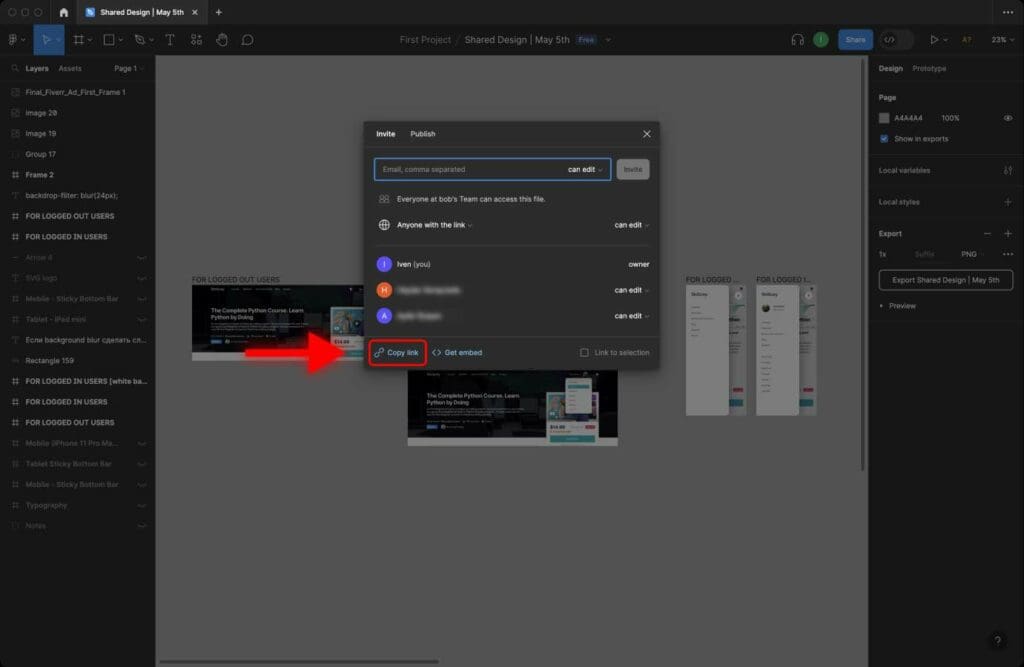
Step 3: Share the link with anyone you want to collaborate with.
How To Send Figma Project Invitation
You can also share your Figma project via email with one or multiple people.
To do this, follow these steps:
Step 1: Click the “Share” button in the top-right corner of your file.
Step 2: In the share options box, enter the collaborator’s email in the “Email” field.
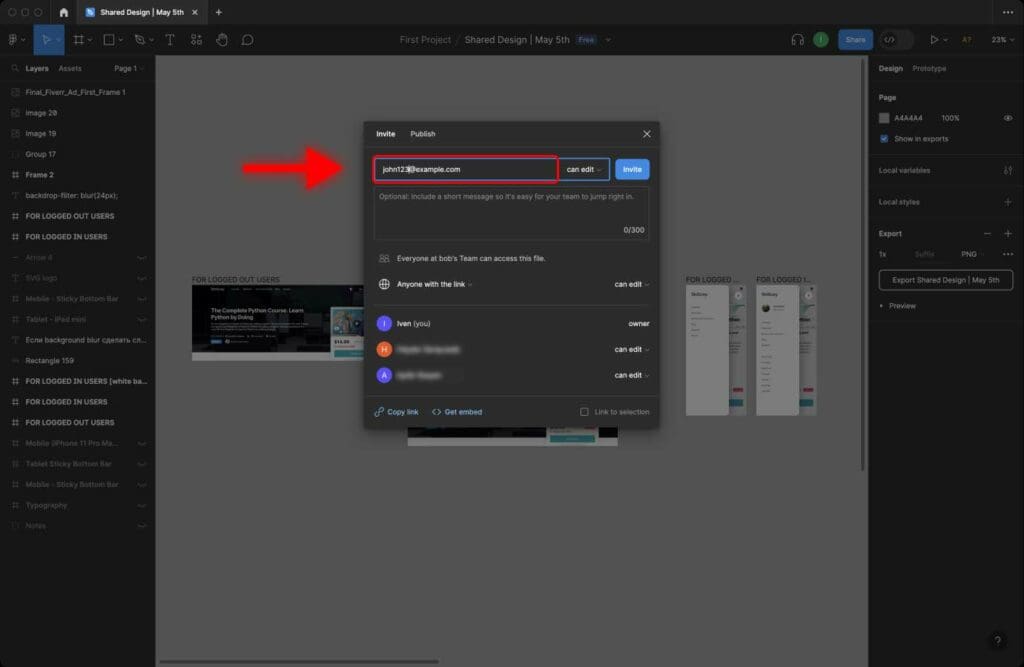
To invite multiple people, separate each email address with a comma.
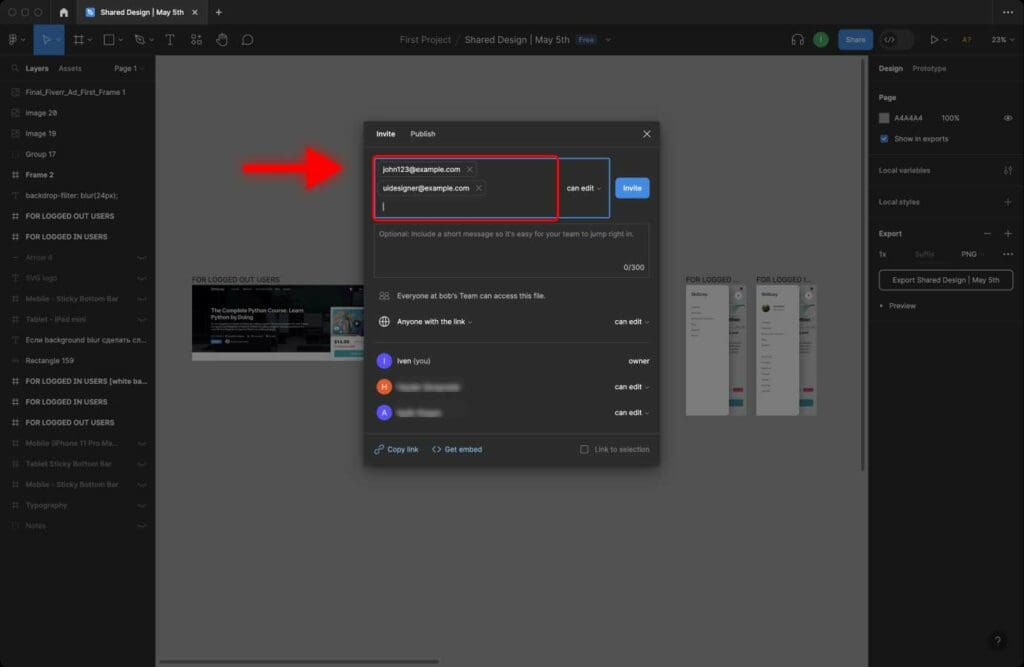
Choose whether the receiver of your file’s link can view or edit your file by selecting “Can Edit” or “Can View” option.

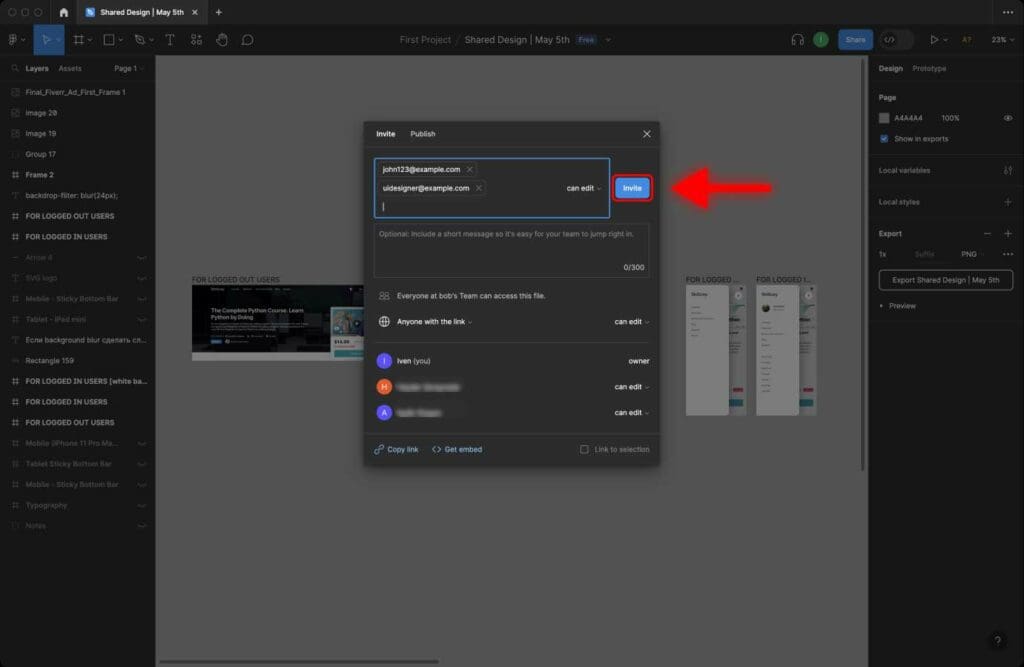
Step 3: Click “Invite.”
How to View Who Has Access to a Figma File
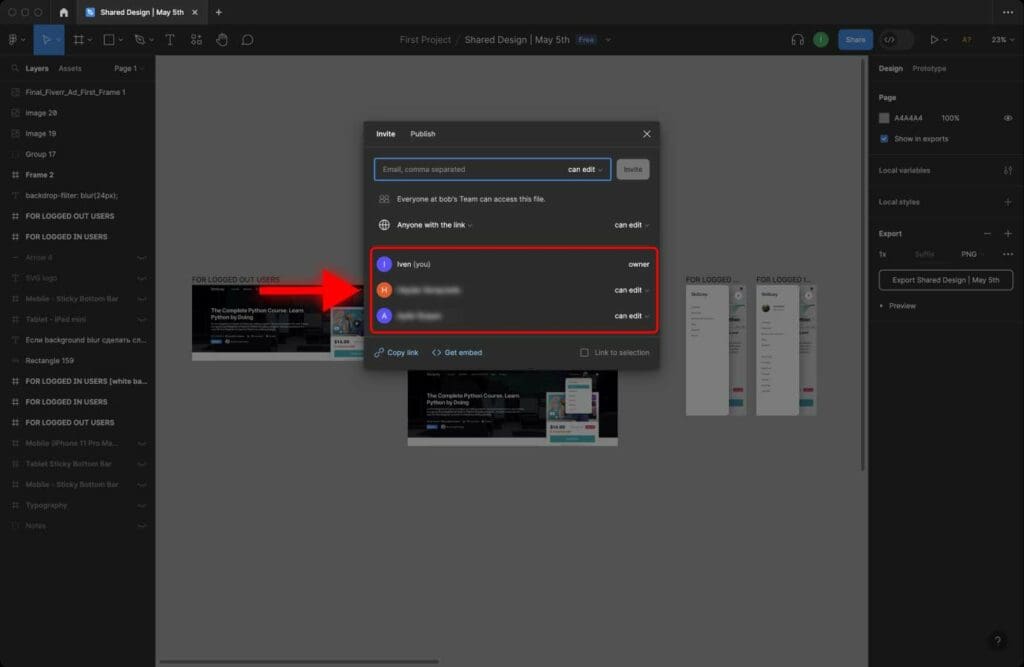
Step 1: Click the “Share” button in the top-right corner of your file.
Step 2: In the pop-up window, you can see a list of people who can access a Figma file and their permissions.
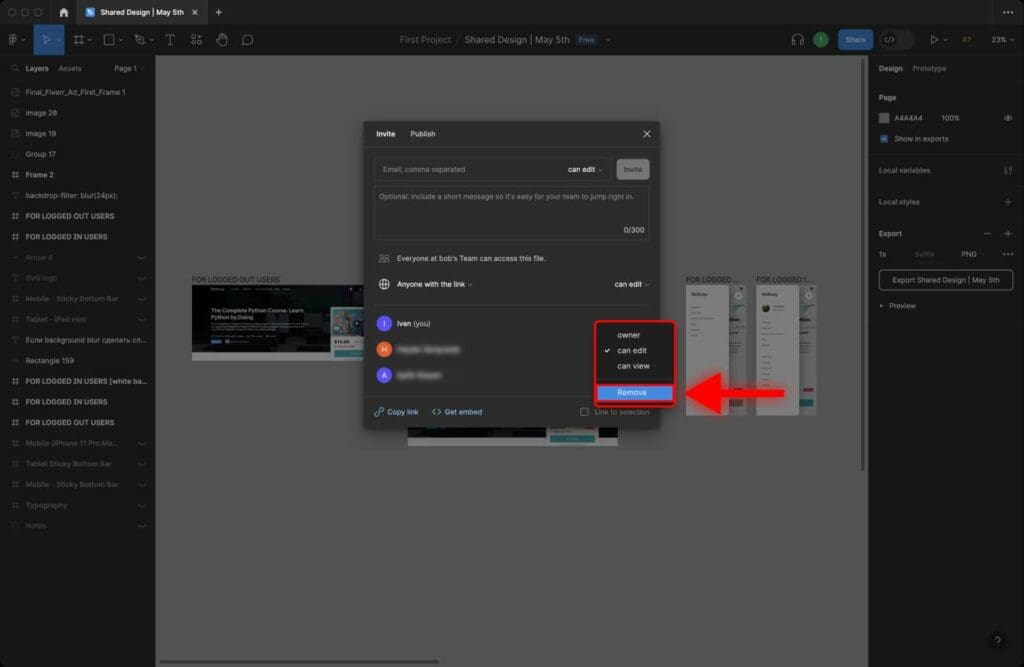
How to Remove a Member From a Figma Project?
To remove a collaborator from your project, follow these steps:
Step 1: Click the “Share” button in the top-right corner of your file.
Step 2: In the share options box, click the member’s permission. It’s either “Can Edit” or “Can View”.
Step 3: In the drop-down menu, select “Remove.”
Frequently Asked Questions
How to change the permissions of a member in Figma?
To change the permissions of a member, follow these steps:
Step 1: Click the “Share” button in the top-right corner of your file.
Step 2: In the share options box, click the member’s name.
Step 3: Choose whether the member “Can View” or “Can Edit” your file.
How to remove a member from a Figma project?
To remove a collaborator from your project, follow these steps:
Step 1: Click the “Share” button in the top-right corner of your file.
Step 2: In the share options box, click the member’s permission. It’s either “Can Edit” or “Can View”.
Step 3: In the drop-down menu, select “Remove.”


