When working with images you may need to remove the background, for example when combining images or creating a transparent background.
In this step-by-step tutorial, I will show you three different ways of removing the background within Pixelmator Pro.
The first two methods require a few minutes, but the third method requires only a single click (hint: this is my favorite because I’m lazy).
Prepare Your Image
Open the image you want to edit by going to “File” and selecting “Open” or by dragging and dropping the image into the Pixelmator Pro interface.
Method 1: Smart Erase
Locate the Erase tool in the toolbar and click on it once.


Click on the Erase tool again to expand the group and reveal the Smart Erase tool.


Alternatively, you can choose the Smart Erase tool from the Tools menu.


With the Smart Erase tool selected, click over the background you want to remove.
Pixelmator Pro will intelligently analyze the image and remove the selected background, leaving only the object or subject in the foreground.


After removing the main background, carefully inspect the image for any remaining parts of the background, especially on the edges of a subject.
Use the Smart Erase tool to remove these remaining background elements by clicking and dragging over them.
You can zoom into the edges of the image to fine-tune erasing any remaining background.
Method 2: Quick Selection
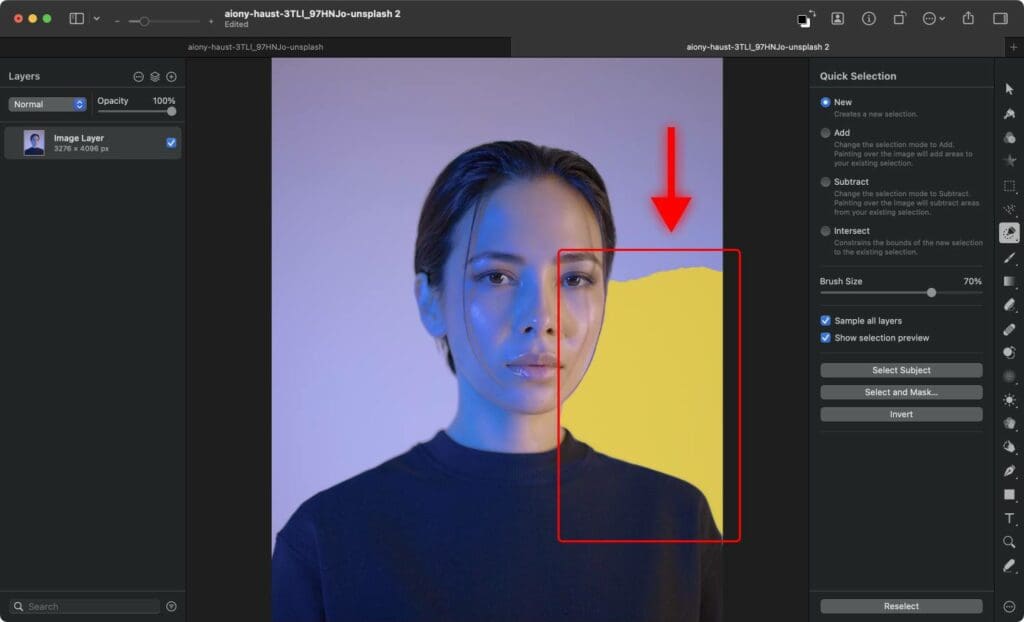
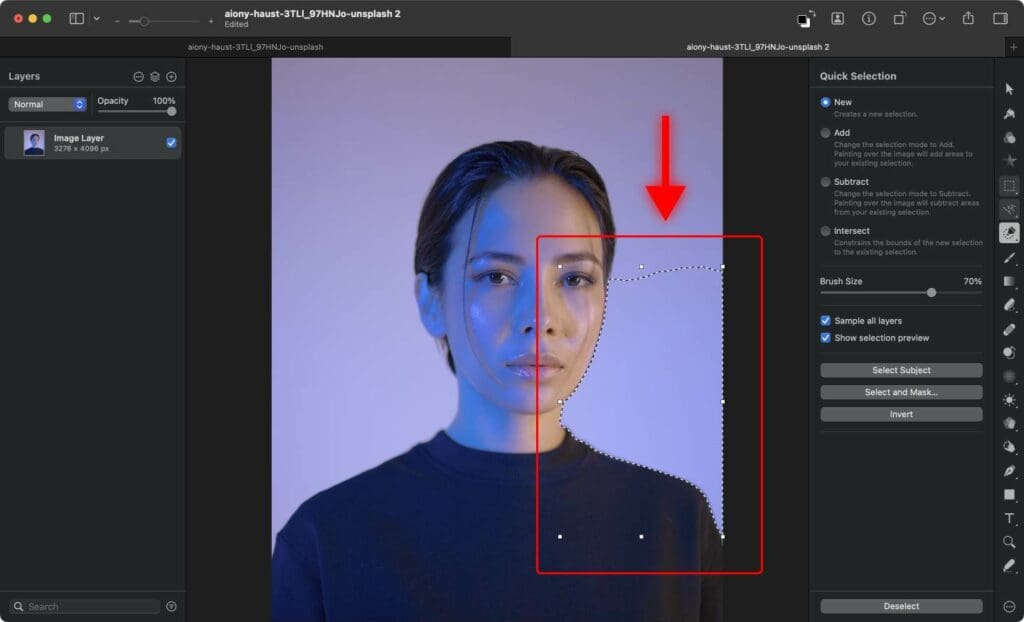
Quick Selection is much more accurate than Smart Erase. The tool selects areas with similar colors.
Select the Quick Selection tool from the toolbar on the right-hand side of the screen.


Use the tool to select the background or subject you want to remove in the image.


If you want to make a bigger selection, hold the “Shift” key and click on the area you want to add to your selection.


If you want to make the selection smaller, hold “Option” on Mac or “Alt” on Windows and click on the area you want to deselect.
Once you have selected the background or a subject you want to remove, click the “Delete” key and it will be removed.


Method 3: Single Click Background Removal in Pixelmator Pro
This method can remove more complex backgrounds. Pixelmator Pro uses its AI capabilities to identify a subject in a given image and remove the background completely. From my own experience, the “Remove Background” feature accurately removes the background in almost all cases.
It’s the fastest way to remove a background from an image in Pixelmator Pro. It usually takes around 5 seconds to remove any background.
Open the image you want to edit by selecting File > Open or by dragging and dropping the image into the Pixelmator Pro interface.
Locate the “Remove Background” feature in Pixelmator Pro. You can find it in the toolbar or the Tools menu.
Click the “Remove Background” button.


In a few seconds the background will be removed.


Save with Transparency
If you want to save the image with a transparent background, follow these steps:
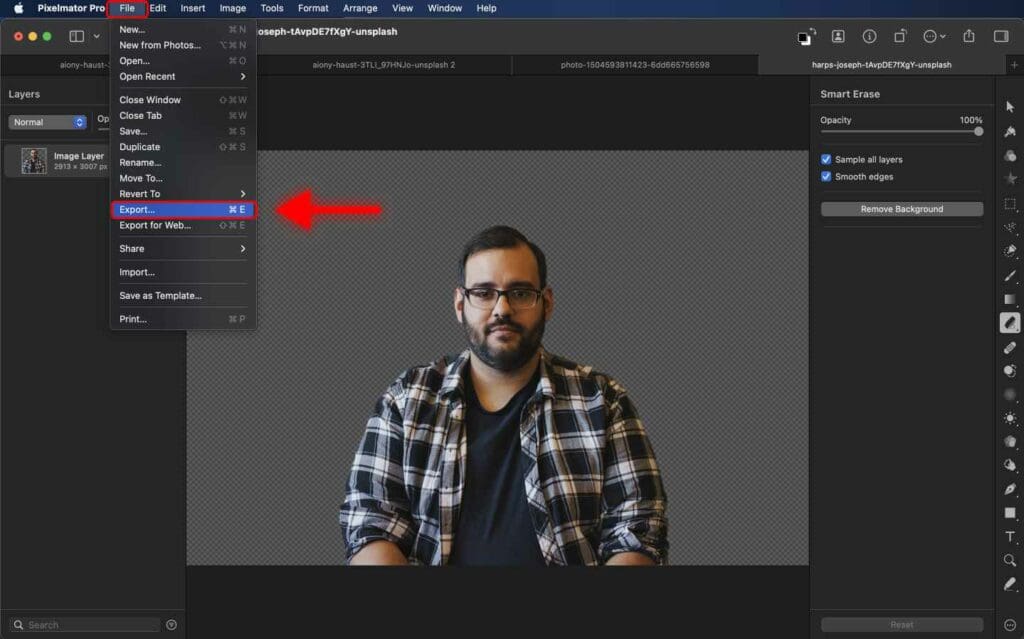
Step 1: Go to “File” and select “Export”.


Step 2: Choose a file format that supports transparency, such as PNG.
Step 3: Specify the destination folder and click Export.
And there you have it – you’ve successfully removed the background from your image using Pixelmator Pro. Now you can use the object or subject with other images or change the background color or transparency.
Frequently Asked Questions
The Pixelmator Pro Smart Erase tool is not working properly. What should I do?
If the Smart Erase tool is not accurately removing the background, try Smart Selection.
Alternatively, you can use the “Remove Background” feature. It is located on the upper right-hand side corner (it looks like a person in a square). This feature uses AI and generally produces better results.
How to restore a part of the image I accidentally erased in Pixelmator?
If you accidentally remove parts of the subject while removing the background, you can undo the action by selecting Edit > Undo or using the keyboard shortcut “Command + Z” on Mac or “Control + Z” on Windows.


