
When working on a complex video project, at some point you will have to color grade your footage.
However, a common issue that editors experience is that the colors of the rendered video don’t match the colors of the video in the timeline in DaVinci Resolve. So you end up having washed-out colors on the exported video from DaVinci Resolve.
In this step-by-step tutorial, I will show you the settings that you need to use in order to render a video that matches colors inside DaVinci Resolve.
Complete all 3 of the below sections to fix this issue.
1: Settings to Match Colors in DaVinci Resolve Timeline
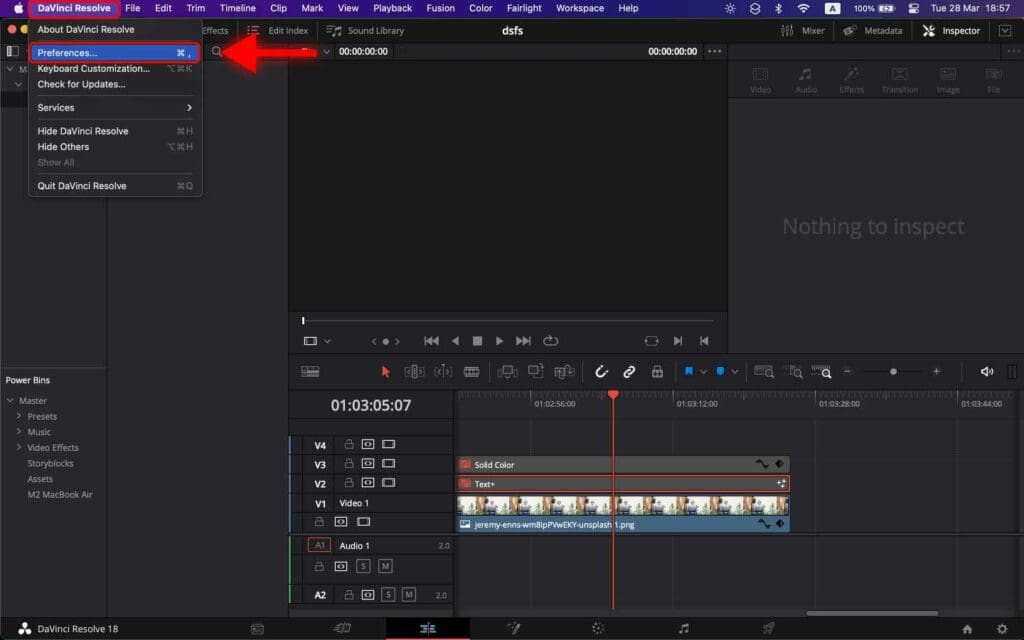
Step 1: Go to “DaVinci Resolve” and select “Preferences…”.
Alternatively, you can use the shortcut “Command” and “,” to open up Preferences.
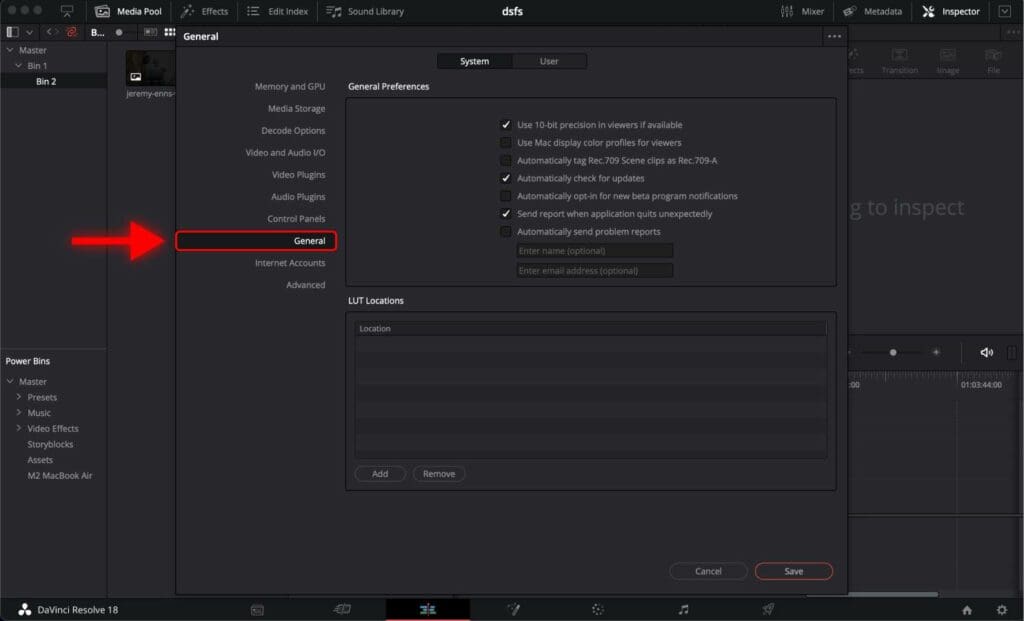
Step 2: Go to “General”.
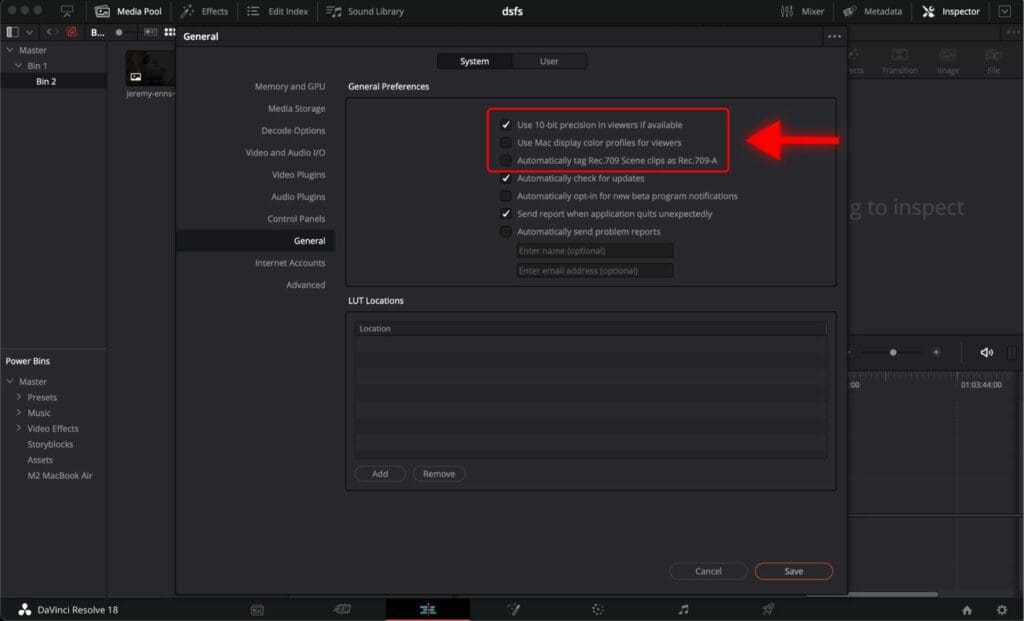
Step 3: Check “Use 10-bit precision in viewers if available”.
Step 4: Uncheck “Use Mac display color profiles for viewers”.
Step 5: Uncheck “Automatically tag Rec.709 Scene clips as Rec.709-A”.
Step 6: Click “Save”.
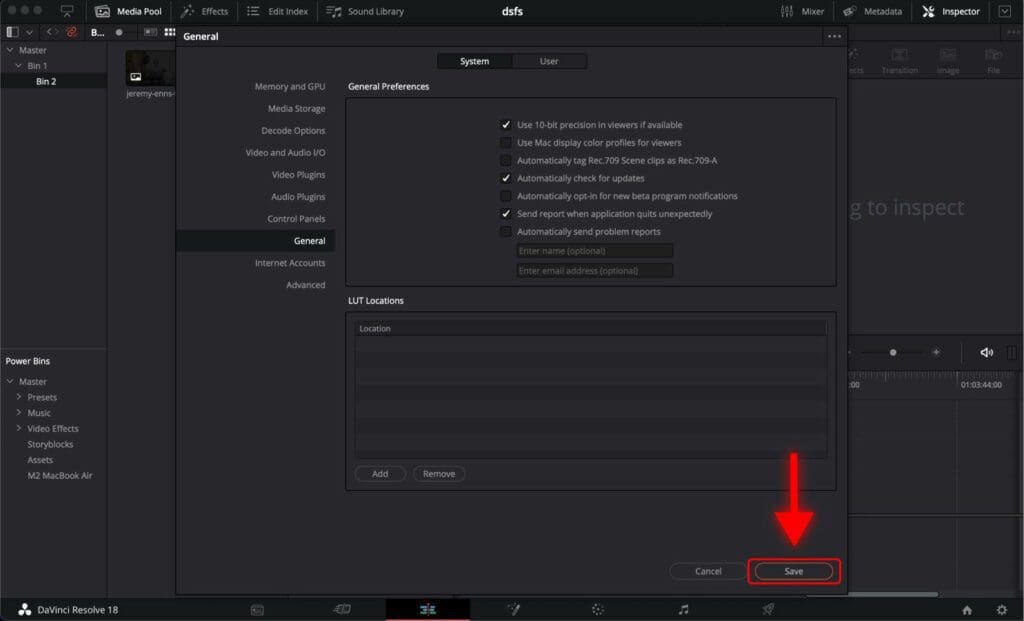
Step 7: Restart DaVinci Resolve for these changes to apply.
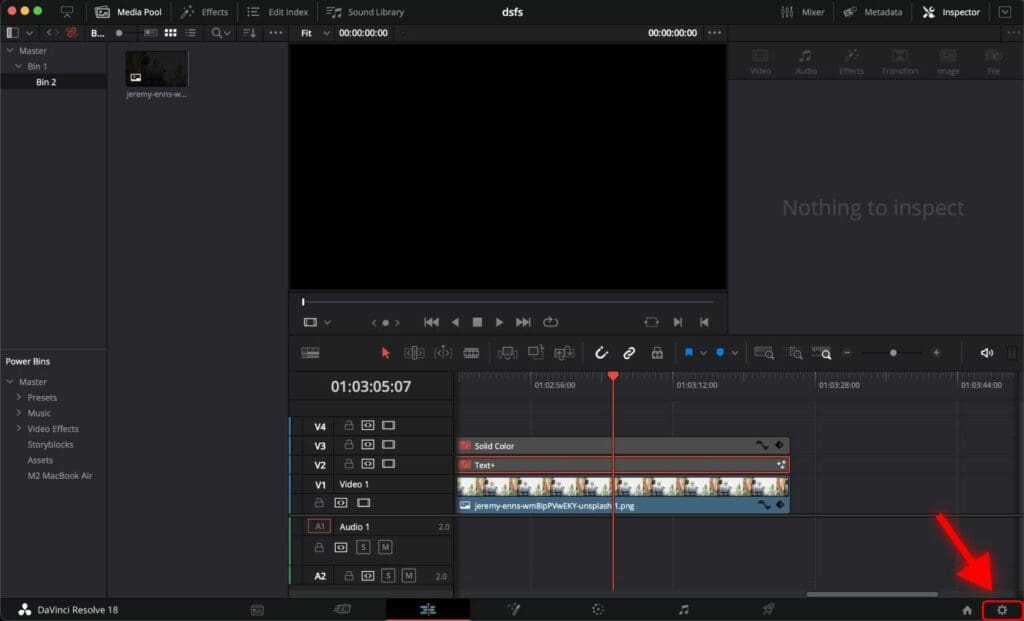
2: Project Settings to Match Colors in DaVinci Resolve Timeline
Step 1: Click on the “Project Settings” icon.
Step 2: Click on the “Color Management” tab.
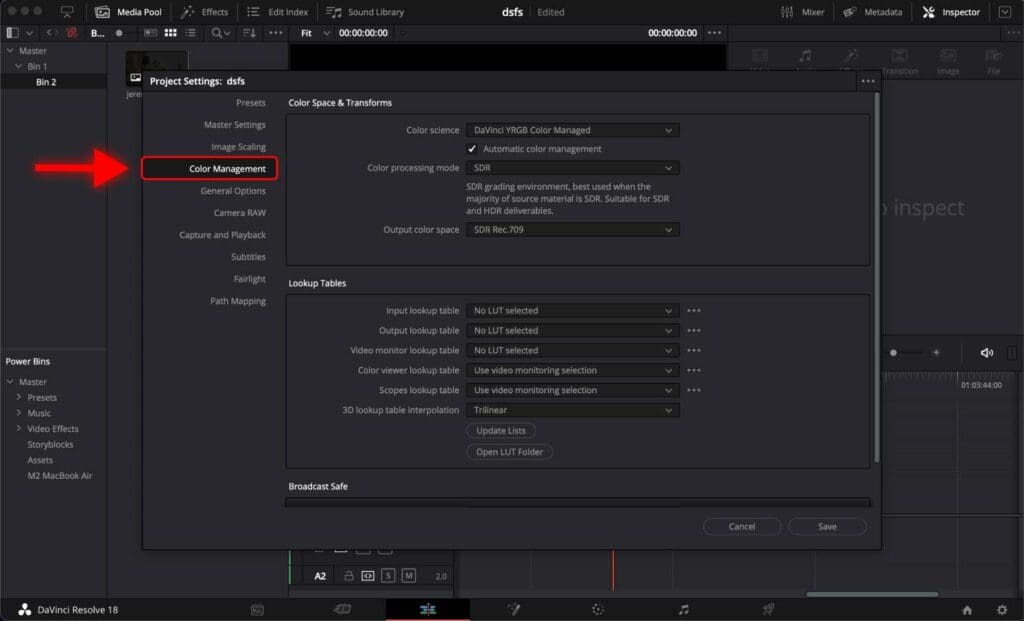
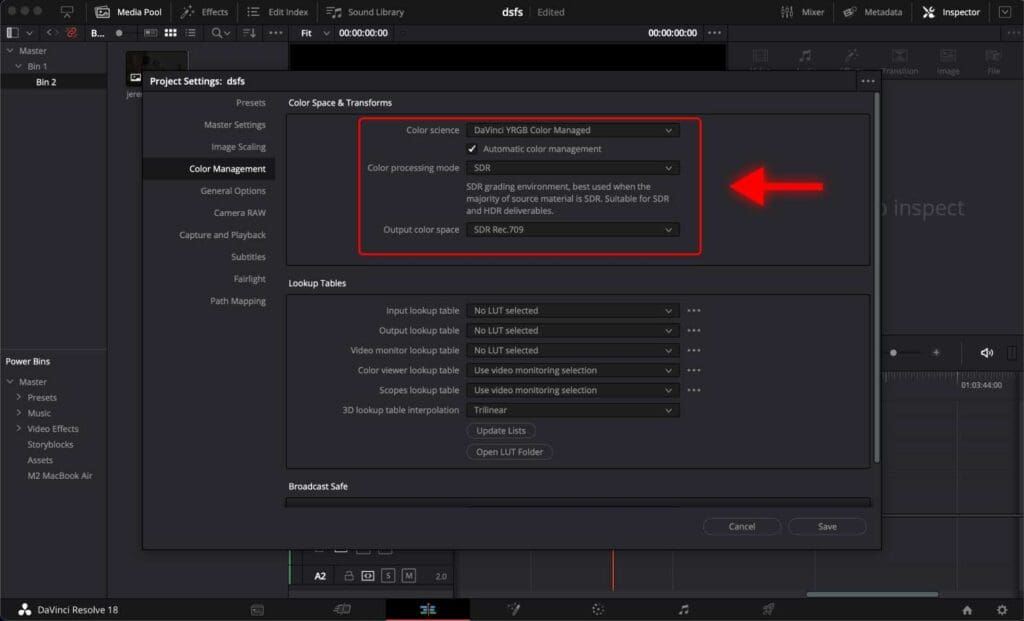
Step 3: For “Color science” select “DaVinci YRGB Color Managed”.
If you don’t see this option, you may select any other available option, as this should work the same.
Step 4: Check “Automatic color management”.
Step 5: For “Color processing mode” select “SDR”.
Step 6: For “Output color space” select “SDR Rec.709”.
Step 7: Click “Save”.

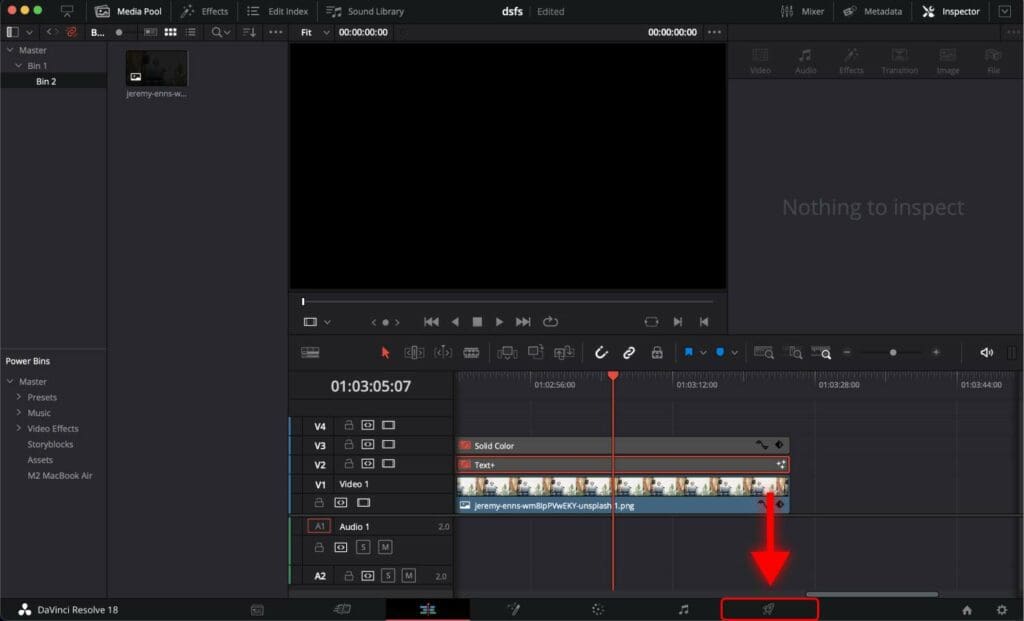
3: Export Settings to Match Colors in DaVinci Resolve Timeline
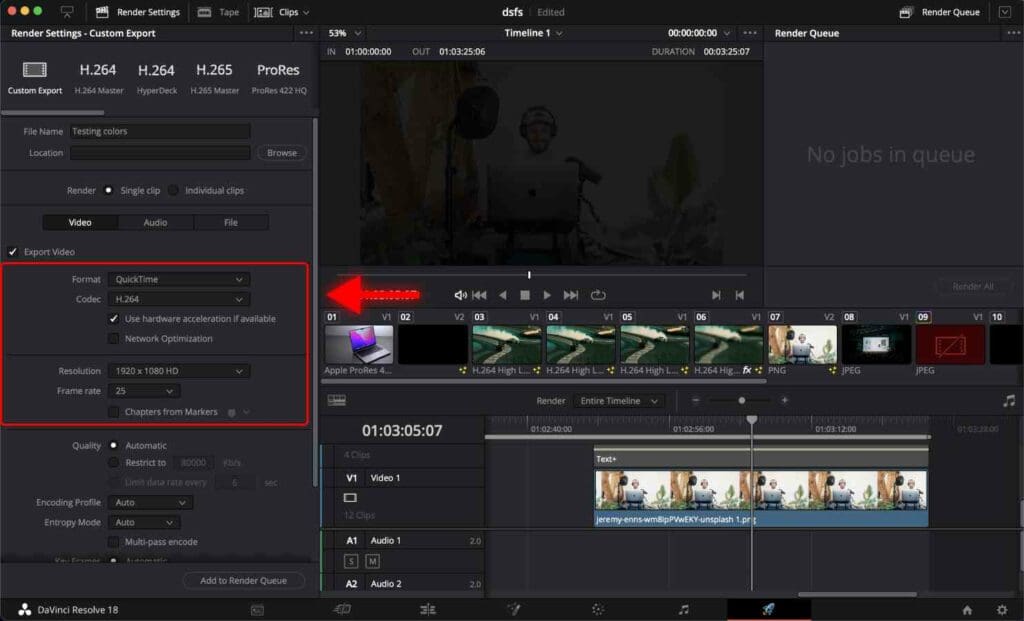
Step 1: Open the “Deliver” tab.
Step 2: For “Format” select “QuickTime”.
Step 3: For “Codec” select “H.264”.
Step 4: Resolution and Frame Rate should match your project settings.
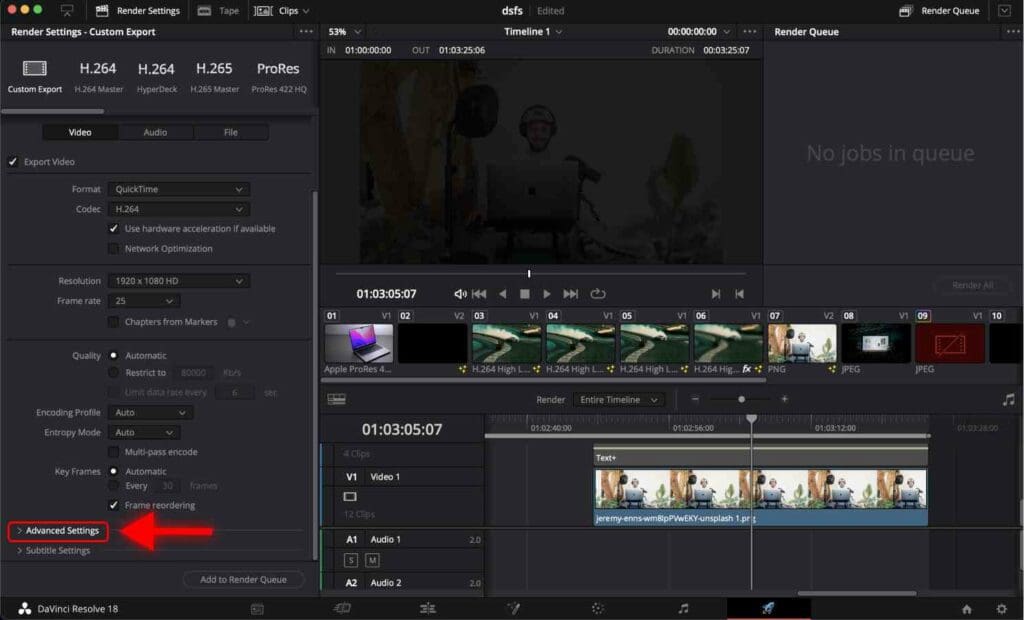
Step 5: Click “Advanced Settings”.
Step 6: For “Color Space Tag” select “P3-DCI”.
Step 7: For “Gamma Tag” select “sRGB”.
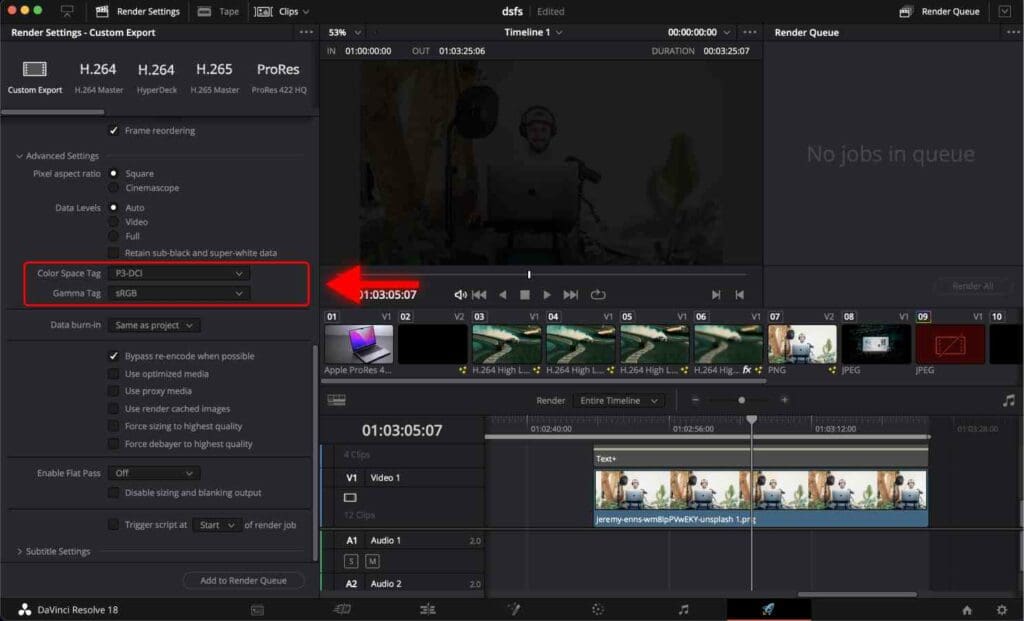
The last two settings are crucial for getting the right colors in the final rendered video.
Now render your video with these settings and check the color difference between the rendered video and the video inside DaVinci Resolve. You shouldn’t see a difference! If you can, make sure you go back through this guide and ensure you’ve followed it correctly.
Frequently Asked Questions
Why does my rendered video’s color look different in DaVinci Resolve?
There may be several reasons why the colors in the rendered video may not match the colors in the timeline in DaVinci Resolve. One of the most frequent reasons is caused by Color Management. Colors in the timeline are displayed and processed in a specific color space. However, when the video is rendered, it may be converted to a different color space, which can cause the colors to look different.
What settings should I use to match colors in DaVinci Resolve?
To have the rendered video match the colors in the timeline in DaVinci Resolve, you must go to Preferences -> General -> Check “Use 10-bit precision in viewers if available”, Uncheck “Use Mac display color profiles for viewers”, Uncheck “Use Mac display color profiles for viewers” and click Save. Restart DaVinci Resolve.
What project settings should I use to match colors in DaVinci Resolve?
Go to Project Settings -> Color Management.
For “Color science” select “DaVinci YRGB Color Managed”. Check “Automatic color management”. For “Color processing mode” select “SDR”. For “Output color space” select “SDR Rec.709”. Click Save.
What export settings should I use to match colors in DaVinci Resolve?
Open the “Deliver” tab. For “Format” select “QuickTime”. For “Codec” select “H.264”. Click “Advanced Settings”. For “Color Space Tag” select “P3-DCI”. For “Gamma Tag” select “sRGB”.


