
Sometimes when editing photos, you’ll need to remove certain objects to make the shot cleaner. The good news is that Pixelmator Pro has a tool that allows you to remove unwanted objects from your photos in seconds.
In this step-by-step tutorial, I will guide you through the steps to remove objects from photos in Pixelmator Pro, and provide solutions to possible issues you may encounter.
Alternatively, you can also remove or change the background of a photo In Pixelmator Pro.
Step 1: Open the image in Pixelmator
Step 1: Right-click on the image.
Step 2: Choose “Open With”.
Step 3: Select “Pixelmator Pro”.
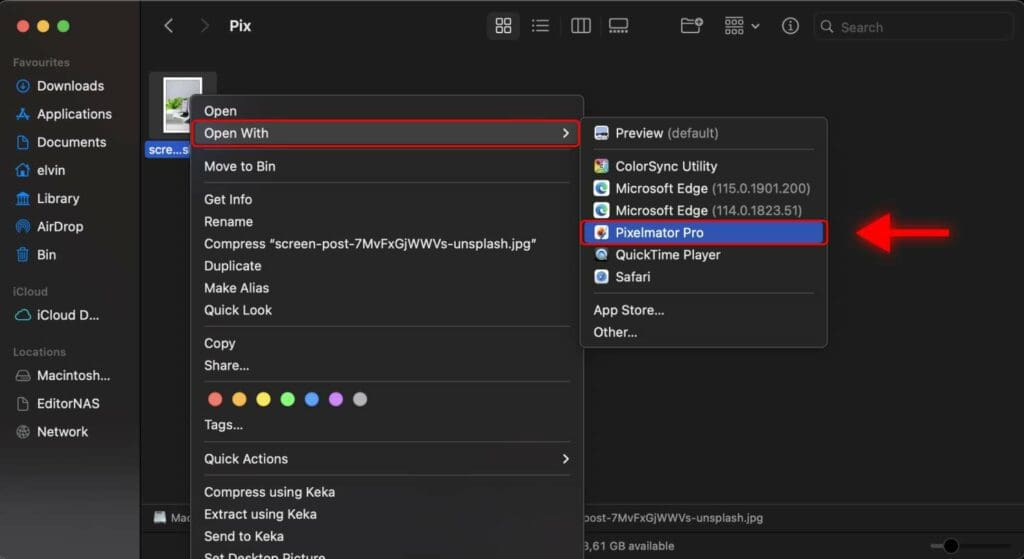
The image will be opened in Pixelmator Pro.
Step 2: Select the Repair Tool
Locate the vertical toolbar on the right-hand side of the screen.
Choose the Repair tool from the toolbar.
Alternatively, you can quickly access the Repair tool by pressing the “R” key on your keyboard.
If needed, you have the option to adjust the Brush size of the Repair tool. It allows you to increase or decrease the Brush size of the Repair tool to cover the object you want to remove. The brush size should be slightly larger than the object you want to remove.
Step 3: Remove Object in Pixelmator Pro
Everything is now configured to begin removing objects from the image.
Click and drag the brush over the object you want to remove. This area will be highlighted in yellow color.
Once you release the cursor, Pixelmator will automatically replace the object with surrounding pixels, blending them seamlessly.
If you make a mistake, use the “Undo” button in the top-left corner of the screen or press “Command + Z” on your keyboard to undo the last action.
Once you are satisfied with the result, save the edited photo.
Step 4: Export Image from Pixelmator Pro
After completing your photo editing in Pixelmator Pro, you’ll need to save the file to your computer.
Navigate to the “File“ menu and choose “Export for Web…“.
The export settings will appear on the right-hand side of the window, as shown in the image.
Select your desired format from the options provided by Pixelmator, which include:
- JPEG
- PNG
- GIF
- WebP
- SVG
If you’re unsure about which format to choose, opt for JPEG.
Next, click the “Export” button.
A window will pop up, prompting you to specify the location where you want to save the image on your computer.
Click the “Export” button to proceed.
As you can see, the original image is on the left, while the image on the right is the one we have successfully removed an object from using the Repair tool in Pixelmator Pro.
In this example I chose to remove the keyboard.
Removing objects from photos in Pixelmator is a simple process that can improve the quality of your photos. With the Repair tool and other editing tools, you can easily remove unwanted objects and create stunning images.
Frequently Asked Questions
What if I accidentally remove part of the photo that I want to keep in Pixelmator Pro?
If you accidentally remove part of the photo you want to keep, use the “Undo” button in the top-left corner of the screen or press “Command + Z” on your keyboard to undo the last action.
You can also use the Clone tool or the Lasso tool to manually copy and paste pixels from other areas of the photo to restore the missing part.
How to remove an object from a photo with multiple layers in Pixelmator?
If you want to remove an object from a photo with multiple layers, make sure to check “Sample All Layers” in the Repair tool settings. This will allow Pixelmator to use pixels from all layers to fill in the area.


