Recording gameplay on your PC couldn’t be any easier. There are a plethora of software solutions to record every game imaginable in a variety of different methods, and perhaps the most popular and widely used is Nvidia’s ShadowPlay, which is a free download from Nvidia’s website.
Now, before we get into the rest of this article, it goes without saying that ShadowPlay is ONLY for those using an Nvidia graphics card. Those on team red running an AMD setup will unfortunately need to use a different program.
This article will focus on ShadowPlay’s “instant replay” function. You can use ShadowPlay to record traditionally (e.g. manually start and stop), but most users tend to take advantage of the “always recording” function of instant replay.
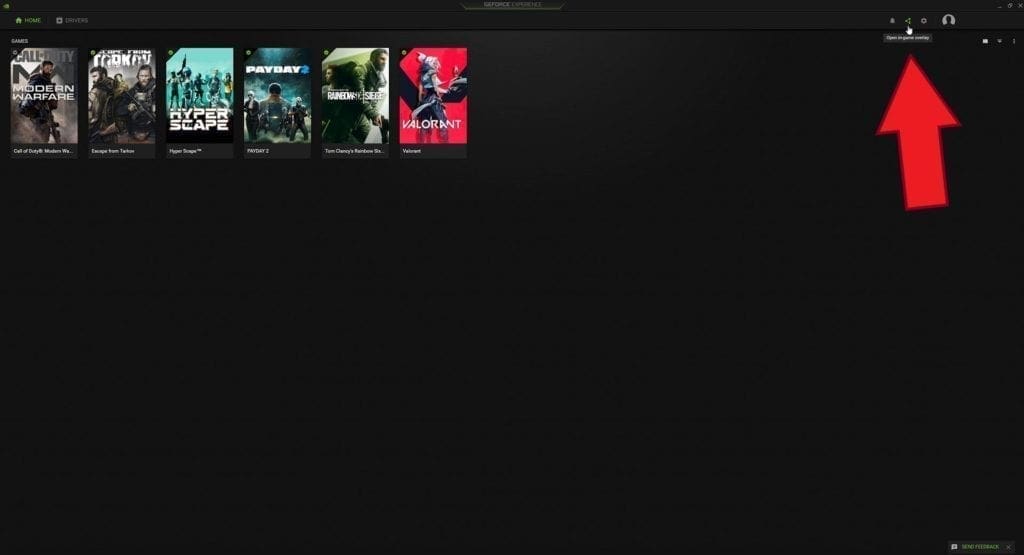
After downloading and installing ShadowPlay, you’ll want to open the program and tweak the settings for best performance. In the top right corner, click the middle “open in-game overlay” icon. This will open the options panel allowing you to edit the settings.
Next, click on the large settings icon when the ShadowPlay menu pops up.

The first thing you’ll want to do is to make sure the HUD layout is set up appropriately. You can specify several settings, including FPS display, recording status indicator, camera, and other elements. We recommend having the FPS in the bottom left corner, and the status indicator in the bottom right (although you can customize this to suit your setup).
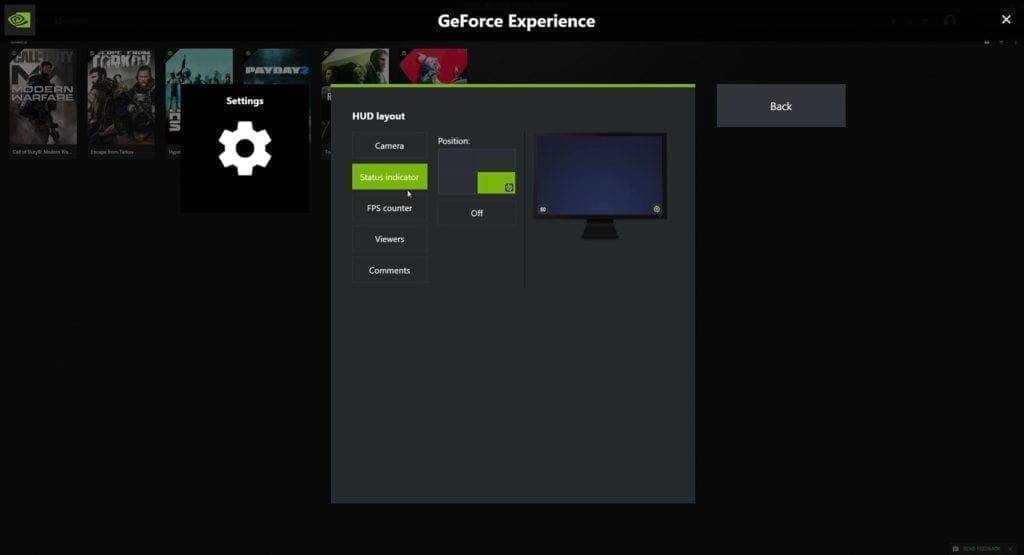
The Status indicator and FPS counter are the two most important. If you are recording gameplay, you will want to record at 60 frames per second (FPS), so you’ll want to make sure your game is displaying at least above that 60 FPS minimum. If your computer isn’t powerful enough or the game runs below 60 FPS, that’s fine, but it’s important to know.
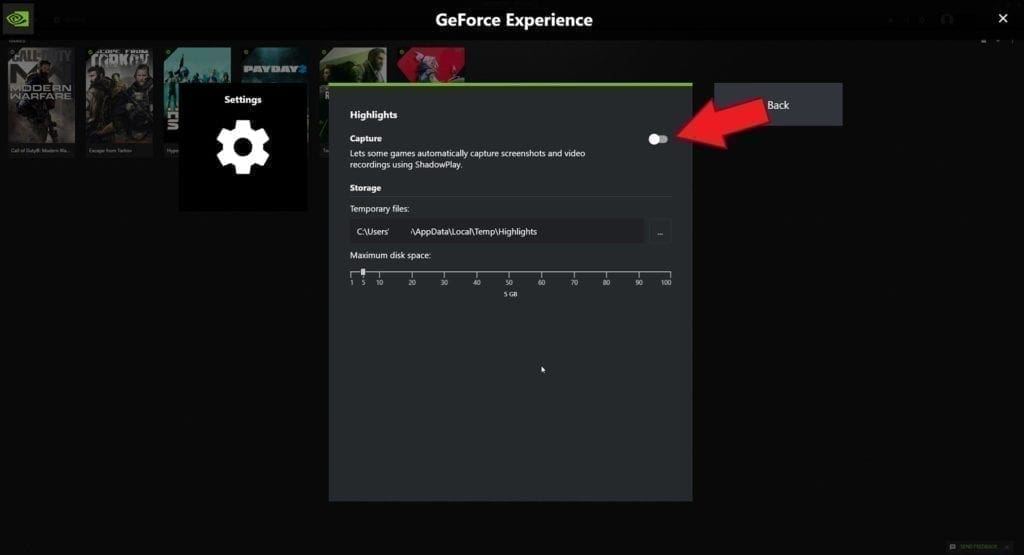
Moving on, we recommend to turn “Highlights” off, as you will be manually specifying which gameplay segments to record.
Next, open the “Audio” settings. If you’re recording gameplay without a voiceover, you’re likely fine with the default settings. However, if you have a microphone and you want to separate the voice track from the game track, you can do this here. Why is this such a cool setting? Well, it allows you to record flexibly and gives you more freedom with each recorded clip.

If you record an exciting piece of gameplay, you will be able to completely mute your voice if necessary, or edit your voice to make it louder/quieter. Or, completely remove the game track and keep just your voice. All you need to make this possible is to import your clip into some kind of editing software, and the audio will appear in two different tracks – one for your voice, and one for the game sounds.
Moving on to the “Video Capture” setting, this is where you can control the length, quality, and size of gameplay clips you record.
Instant replay length will vary depending on what your goal is. Are you looking to record small sections of gameplay, such as a killstreak on Call of Duty, or a funny fail on Fortnite? You should set the instant replay length to either 5 minutes or less. This will capture the last 5 minutes of gameplay when you hit the instant replay hot key. You can then edit this clip in an editing program to cut out the unnecessary footage.
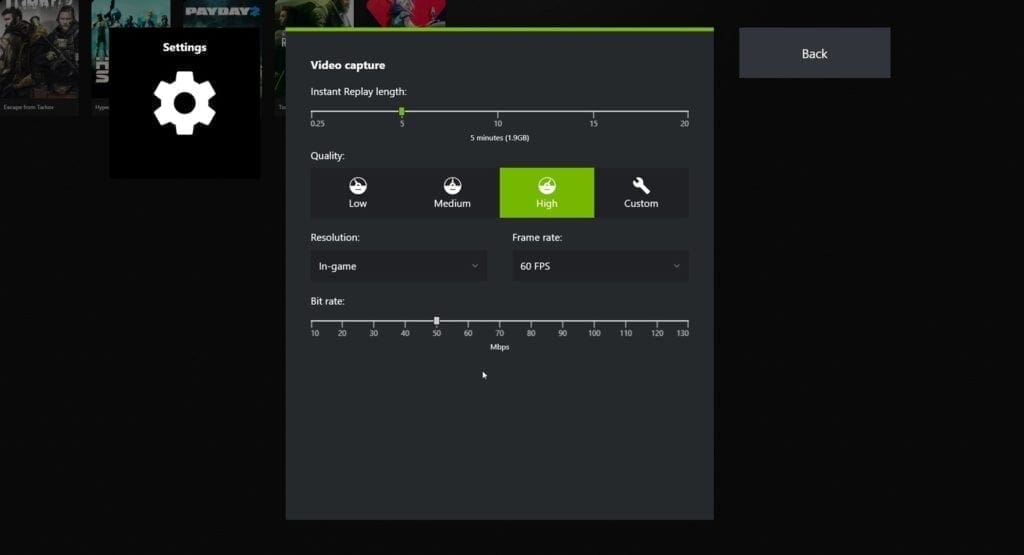
If you’re looking at recording more than 5 minutes, this is entirely possible. However, the file size of each clip will be significantly larger. This is a handy tool for someone who would like to record entire games if necessary, but does not want to manually record and have to start and stop frequently.
We recommend to set the quality setting as “High”, use an in-game resolution setting (e.g. if you play at 1080p, ShadowPlay will record at 1080p, and use a frame rate of 60 FPS. As mentioned previously, if you’re unable to achieve a 60 FPS minimum frame rate in your game, you should record at 30 FPS.
We tend to select a relatively high bit rate setting, which is essentially how many “mega bits per second” are recorded. A higher bit rate setting will result in higher recording quality, but is more taxing on your PC (e.g. may decrease performance during gaming) and will result in large file sizes. We recommend experimenting with this setting. We have a high-end PC, so we are able to comfortably record in 50-70 Mbps. However, if your PC is more mid-range, 20-40 Mbps is also fine.
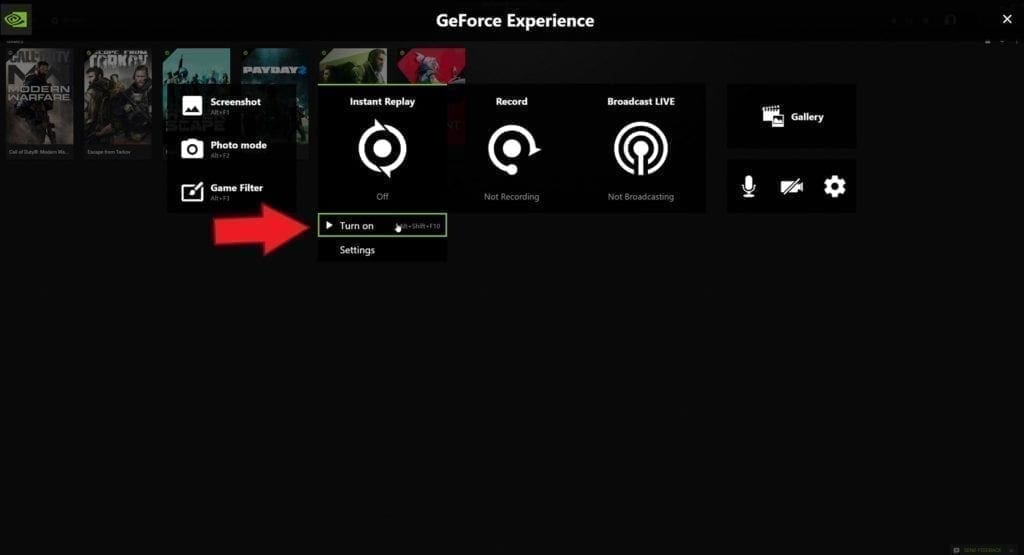
Now, don’t forget to turn instant replay on in the GeForce Experience settings! Now you’re good to go and are ready to record some awesome gameplay footage.
Once you have your footage, you can edit it using a free video editing program like DaVinci Resolve. Don’t forget to check out my best DaVinci Resolve render settings for YouTube if you want to maximize the quality of your gaming video!


