Sometimes, you need to resize or scale one element of your UI design while keeping the size and proportions.
Resizing content within frames and groups can be a bit tricky, but Figma made it easier by introducing the “Scale” tool.
In this step-by-step tutorial, I will show you how to resize and scale frames and groups proportionally and how to use the “Scale” tool in Figma.
Before we dive into the resizing techniques, let’s quickly understand the difference between frames and groups in Figma.
What are the differences between Frames and Groups?
Frames are independent containers that can have their own size, while groups are containers whose size is determined by their content.
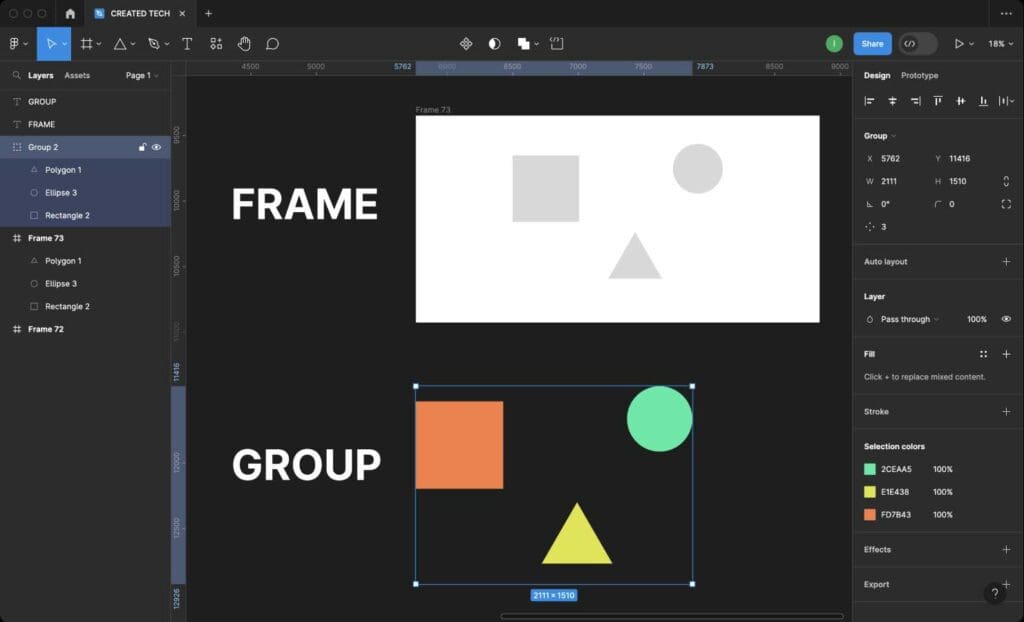
Frames are more flexible and offer additional features like applying constraints and creating components.
On the other hand, groups are useful for combining multiple elements into a single top-level layer.
In Figma, you can resize any object except for locked layers. Therefore, before scaling a frame or group, make sure all layers inside are not locked.
How to Resize Frames With Content in Figma
To resize a frame and all the content contained within it, follow these steps:
Step 1: Select the frame by clicking on it.

Step 2: Make sure all the content (e.g. UI elements or logos) is inside the frame. If not, move them inside the frame using the selection tool.

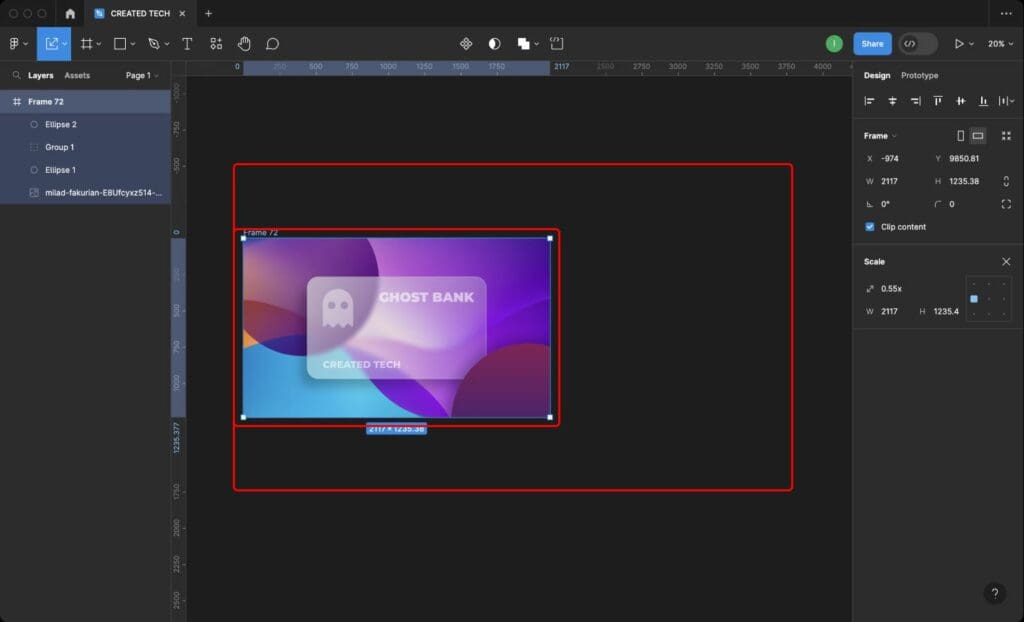
Step 3: Press the “K” key on your keyboard to select the “Scale” tool. Alternatively, you can choose the “Scale” tool in the toolbar.
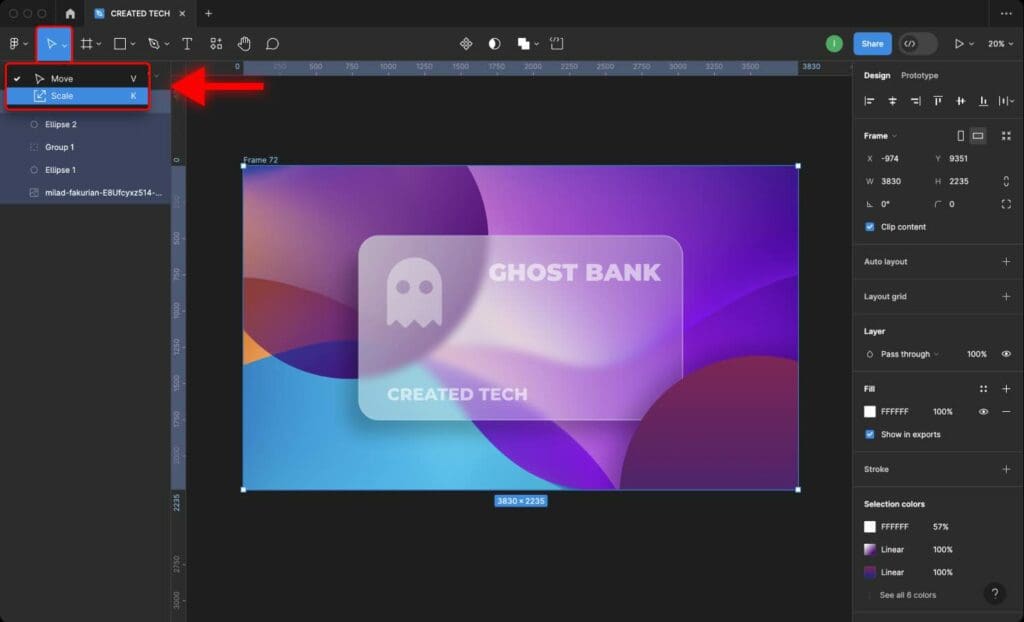
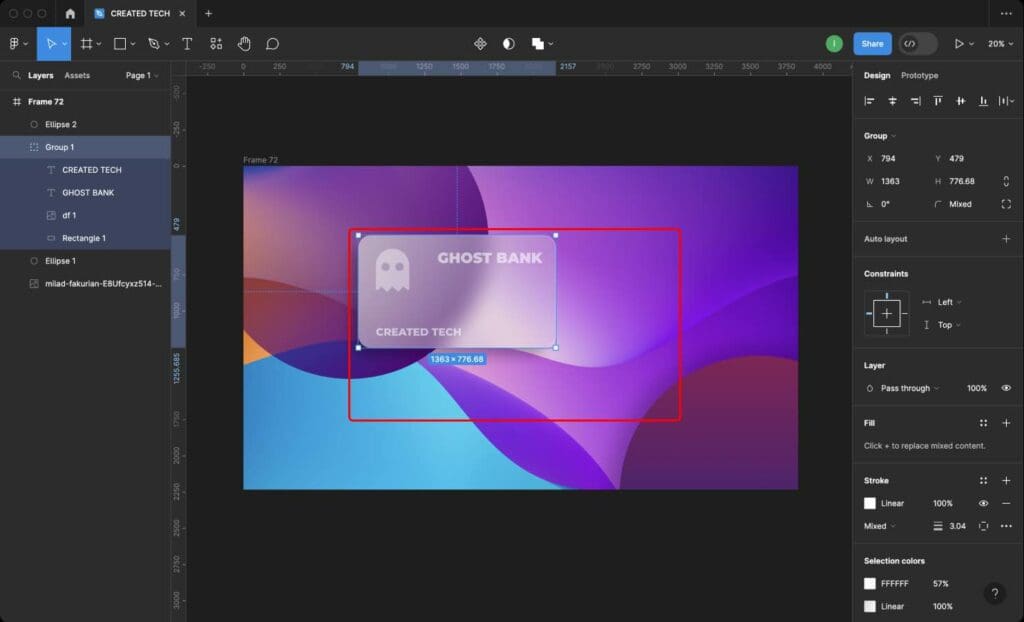
Step 4: Click and drag any of the corner handles of the frame to scale it up or down. The content inside the frame, including images, text, and shapes, will scale proportionally with it.
How to Resize Groups With Content in Figma
To resize a group and the content within it, follow these steps:
Step 1: Select the group by clicking on it.
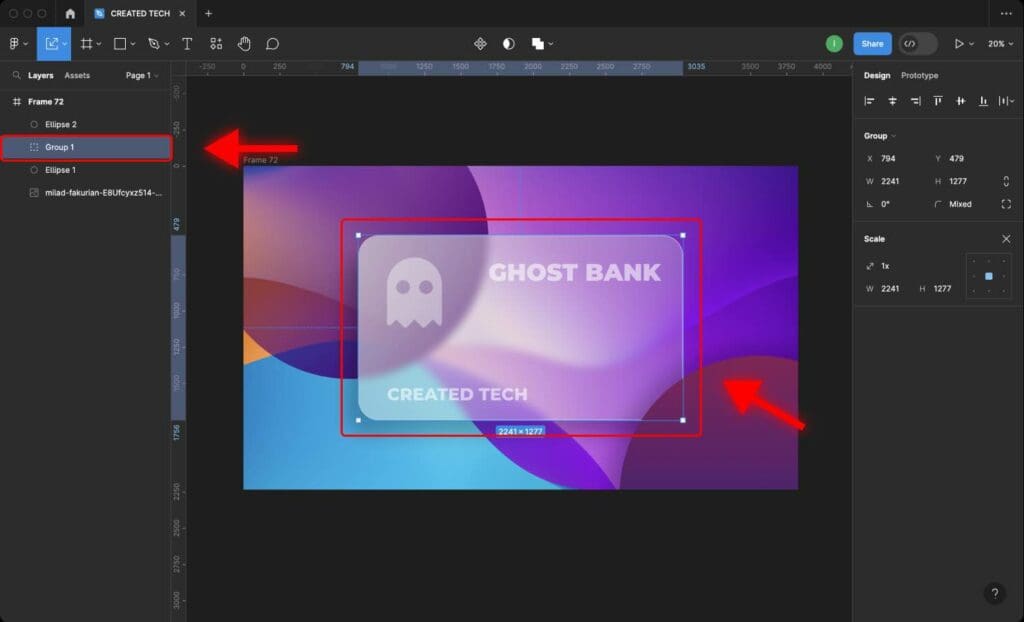
Step 2: Press the “K” key on your keyboard to select the “Scale” tool. Alternatively, you can choose the “Scale” tool in the toolbar.
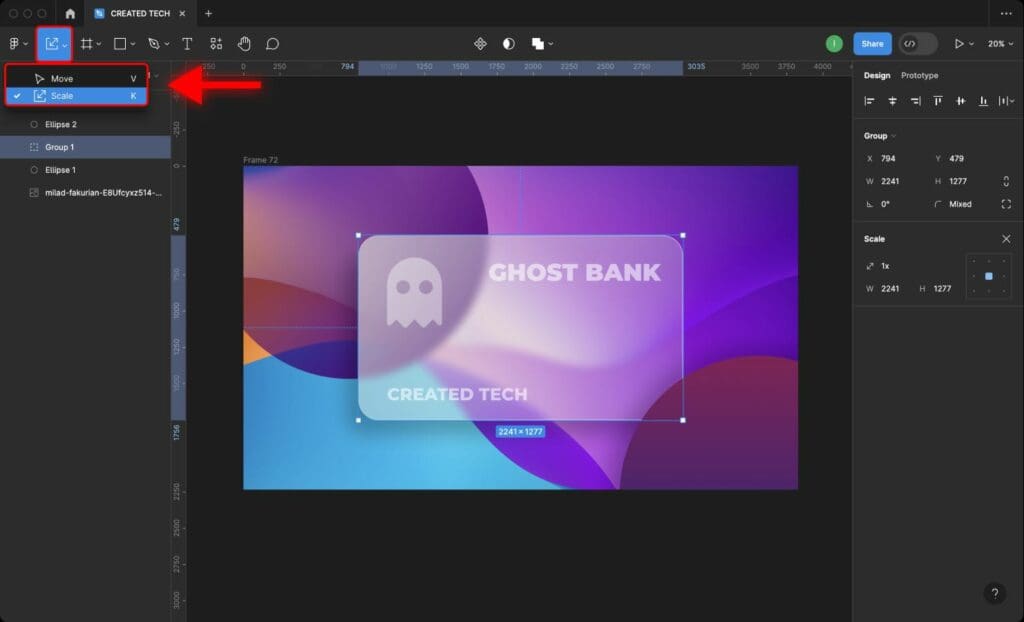
Step 3: Click and drag any of the corner handles of the group to scale it up or down.
Learn 3 Ways to Crop Images in Figma.
Frequently Asked Questions
When I resize a frame in Figma, the content inside it is not scaling properly. What should I do?
Make sure all content (e.g. UI elements or logos) is inside the frame before resizing it. If the content is not scaling proportionally, check if you have selected the frame and not the individual elements inside it. Also, make sure all the layers inside the frame are unlocked.
How to resize a frame without moving the elements inside it in Figma?
Hold down the “Shift” key on your keyboard while resizing the frame. This will help constrain the proportions of the frame without affecting the position of the elements inside the frame.
If you want to crop the frame, hold down the “Command” key on macOS or “Ctrl” key on Windows and click on the edge of the frame to crop it.
How to resize a frame or a group without stretching the content inside it within Figma?
Step 1: Select the frame by clicking on it.
Step 2: Make sure all the content is inside the frame. If not, move them inside the frame using the selection tool.
Step 3: Press the “K” key on your keyboard to select the Scale tool. Alternatively, you can select the Scale tool in the toolbar.
Step 4: Click and drag any of the corner handles of the frame to scale it up or down. The content inside the frame, including images, text, and shapes, will scale proportionally with it.


