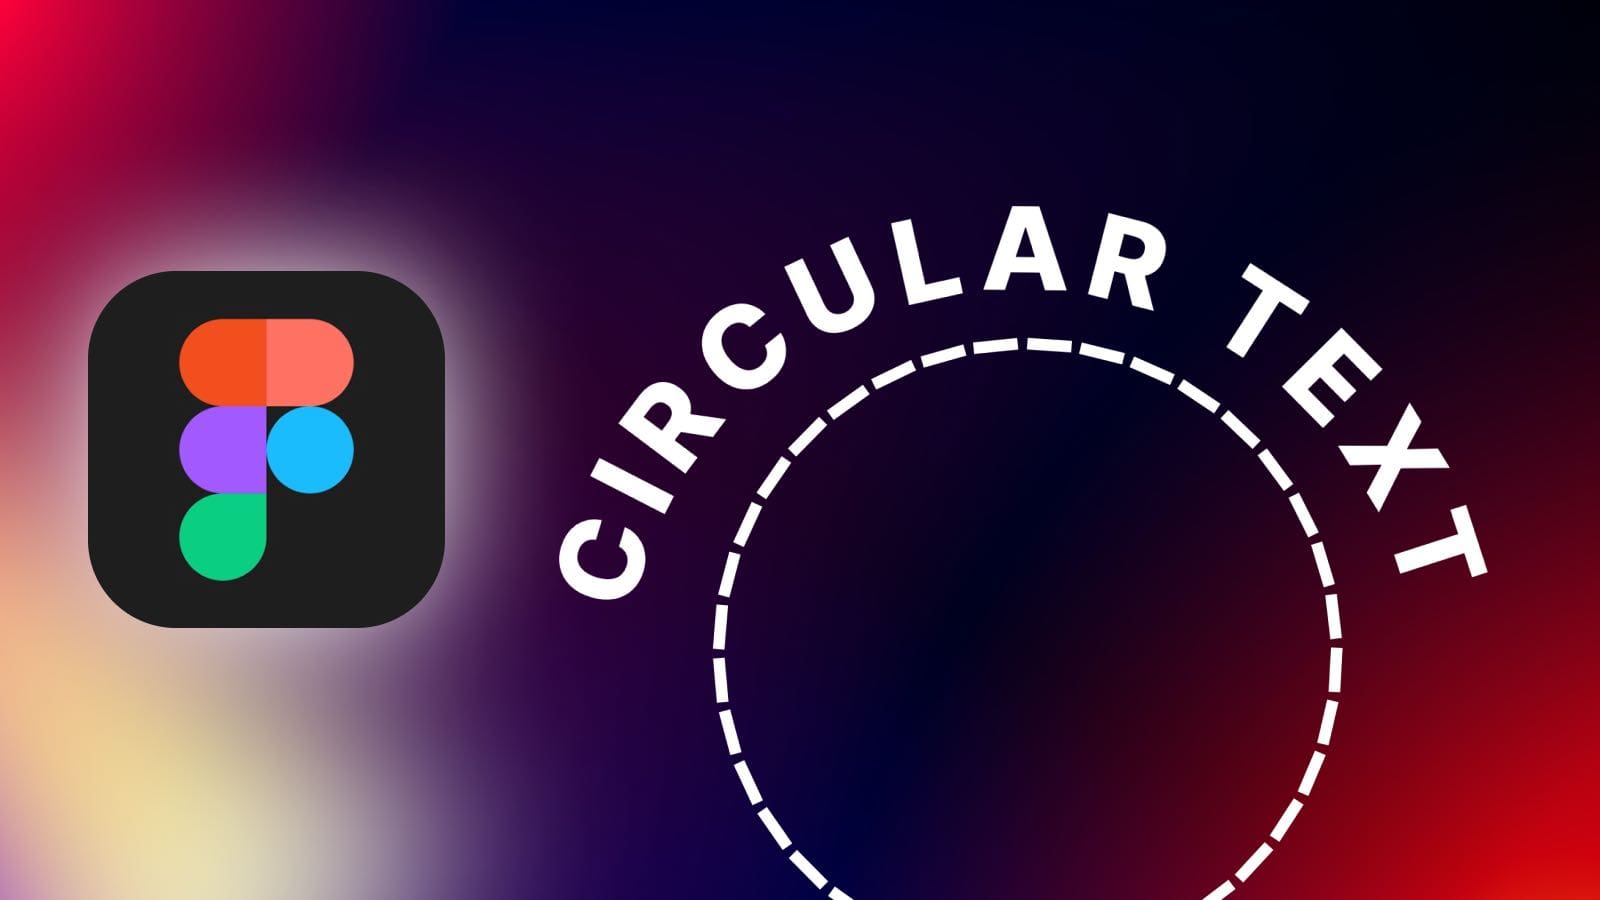
Circular text, also known as curved text or text on a path, refers to text arranged in a circular or curved fashion rather than in a straight line.
Circular text can be used for various design purposes, such as creating logos, labels, banners, or decorative elements in graphic design, web design, or print media.
Figma doesn’t have a native feature for creating curved text. However, Figma has a massive library of plugins that allows you to create curved text.
In this step-by-step tutorial, I will show you how to curve text in Figma using a third-party plugin.
1. Prepare your text layer in Figma
Before we start gettin’ curvy, let’s first set up our text layer with the desired font, size, and color. To do this:
Step 1: Create a new text element by selecting the Text tool from the left toolbar and clicking on the canvas.
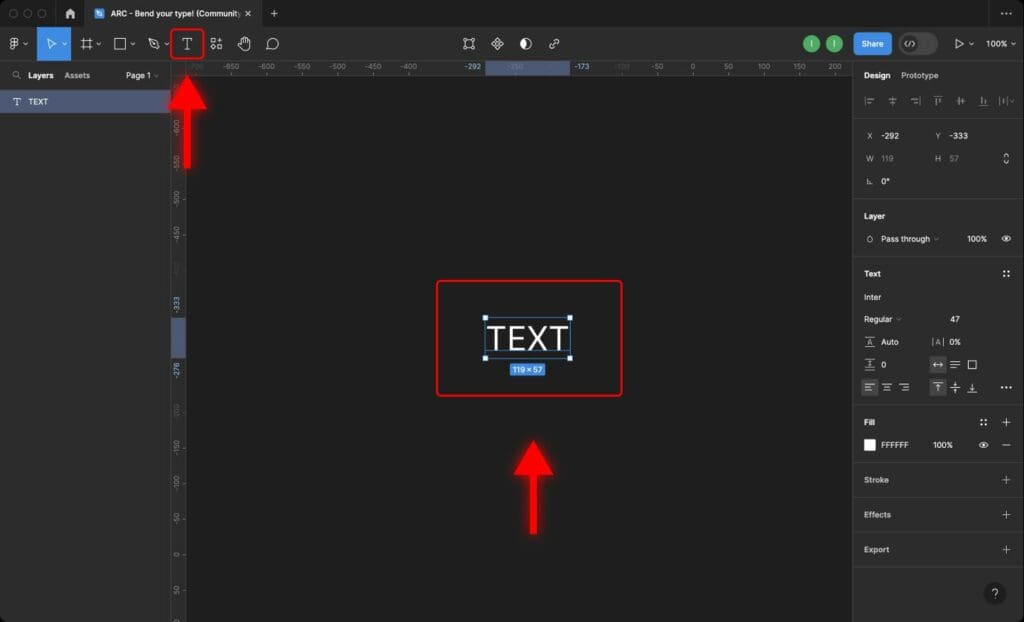
Step 2: Type in your desired text and adjust the font, size, and color using the options in the right sidebar.
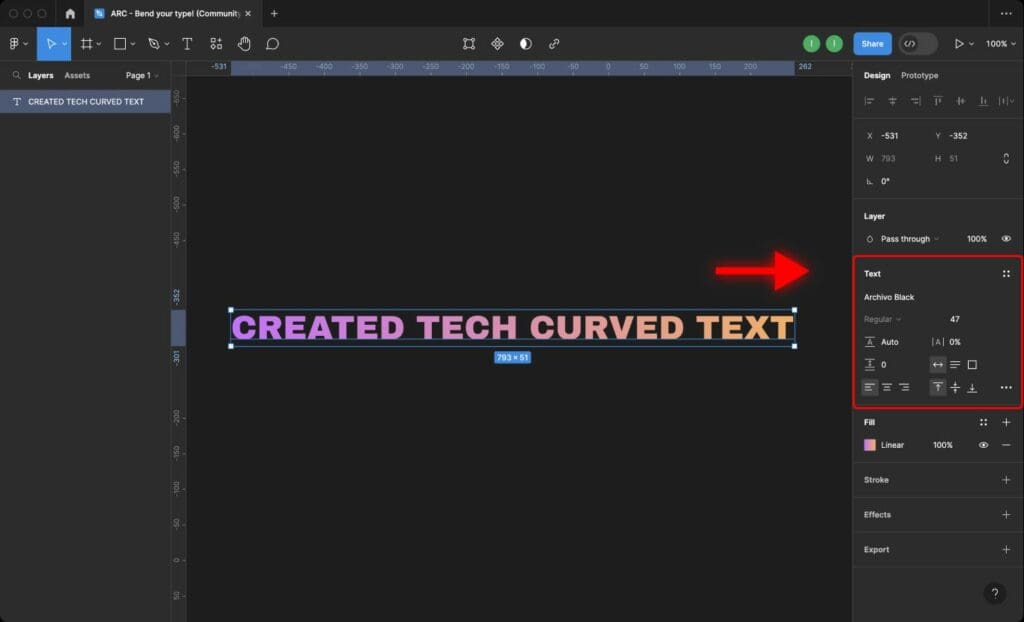
I decided to apply a color gradient effect to the text.
2. Install the Arc plugin in Figma
To start using the Arc plugin, follow these steps:
Step 1: Open the Figma desktop app or web app and navigate to the Resources tab on the toolbar.
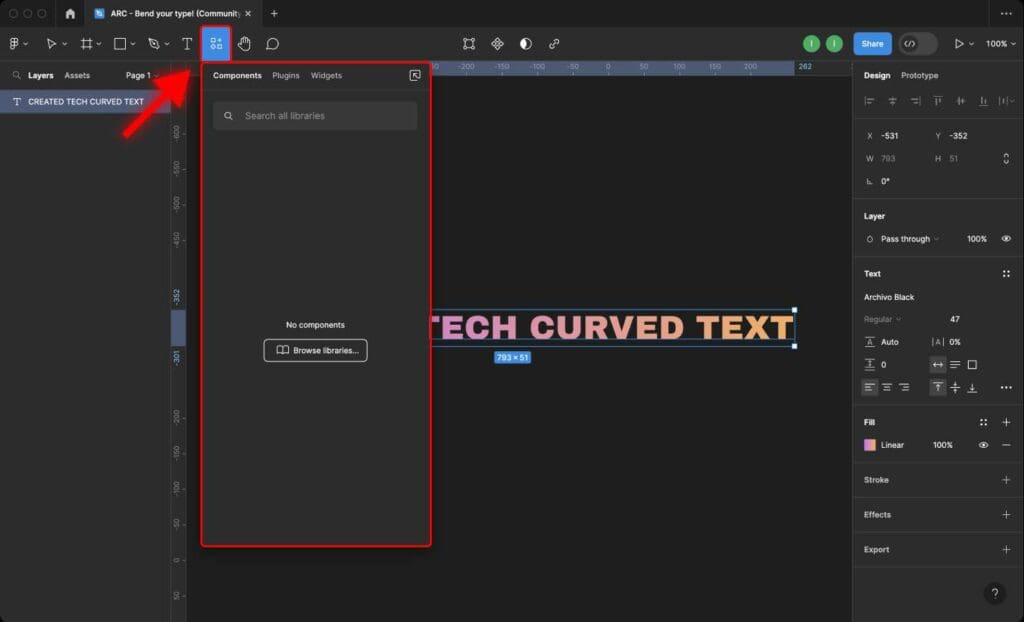
Step 2: Click on Plugins.
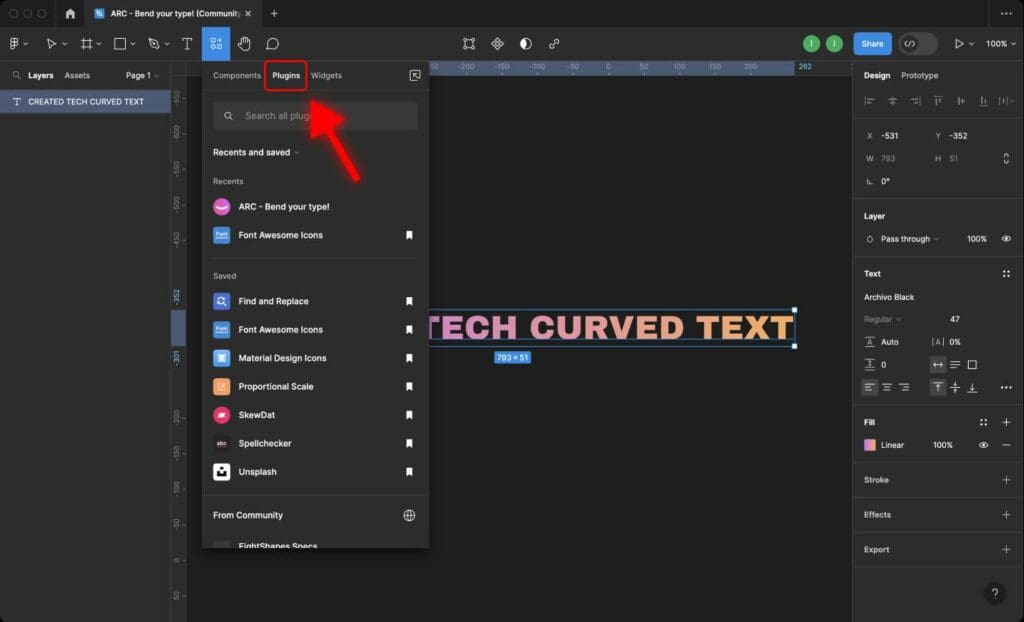
Step 3: In the search bar, type “Arc” and press Enter.
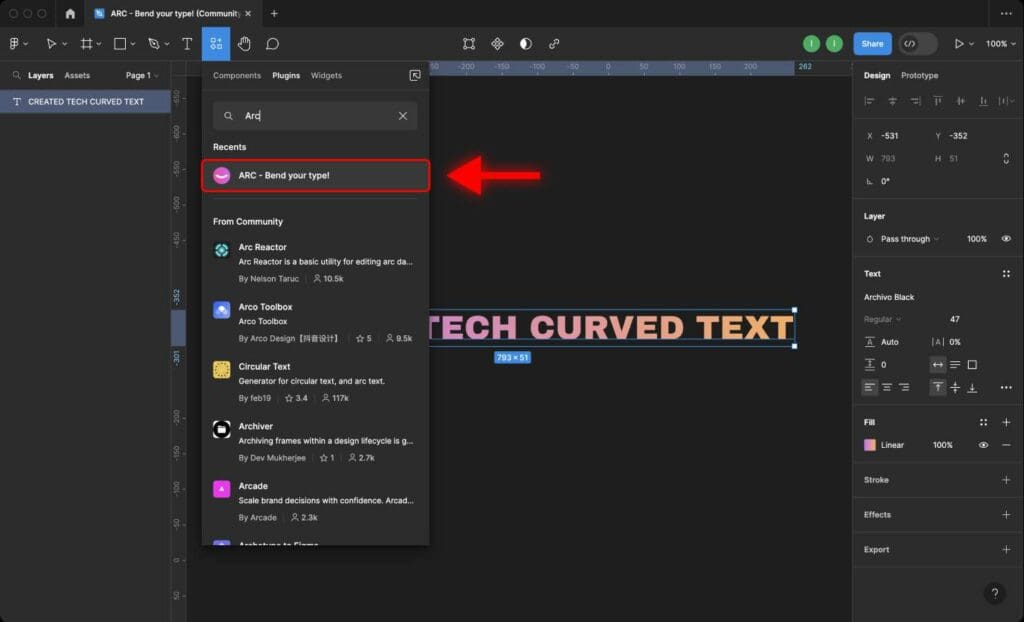
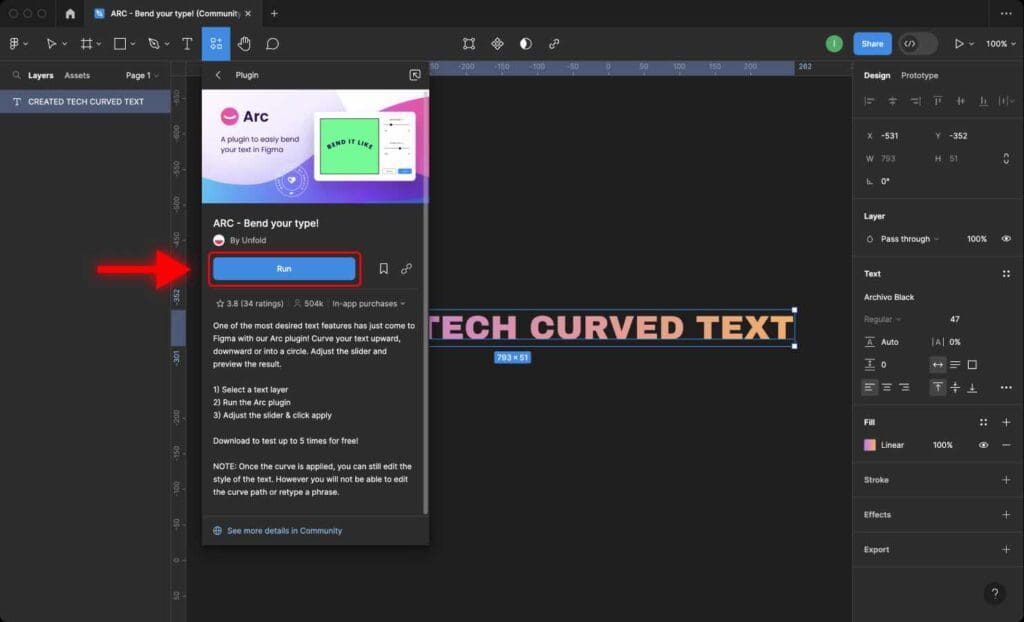
Step 4: Click on “ARC – Bend your type!” plugin and click “Run”.
3. Customize the circular text using the Arc plugin in Figma
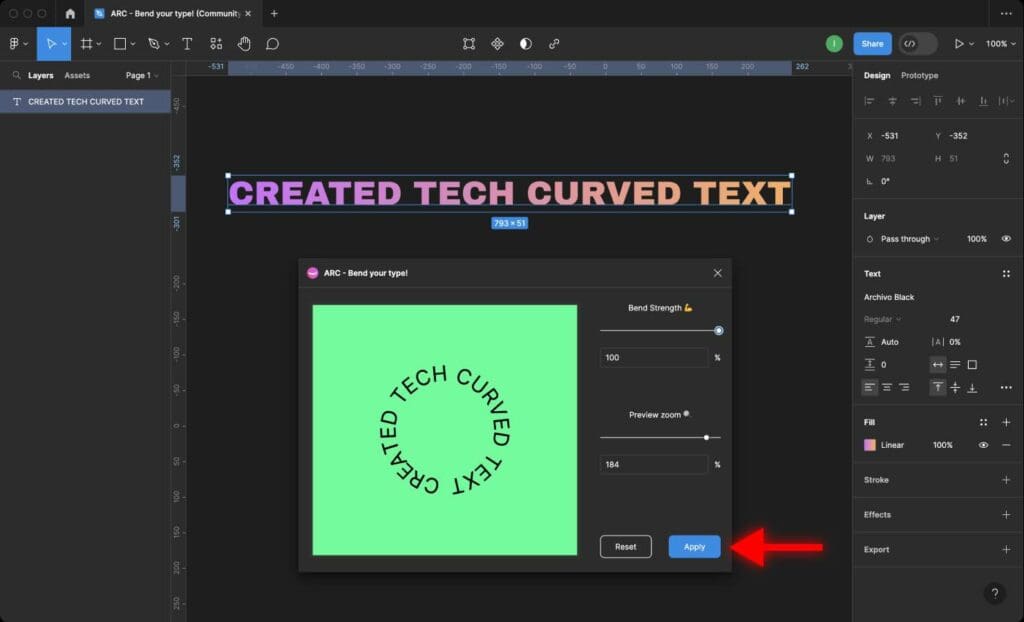
The Arc plugin allows you to curve your text upward, downward, or into a circle. Here’s how you can customize the circular text:
Step 1: After launching the Arc plugin, you’ll see a popup window that previews the text and a slider on the right side to customize the curvature.

Step 2: Drag the slider to the left to curve the text downward or to the right to curve it upward.
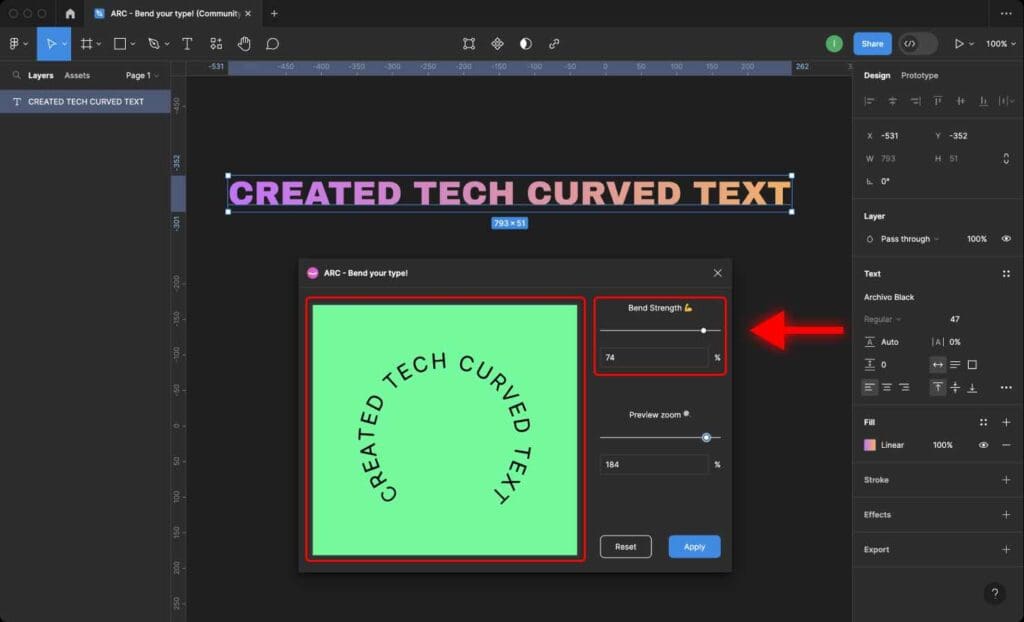
Step 3: To create a circular text, drag the slider all the way to the right until it forms a complete circle.

Step 4: Click the “Apply” button to save the changes to the text layer.
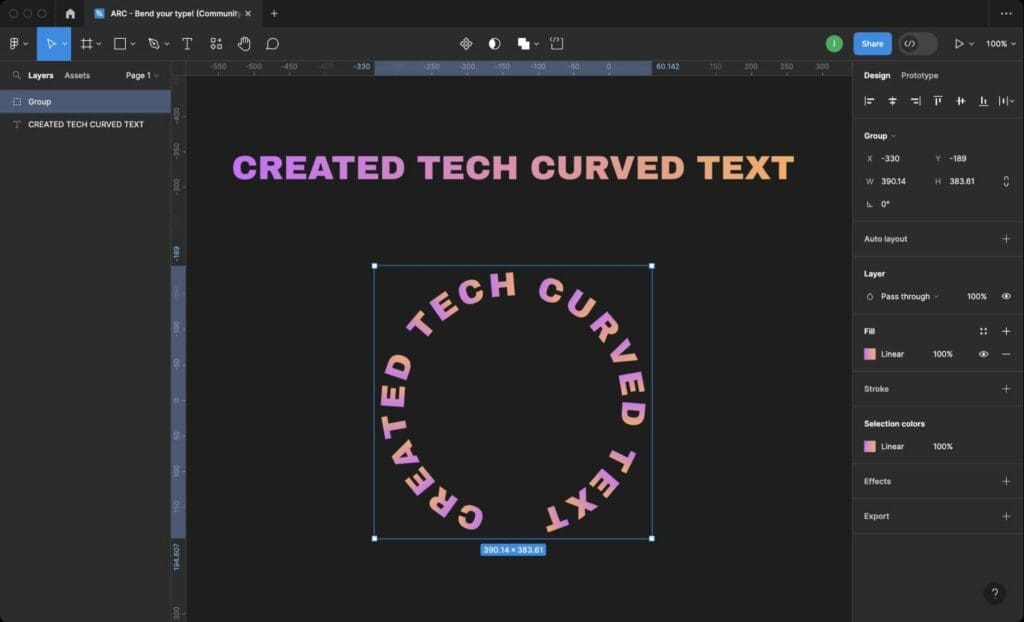
Please note that this plugin transforms a text layer into a group of individual letter layers, each angled individually to form a curve.
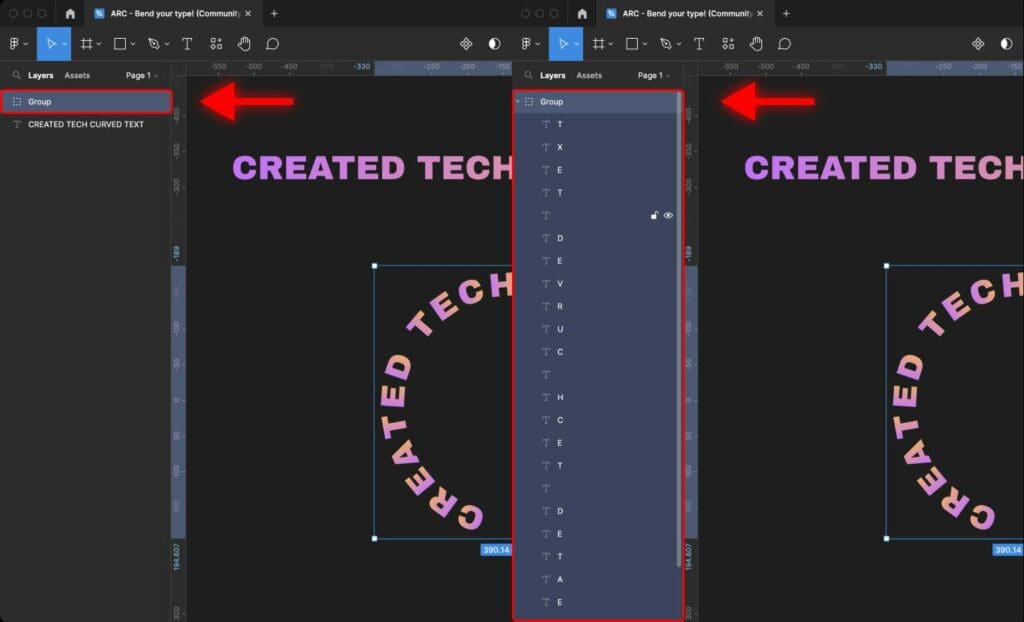
Therefore, if you want to edit the text layer again, you must delete the curved text and edit the original text layer again.
It is inconvenient, especially if you need to tweak the text back and forth, but currently, this is the only possible way to create curved text in Figma.
And that’s it! That’s how you can apply a curved effect to text within Figma. Don’t forget to export your final project!
Frequently Asked Questions
Can I edit the curve path after applying the Arc plugin in Figma?
No, the Arc plugin only allows you to adjust the curvature of the text, not the curve path itself. If you need more control over the curve path, you can try other plugins or external tools like Adobe Illustrator or Pixelmator.
Why is my text not curving properly in Figma?
Make sure you have selected the text layer before launching the Arc plugin. If the text is still not curving as expected, try adjusting the font size or the text box’s width.
What plugins can create circular text in Figma?
There are multiple plugins available in the Figma community that can help you create circular text. Some of them are To Path, Circular Text, Arc, and TextWrap.


