One way to make your text more engaging is to use video to fill the space within the text.
In this step-by-step tutorial, I will walk you through two options to add a video inside text using DaVinci Resolve, so you can create stunning video projects that captivate your viewers.


The first option is relatively fast and straightforward, allowing editors to insert a video clip into their text without creating masks in DaVinci Resolve. However, this option has some limitations in terms of customization and flexibility.
The second option involves creating a mask using Fusion in DaVinci Resolve, which can offer greater control and flexibility over the placement and appearance.
While the second option may sound more challenging at first, it is not more difficult than the first option. It can ultimately result in a more polished and professional-looking video.
In this tutorial, I will guide you through both options to add a video inside the text in DaVinci Resolve, so you can choose the one that best fits your needs.
Option 1: How to Add Video Inside Text in DaVinci Resolve
Step 1: Place the video clip into the timeline on the 2nd video track.
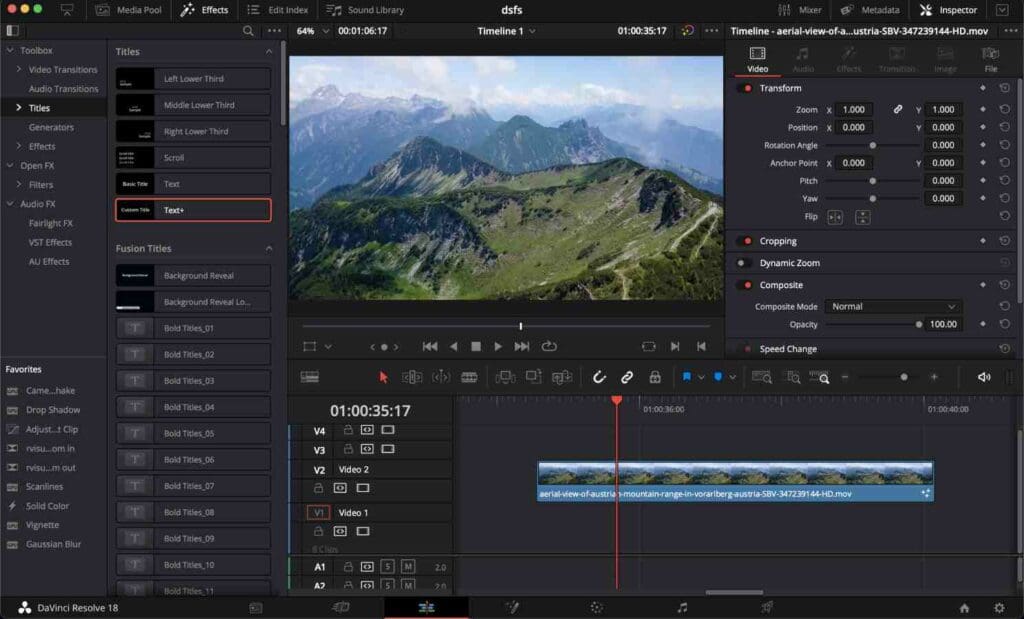

You may want to edit the video clip by trimming or slowing it down to create a slow-motion effect.
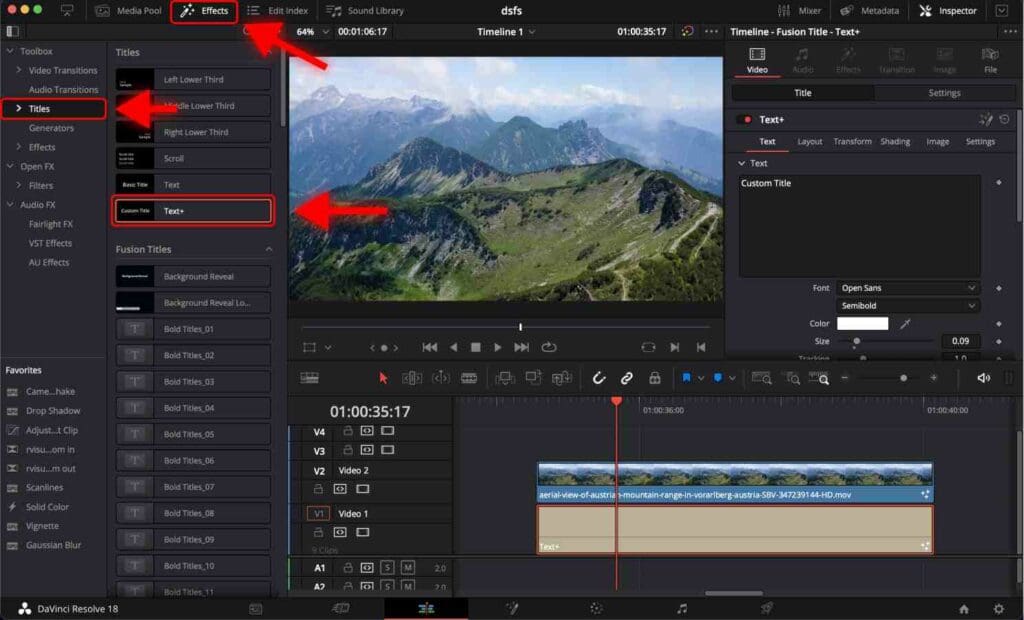
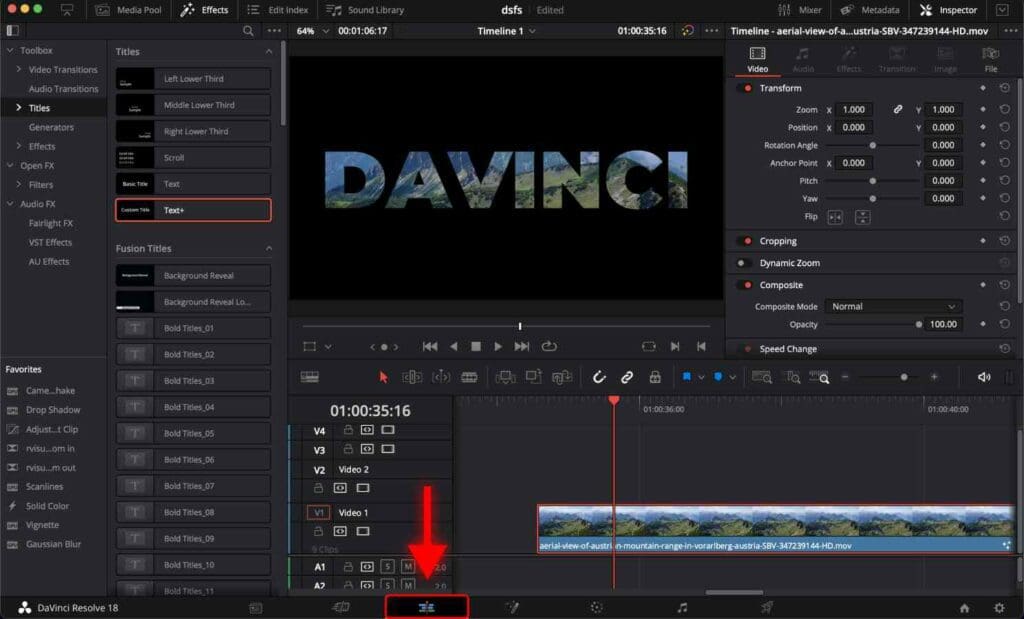
Step 2: Go to the “Effects” tab
Step 3: Choose “Titles” in the Toolbox list
Step 4: Click on the “Text+” title and drag it to the timeline BELOW the video clip.

Step 5: Click on the video clip.
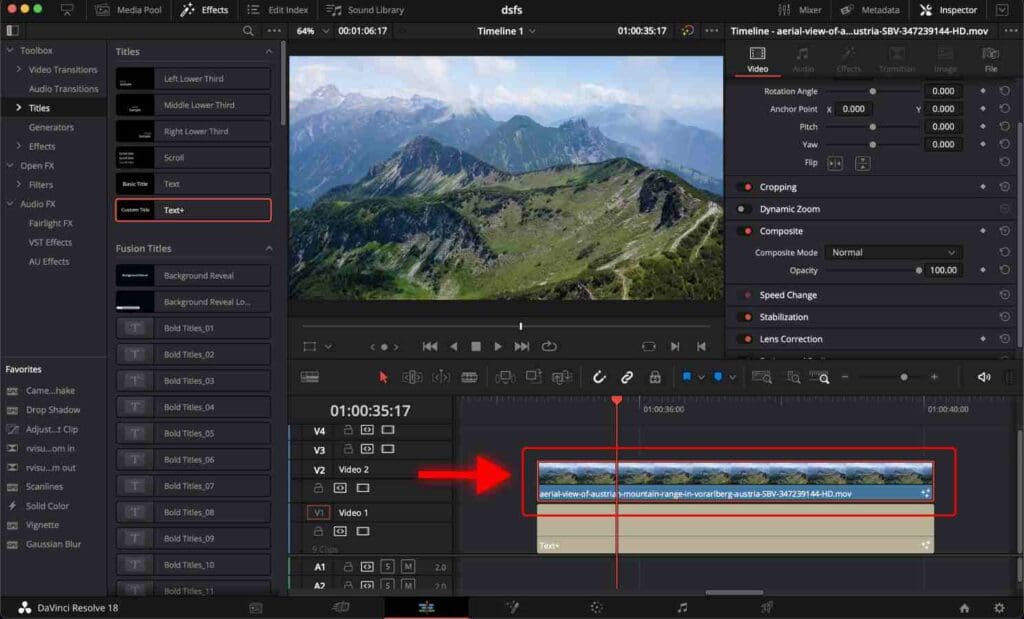

Step 6: Go to the “Inspector” tab > “Video” tab > “Settings” menu.
Step 7: Scroll down and change “Composite Mode” to “Darken”.
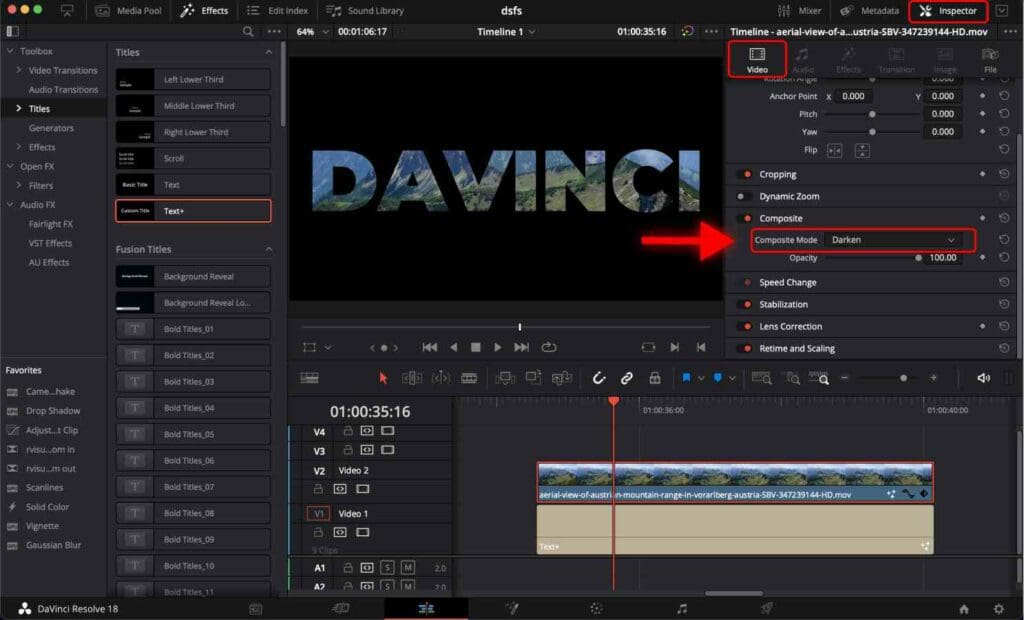

Step 8: Click on the text clip.
Step 9: Go to the “Inspector” tab > “Video” tab > “Title” menu and type the desired text.
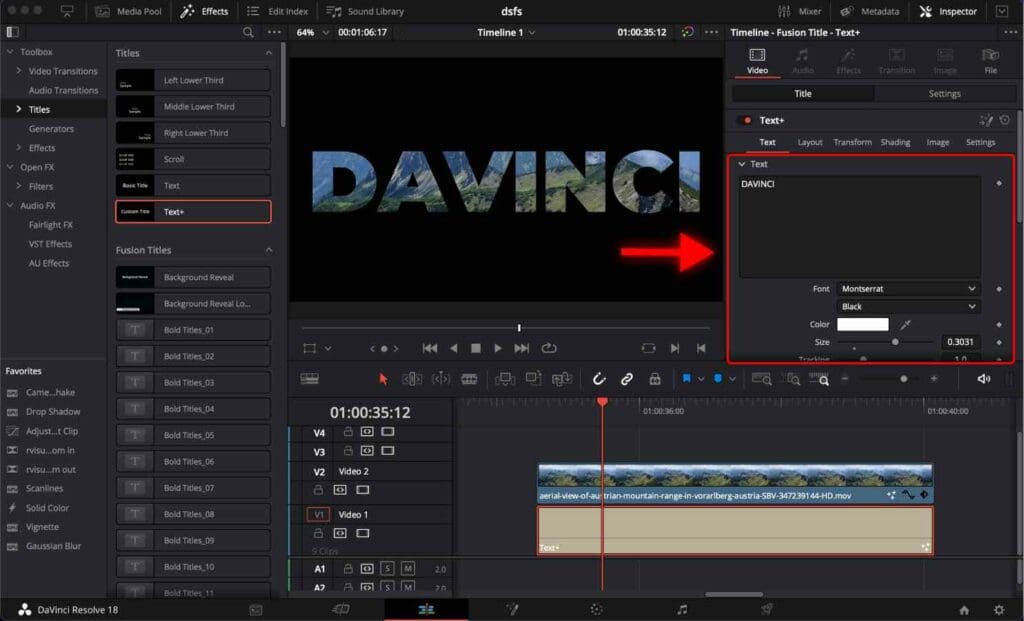

Here you can also customize the text size, font, and more.
This option has one huge limitation – you cannot change the background behind the text. Therefore, this option works only if you want the background to be black.
You need to use a mask if you want a video or an image behind the text. It’s very easy to do. Let me show you how.
Option 2: How to Add Video Inside Text in DaVinci Resolve Using Mask
Step 1: Drag the video clip into the timeline.
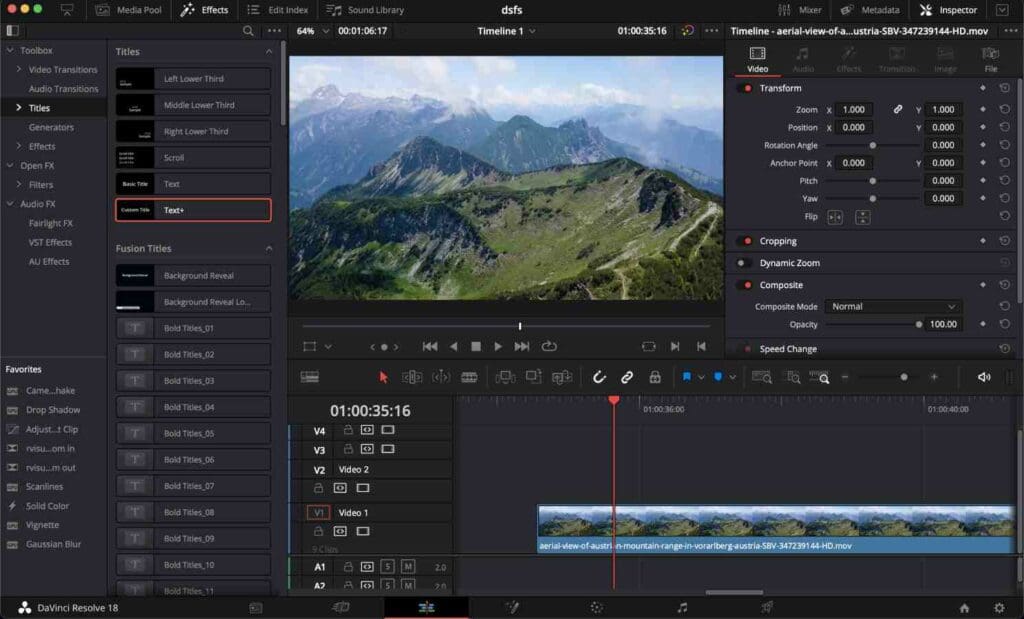

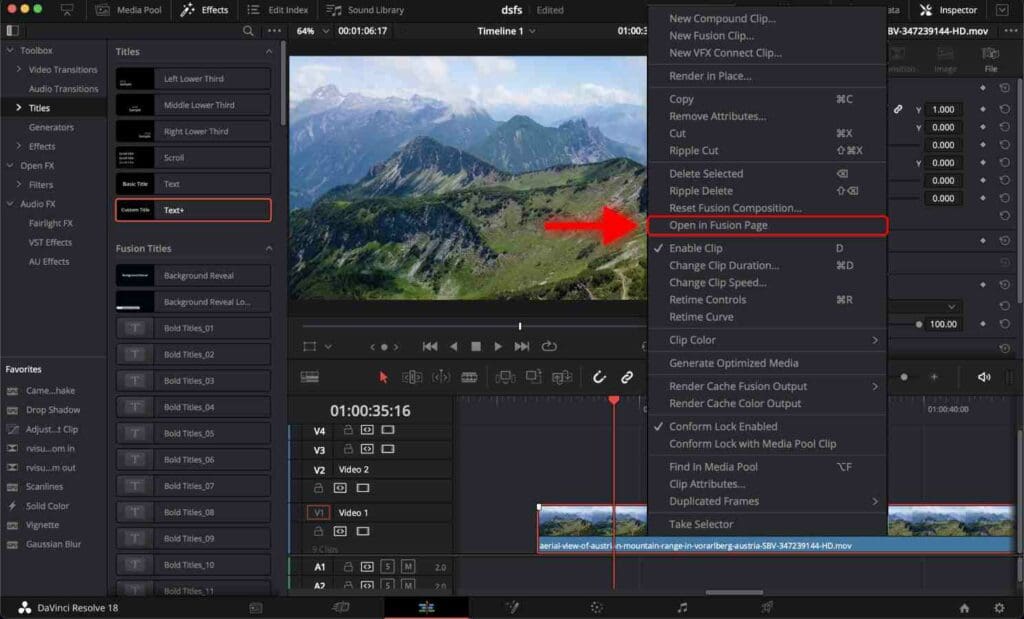
Step 2: Right-click on the video clip and select “Open in Fusion Page”.
Alternatively, you can open the Fusion page with the shortcut Shift + 5.
70 Easy DaVinci Resolve Shortcuts You Can’t Afford to Miss.

Step 3: Drag “Text+” on the node area.
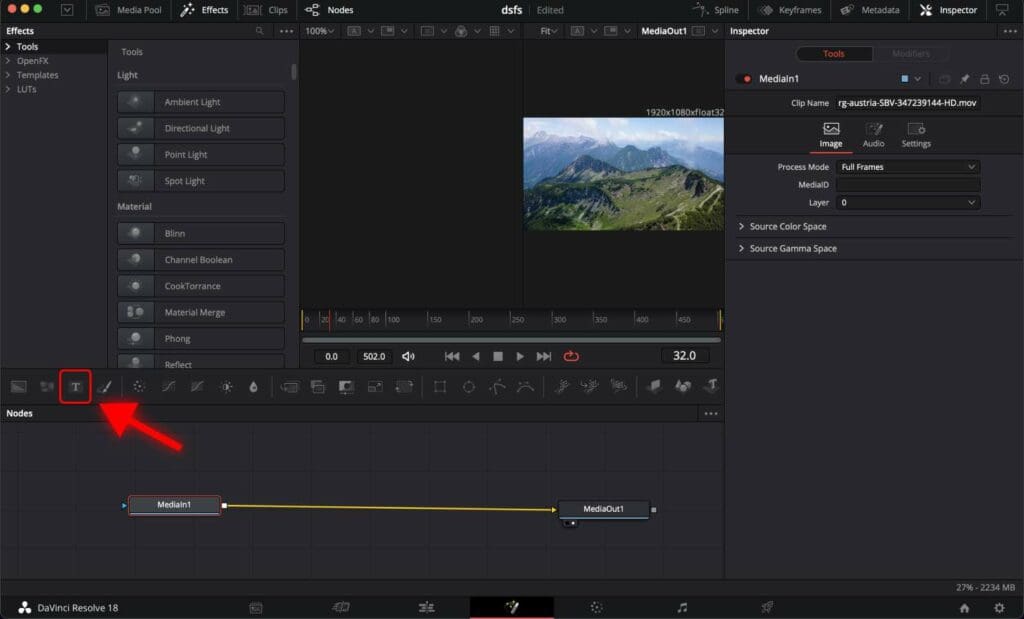

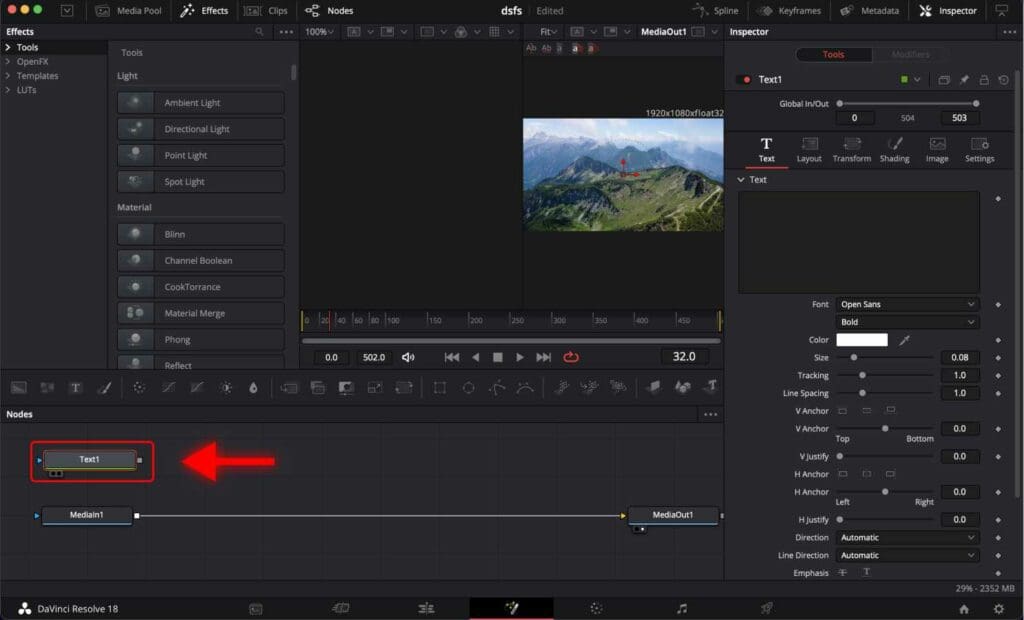

Step 4: Click on the white square to the right of the “Text1” node and drag it over the “MediaIn1” node.
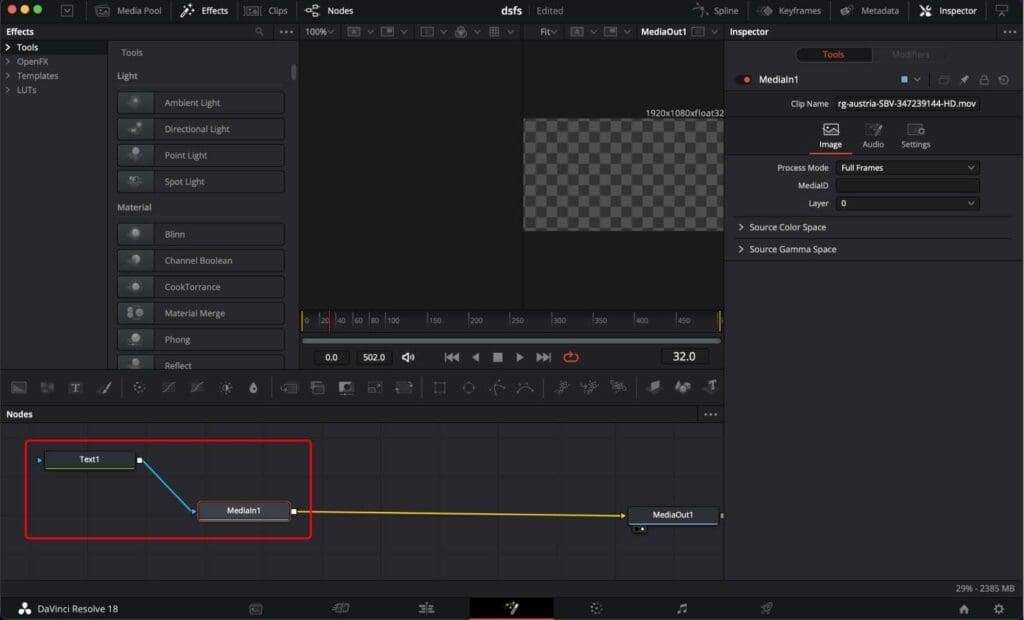

Now you can see that the “Text1” node is connected to the “MediaIn1” node.
Step 5: Click once on the “Text1” node.
Step 6: In the “Inspector” tab, write the desired text in the text field.
Step 7: Play with the size and font of the text to make it bigger.
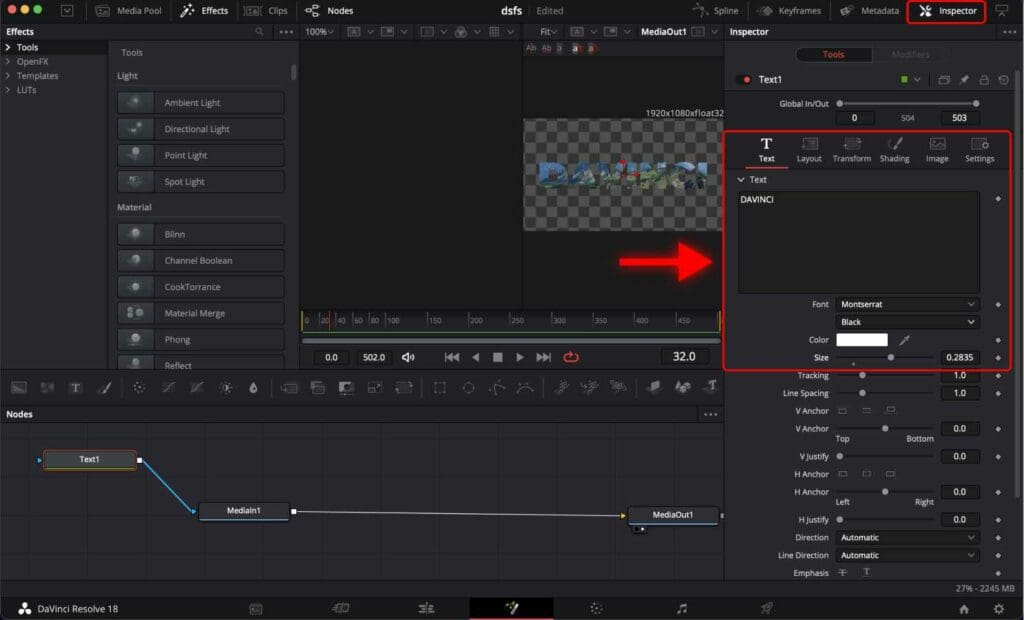

Step 8: Go back to the “Edit” tab.

Using a mask gives you more flexibility. You can now add any background you want, and it won’t interfere with the text.
Once your video is ready to be exported, check out the following tutorials showing you the best way to export your video projects in DaVinci Resolve.
Best DaVinci Resolve Render Settings For Youtube.
2 Export Settings to Match Colors in DaVinci Resolve Timeline.
Frequently Asked Questions
How to add a video inside the text in DaVinci Resolve?
There are two ways to achieve this. The first method involves using the Fusion page, which allows you to create more complex visual effects. The second method is to use the Edit page, which is simpler and faster.
How to add a video inside text using the Edit page in DaVinci Resolve?
To add a video inside text using the Edit page, you need to create a new text layer and place a video layer on top of that. Then, you can use the “Composite” section in the “Inspector” panel to apply a composite mode to the video layer. Select the “Darken” composite mode.
How do I add a video inside text using the Fusion page?
To add a video inside text using the Fusion page, you need to open the video in the Fusion page. Then, create a text node and connect it to the MediaIn node.

