
Changing the aspect ratio of your video might be helpful when you want to adapt a regular 16:9 aspect ratio video for TikTok or Instagram Reels. The good news is that DaVinci Resolve makes it extremely easy to do.
In this step-by-step guide, I’ll walk you through the process of changing the aspect ratio using two different methods. One is for the free version of DaVinci Resolve, and the second method is for the paid version – DaVinci Resolve Studio.
What is Aspect Ratio?
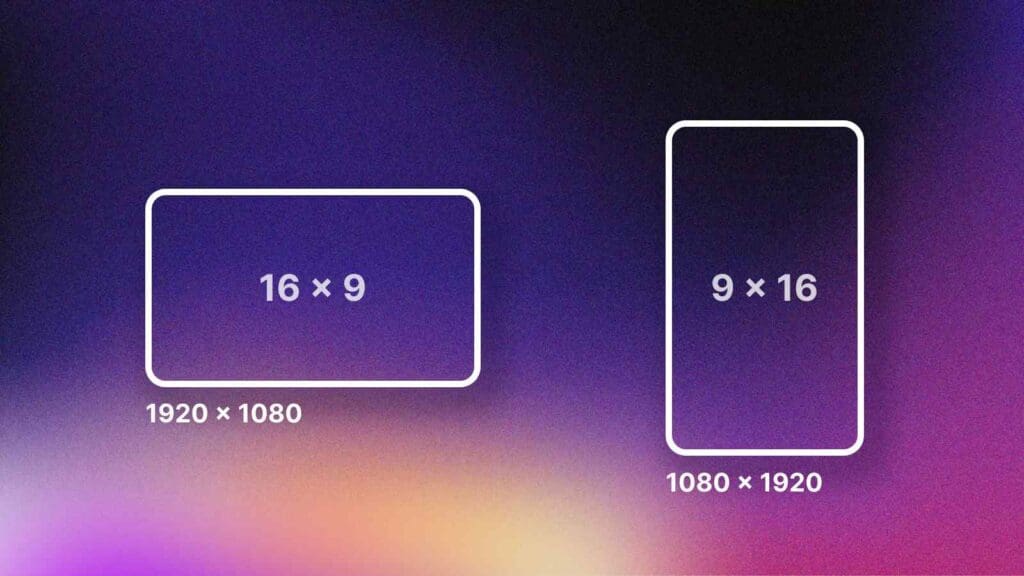
Aspect ratio is a term used to describe the proportional relationship between the width and height of an image or video. It is expressed as a ratio, such as 16:9 or 4:3. The first number represents the width of a video, and the second number represents the height.
Changing Aspect Ratio in DaVinci Resolve Free Version: Using Retime and Scaling
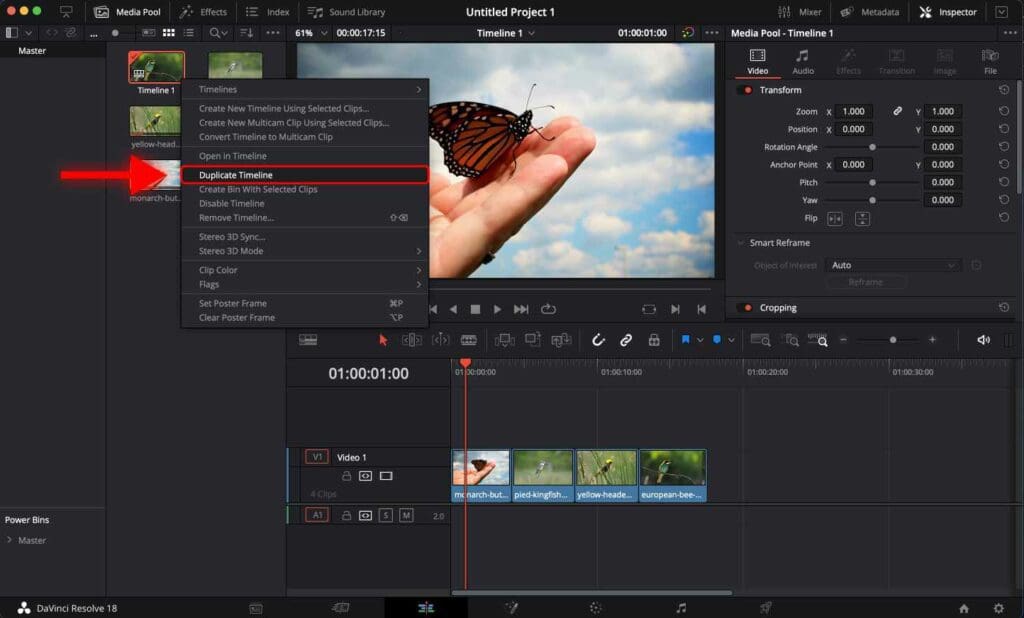
First, we have to duplicate the timeline with the video you want to adapt. Our goal is to change the resolution without affecting the main timeline.
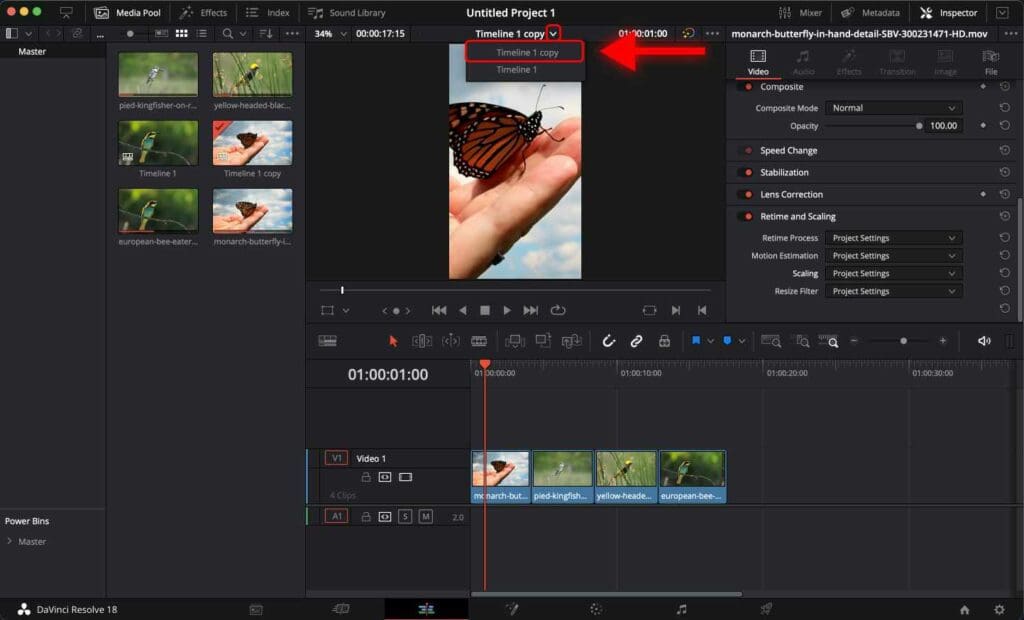
Step 1: Right-click on the current timeline and select “Duplicate Timeline”.
Usually, the first timeline created in DaVinci Resolve is titled “Timeline 1”

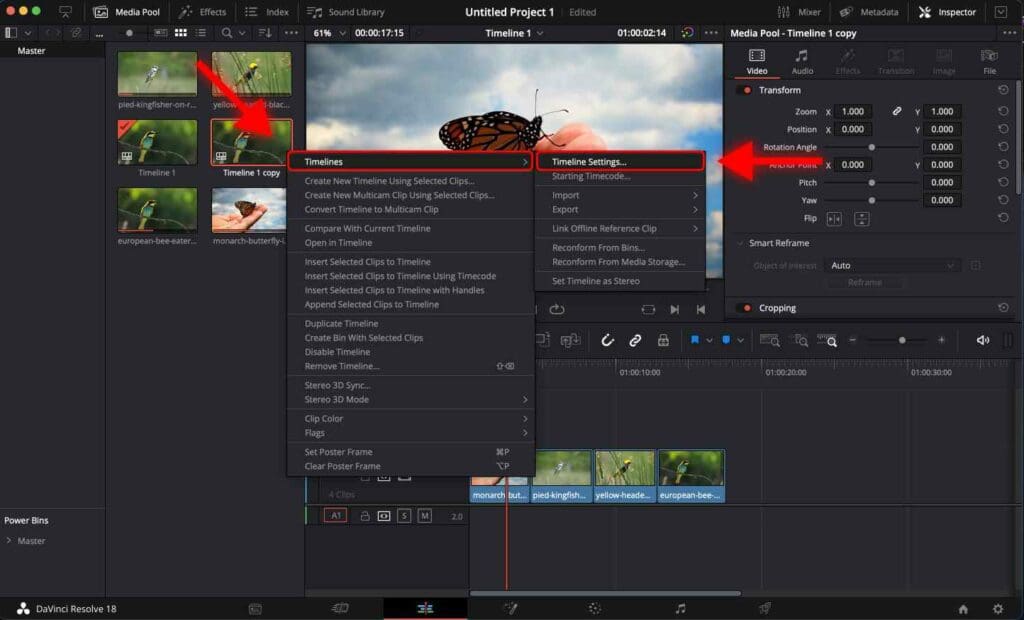
Step 2: Right-click on the duplicated timeline and select “Timeline Settings…”.
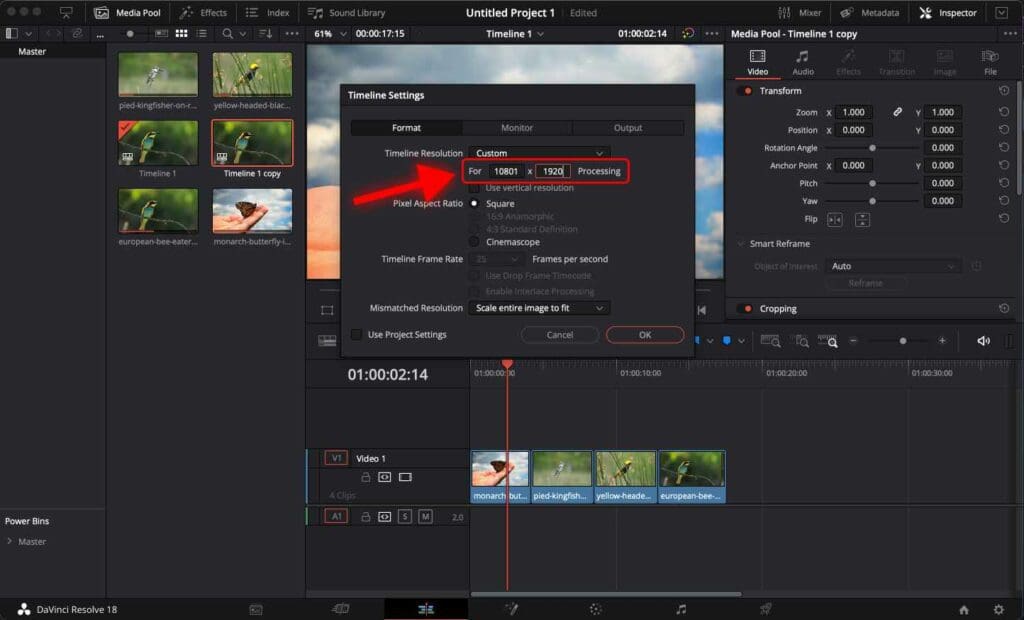
Step 3: Uncheck “Use Project Settings”.
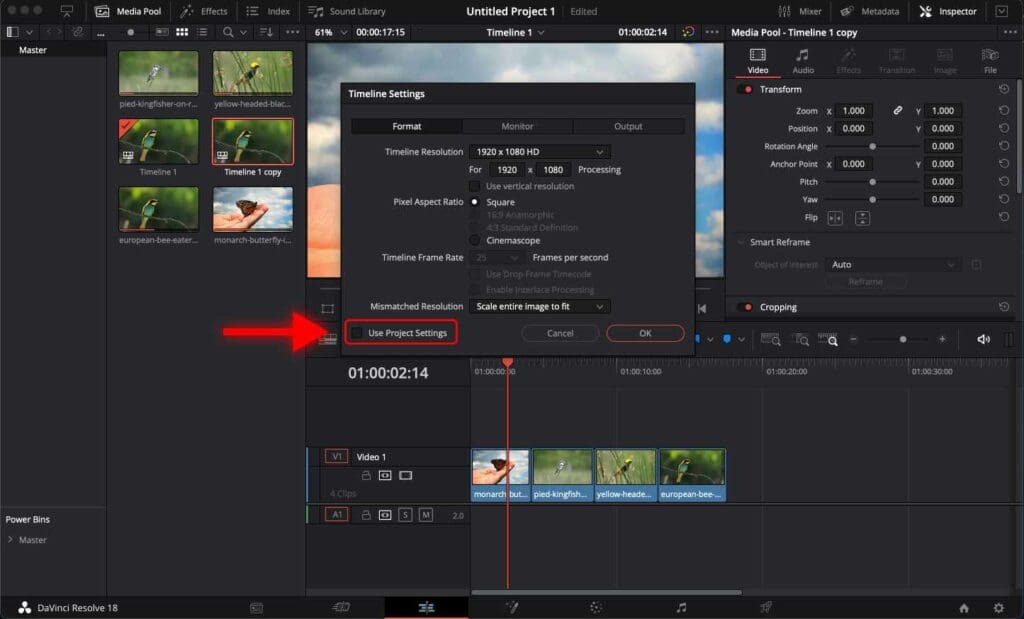
Step 4: Change the resolution to “1080 x 1920“.
Step 5: For “Mismatched Resolution”, select “Scale full frame with crop”.
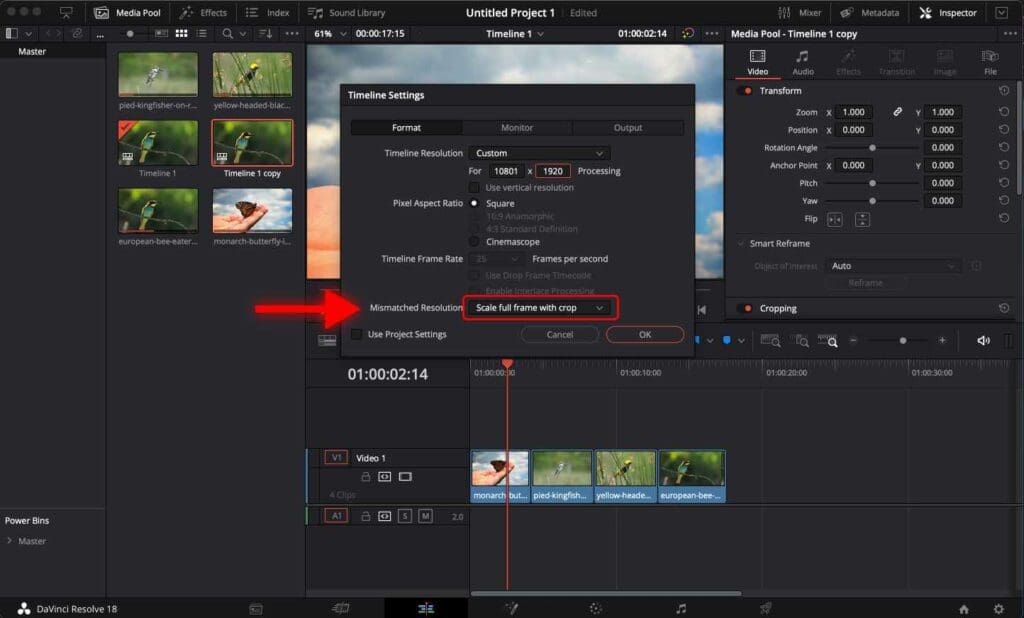
Step 6: Click “OK” and open the duplicated timeline.
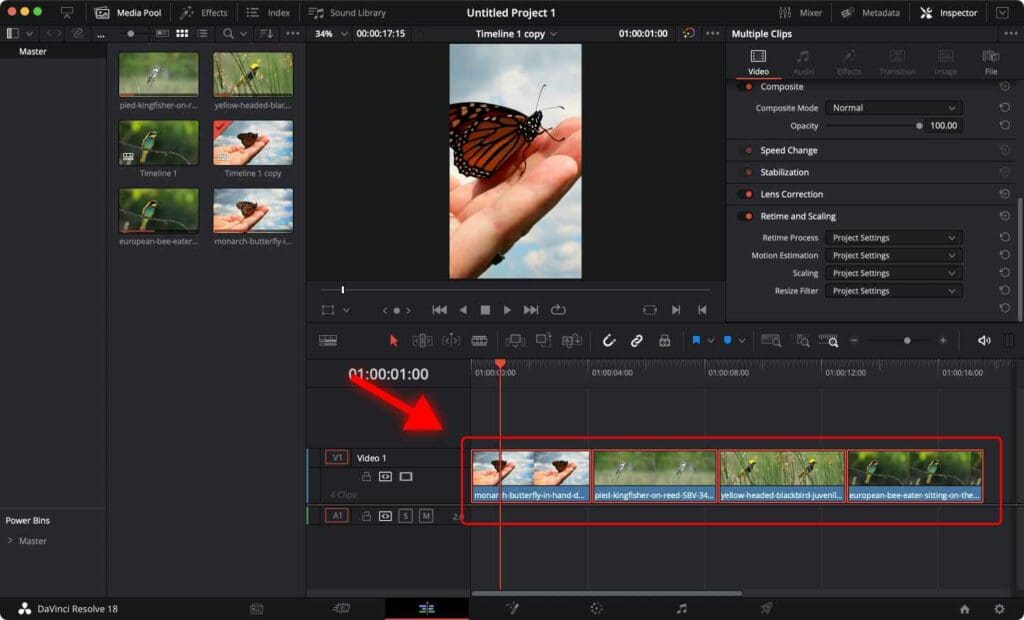
Step 7: Select everything on the timeline with your mouse or use the shortcut “Command + A” on macOS or “Control + A” on Windows.
To learn some of the most frequently used DaVinci Resolve shortcuts for macOS and Windows, check out 70 Easy DaVinci Resolve Shortcuts You Can’t Afford to Miss.
Step 8: Go to the Inspector tab and open the “Retime and Scaling” section.
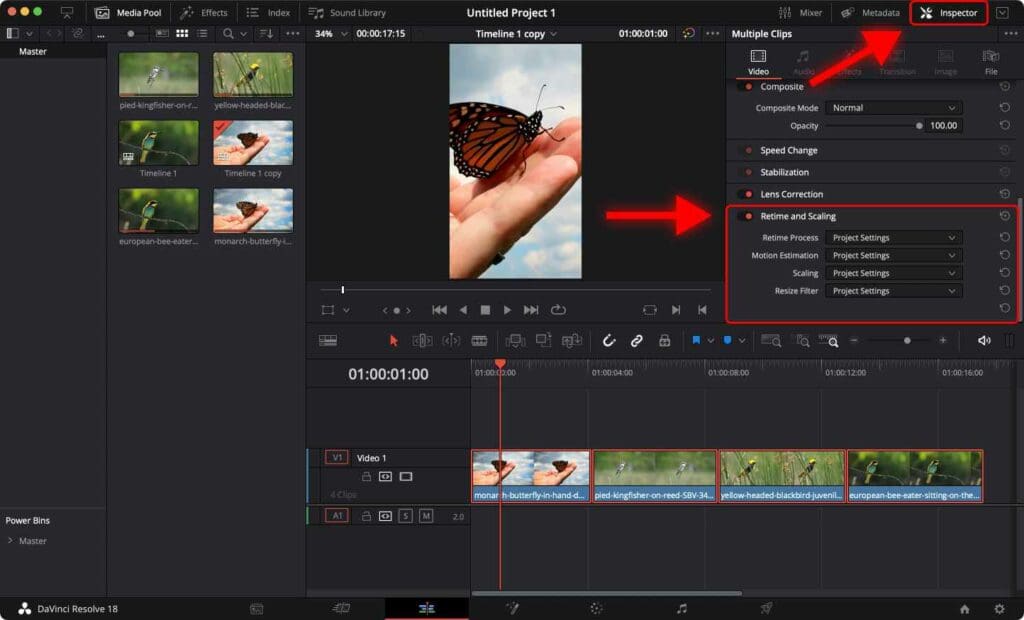
Step 9: For “Scaling” select “Fill”.
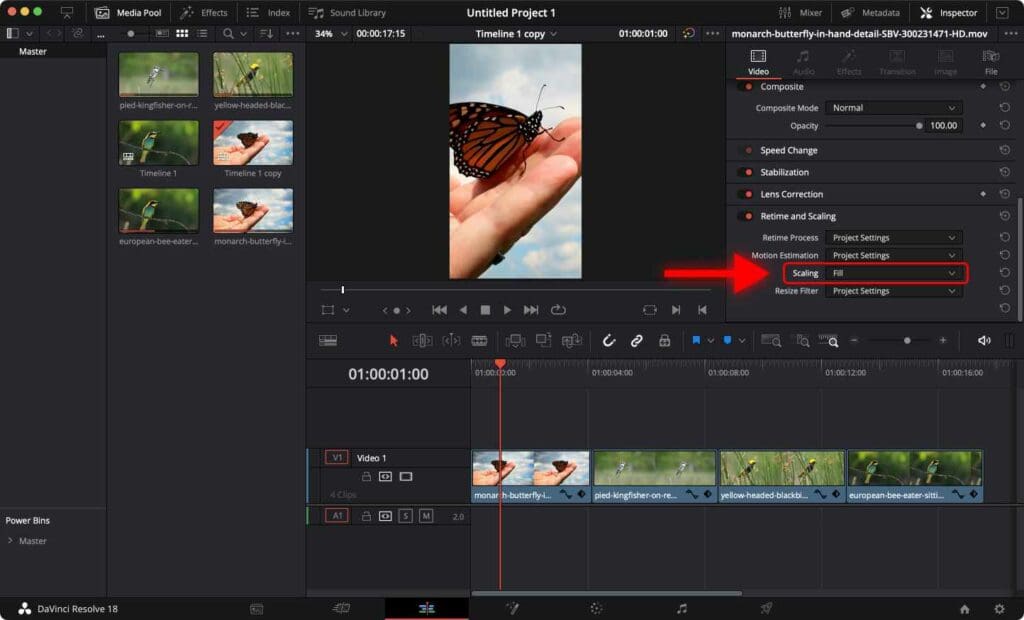
All done!
Now DaVinci Resolve will scale each frame to fill the entire frame of the video.
If you are planning to upload 9:16 (vertical) videos to social media, make sure you check out the best video export settings for TikTok, Instagram Reels, and YouTube Shorts.
Changing Aspect Ratio in DaVinci Resolve Studio Version: Using Smart Reframe
If you’re using the Studio version of DaVinci Resolve, you can access additional features, including the powerful Smart Reframe tool.
This feature allows Resolve to automatically reframe each video so that the main subject in the clip remains in the center.
Follow these steps to change the aspect ratio using Smart Reframe.
Step 1: Right-click on the current timeline and select “Duplicate Timeline”.
Step 2: Right-click on the duplicated timeline and select “Timeline Settings…”.
Step 3: Uncheck “Use Project Settings”.
Step 4: Change the resolution to “1080 x 1920“.
Step 5: For “Mismatched Resolution”, select “Scale full frame with crop”.
Step 6: Click “Ok” and open the duplicated timeline.
Step 7: Select everything on the timeline with your mouse or use the shortcut “Command + A” on macOS or “Control + A” on Windows.
Step 8: Go to the Inspector tab and click on the “Smart Reframe” section.
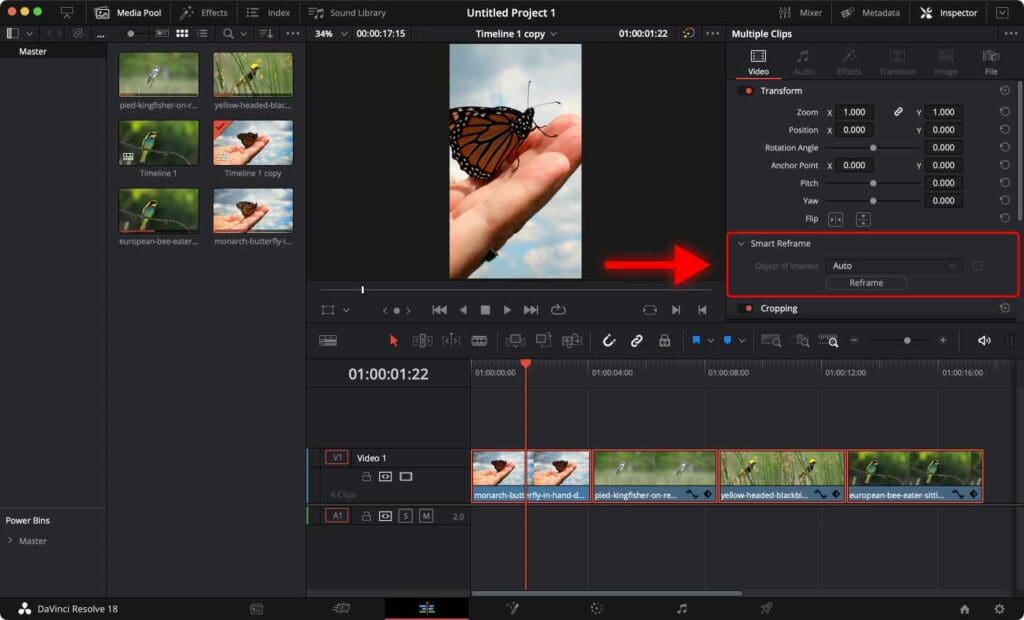
Step 9: It will be set to “Auto” by default. Click “Reframe”.

DaVinci Resolve will look at each clip and will determine the main subject inside that clip. Then, it will try to keep the subject in the center of the video by keyframing it’s position.
Instead of you going through each clip and manually keyframing the desired position, DaVinci does it automatically, saving you a ton of time.
Once it’s done, play the video and check the final result.
Conclusion
You have successfully learned how to change the aspect ratio of an existing video or timeline in DaVinci Resolve using both the free and Studio versions.
Remember, in the free version of DaVinci Resolve, you can utilize the Retime and Scaling options in the Inspector panel to adjust the aspect ratio.
On the other hand, if you have access to the Studio version, you can take advantage of the powerful Smart Reframe tool to change the aspect ratio and fine-tune the framing of your videos.
Frequently Asked Questions
I can’t find the Retime and Scaling options in the Inspector panel for DaVinci Resolve?
Make sure you have selected the video clip on the timeline before accessing the Inspector panel. The Retime and Scaling options will appear once a clip is selected.
Why can’t I enable Smart Reframe in DaVinci Resolve Studio
Smart Reframe is a feature exclusive to DaVinci Resolve Studio. Make sure you are using the Studio version and have a valid license.
Why does video quality drop after changing the aspect ratio in DaVinci Resolve?
When changing the aspect ratio, it’s important to maintain the original resolution and avoid excessive scaling. Try to choose an aspect ratio that matches your original footage to minimize quality loss.
Alternatively, you can upscale the clips to 4K or even 8K inside DaVinci Resolve.


