Cropping is used in many cases, but it’s commonly used to create a split-screen effect.
If you are new to editing in DaVinci Resolve, finding how to crop a video might be challenging.
In this step-by-step tutorial, I will show you two ways to crop a video in DaVinci Resolve and how to create a split-screen effect.
Option 1: Cropping Tool in DaVinci Resolve
Step 1: Click on the clip you want to crop.
You can zoom-in or zoom-out the timeline to see the clips better.
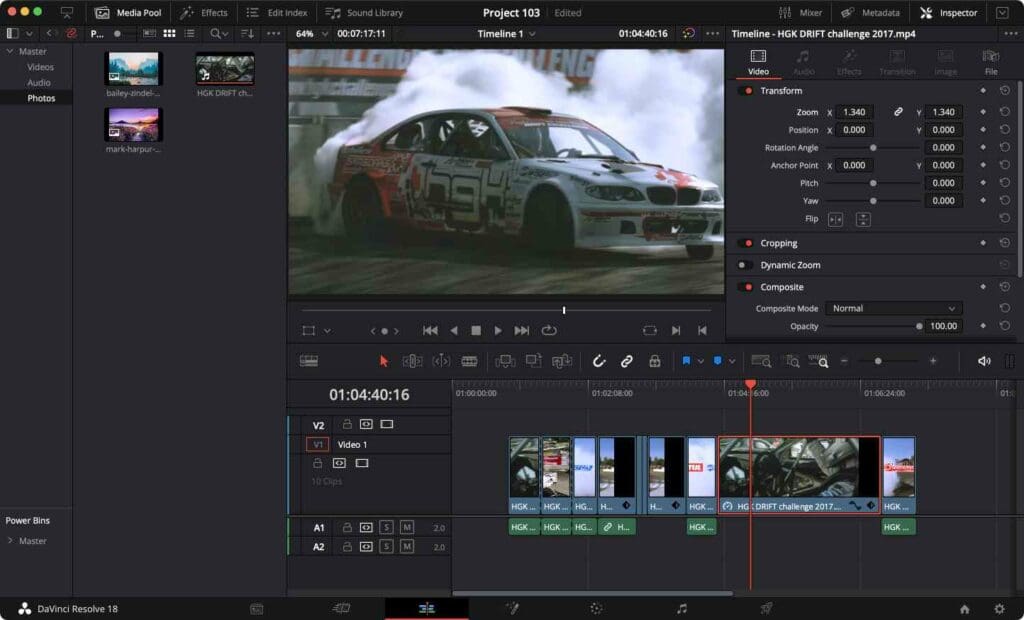

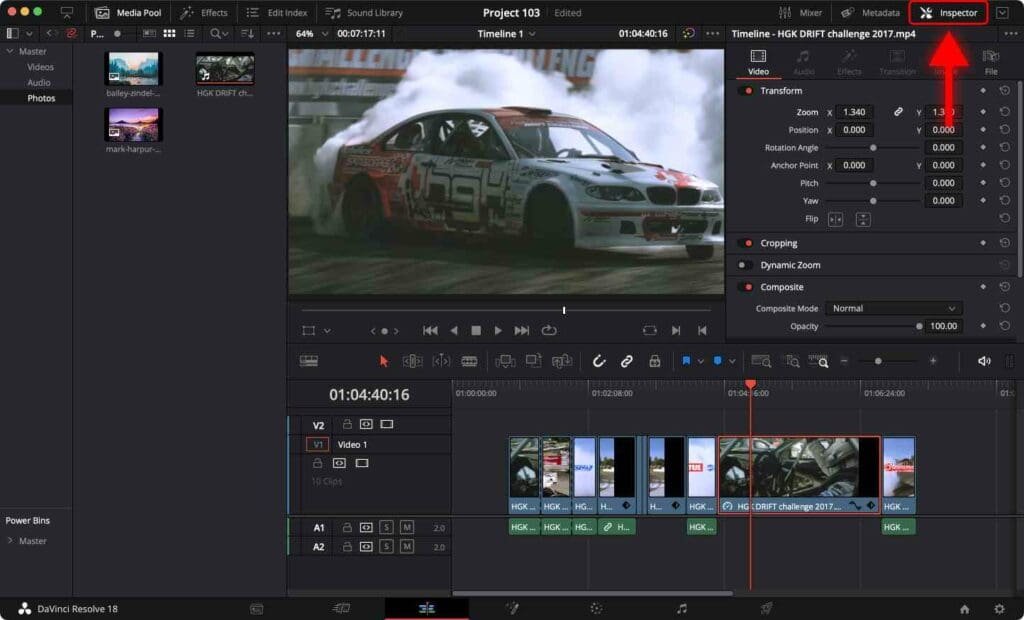
Step 2: Go to the Inspector tab.

Step 3: Scroll down to find the Cropping section.
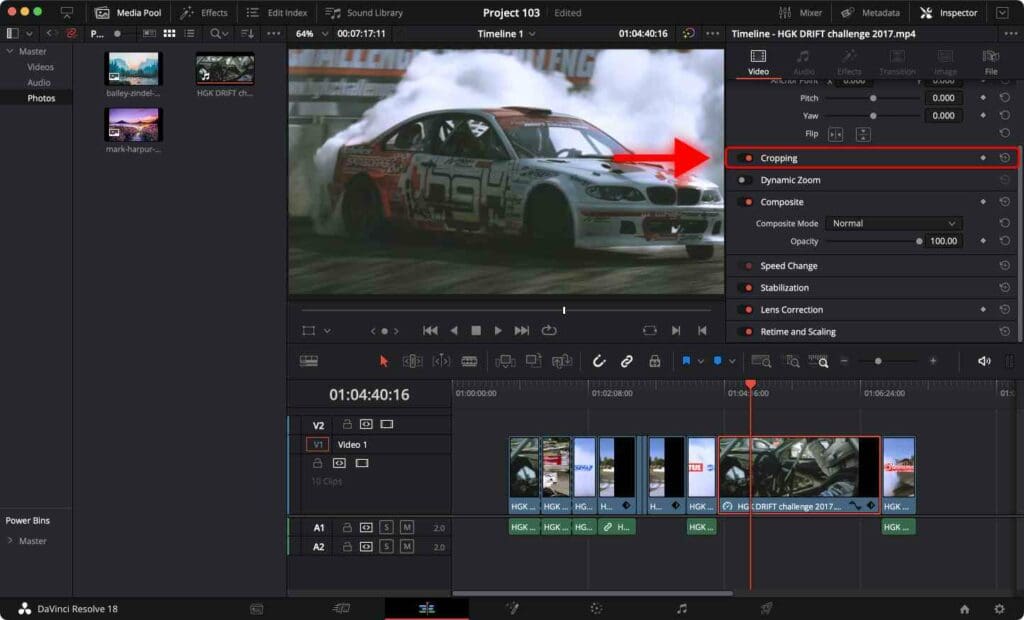

Step 4: Click on the “Cropping” section to open it.
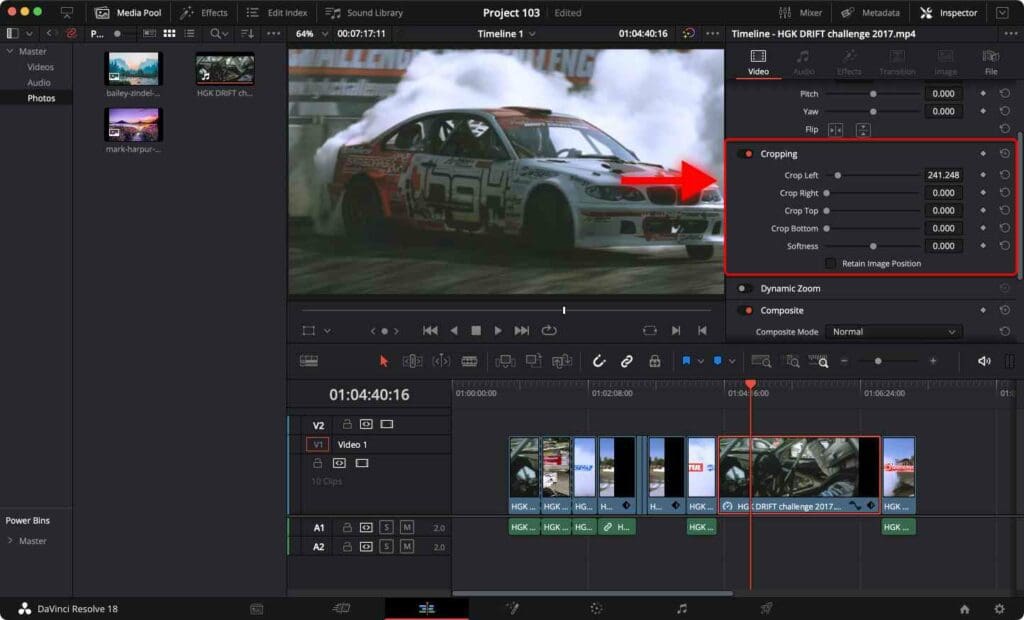

Now you can see the following parameters:
Crop left: Crops the solid color from the left.
Crop Right: Crops the solid color from the right.
Crop Top: Crops the solid color from the top.
Crop Bottom: Crops the solid color from the bottom.
Now you can crop the video from any direction. This can be done by moving the sliders left or right.
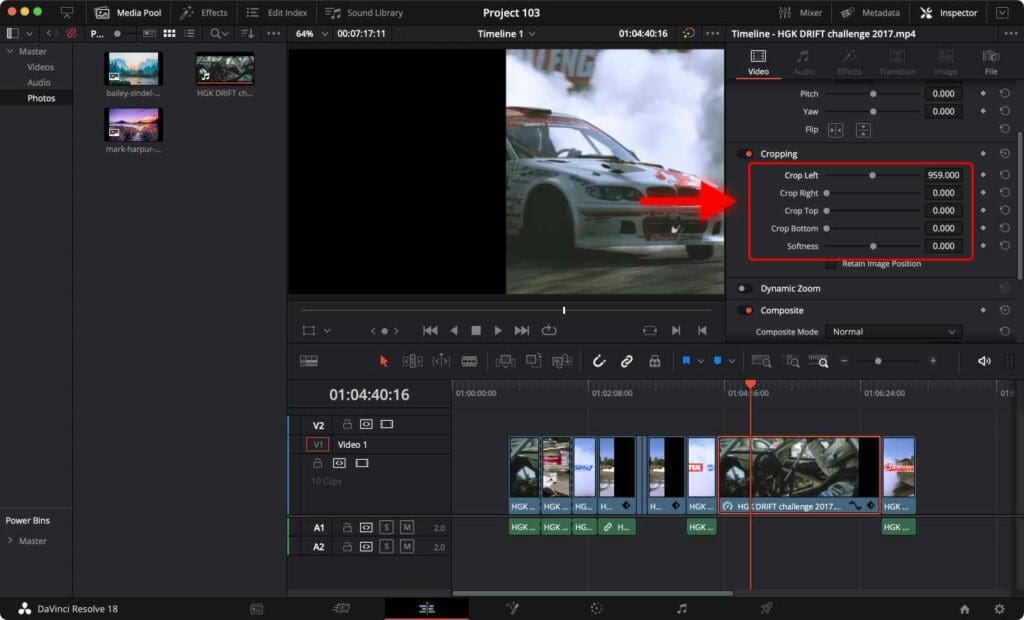

This cropping section comes in handy when you want to highlight text.
Option 2: Using the Crop Tool
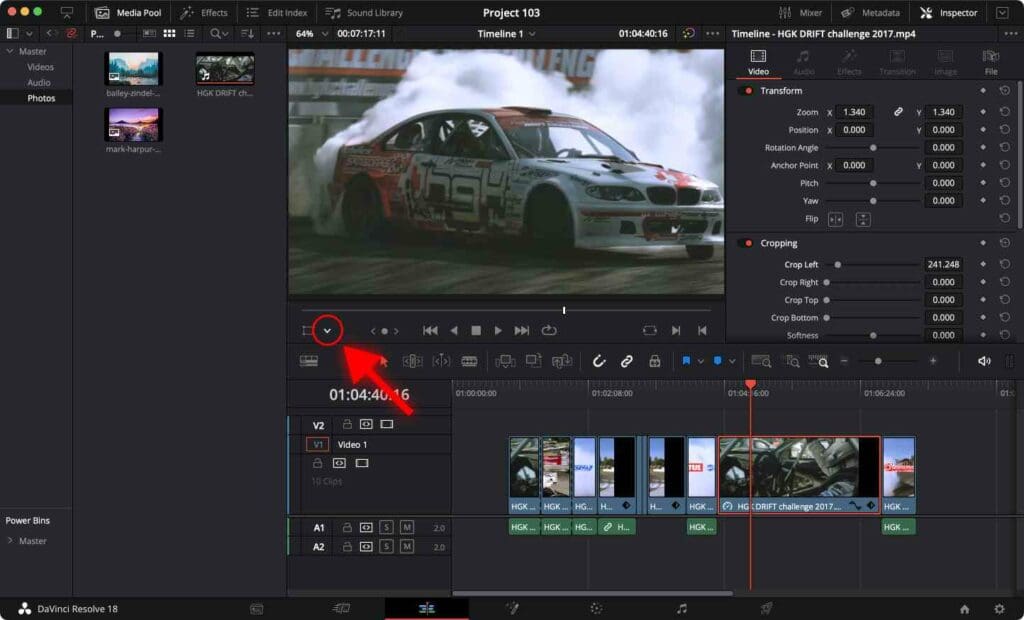
Step 1: Click on the drop-down icon close to the Transform tool

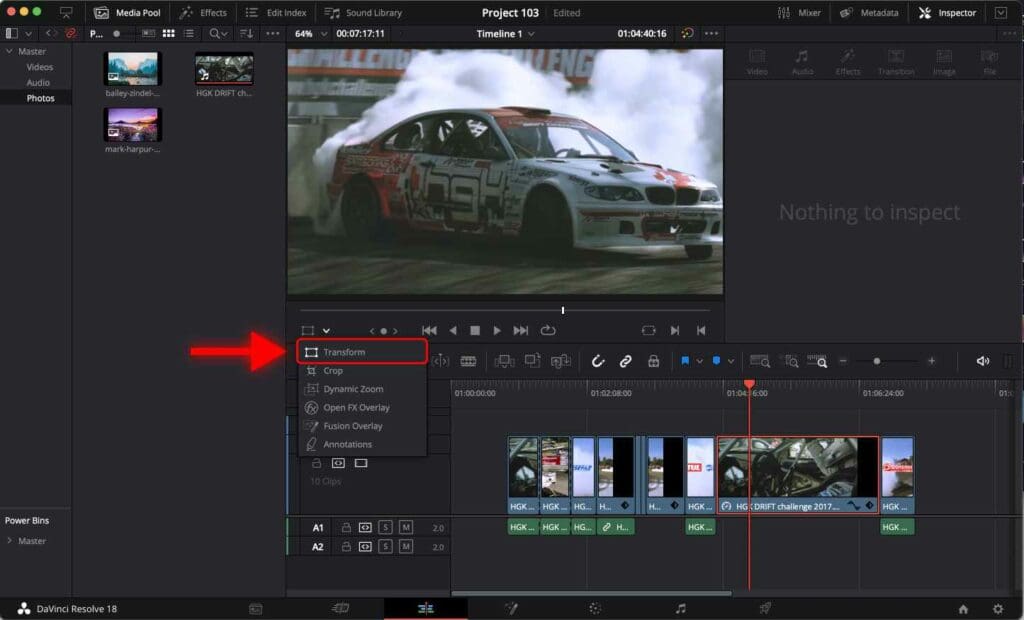
Step 2: Select Crop.

Step 3: A white box will appear around the video playback screen.
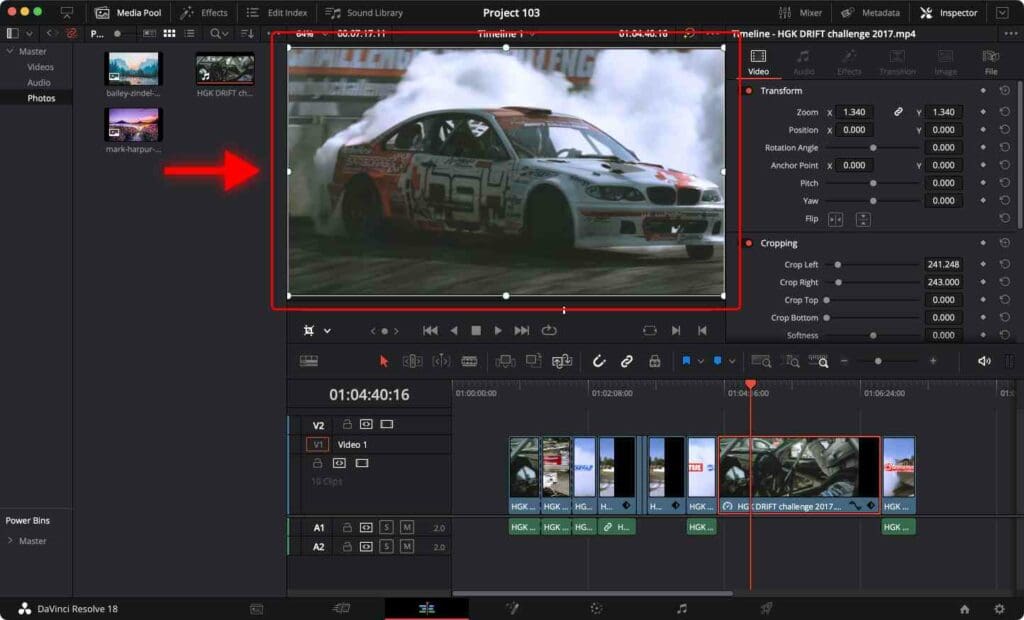

Step 4: Drag the white dots to crop the video.
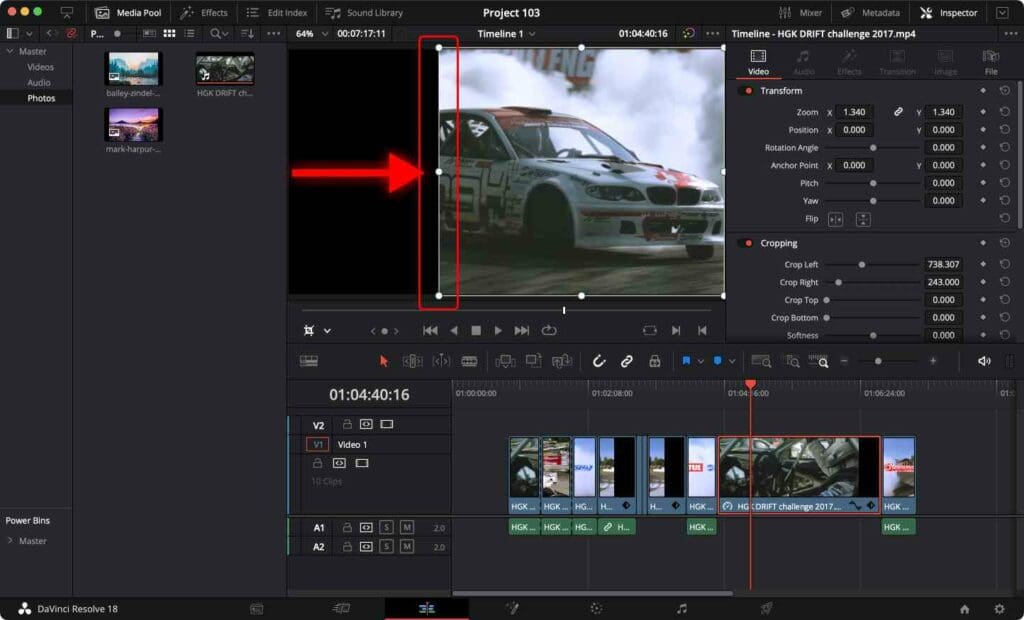

All done!
To create a split-screen, place another video on the timeline and repeat the cropping process.
Practice makes perfect, so don’t be afraid to experiment and try new things.
Once your video is ready to be exported, render the video using the best DaVinci Resolve render settings.
Frequently Asked Questions
How to crop a video in DaVinci Resolve?
Go to the “Inspector” tab. Scroll down to find the “Cropping” section. Click on the “Cropping” section to open it. You can then adjust the cropping values for the video’s top, bottom, left, and right sides.
How to split-screen a video in DaVinci Resolve?
Click on the drop-down icon close to the “Transform” tool. Select “Crop”. A white box will appear around the video playback screen. Drag the white dots to crop the video. Place a different video on the timeline below the cropped video to get the split-screen effect.
How to animate a split-screen effect in DaVinci Resolve?
You can animate a split-screen effect in DaVinci Resolve using keyframes. To do this, select the clip you want to animate and go to the “Inspector” tab. Click on the “Transform” section and add keyframes for the “Position” settings at the desired points in the timeline. You can then adjust the values of the keyframes.


