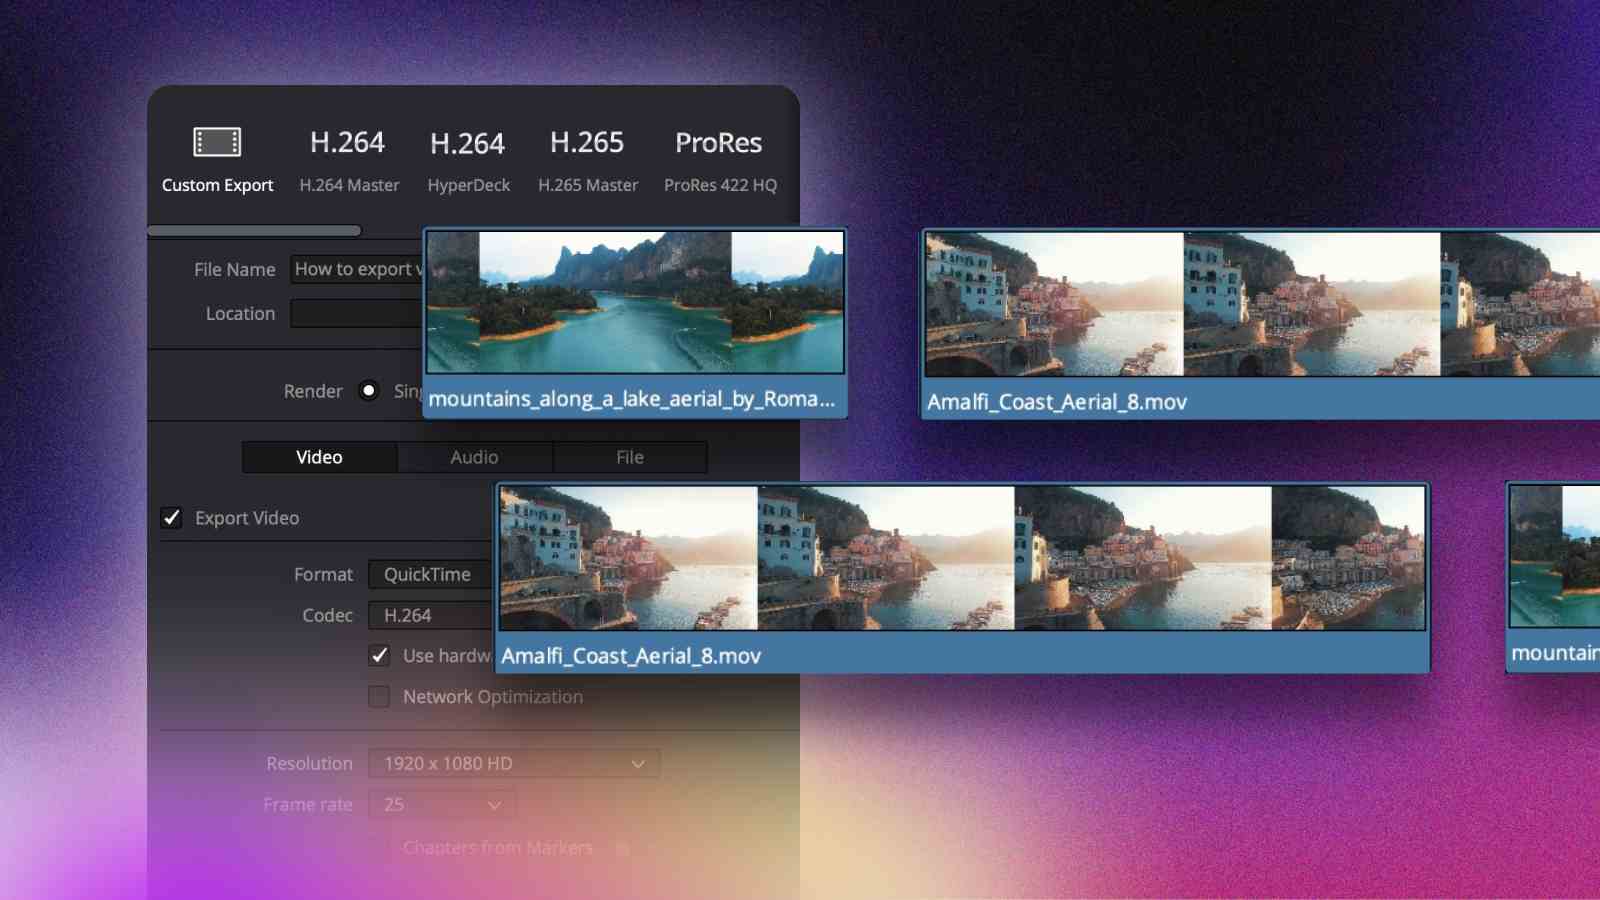
DaVinci Resolve offers several options when it comes to exporting videos.
In most cases, our goal is to export a video project in a single video file. But there are situations when you need to export individual clips in the timeline.
Exporting separate clips in Davinci Resolve can simplify the editing workflow.
It is especially useful when editing B-Rolls for future use. Once you finish the editing, you can make Resolve export each clip individually.
In this step-by-step tutorial, I will show how to export individual clips in DaVinci Resolve. Following these steps, you can save clips as separate files for further editing, archiving, or sharing.
Why render individual clips?
- If you work on a large video project and want to save individual clips for future use.
- Your client might ask to check the color grading of Individual clips.
- You edit B-Rolls and what each clip to be rendered individually.
How to export individual clips in DaVinci Resolve?
Step 1: Go to the Delivery page
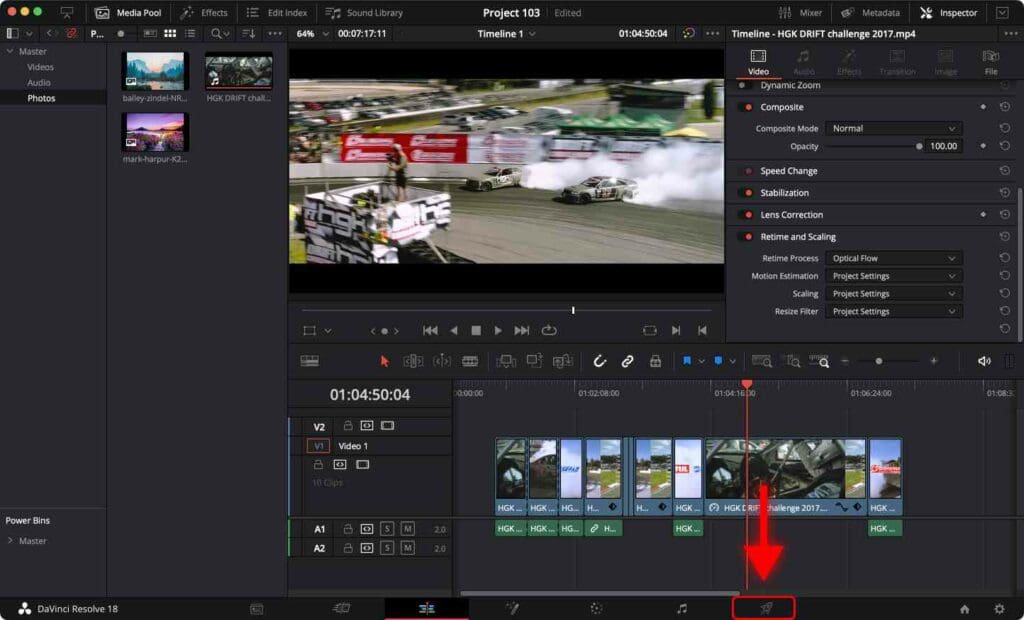
Alternatively, you can open the Delivery page with the shortcut Shift + 8.
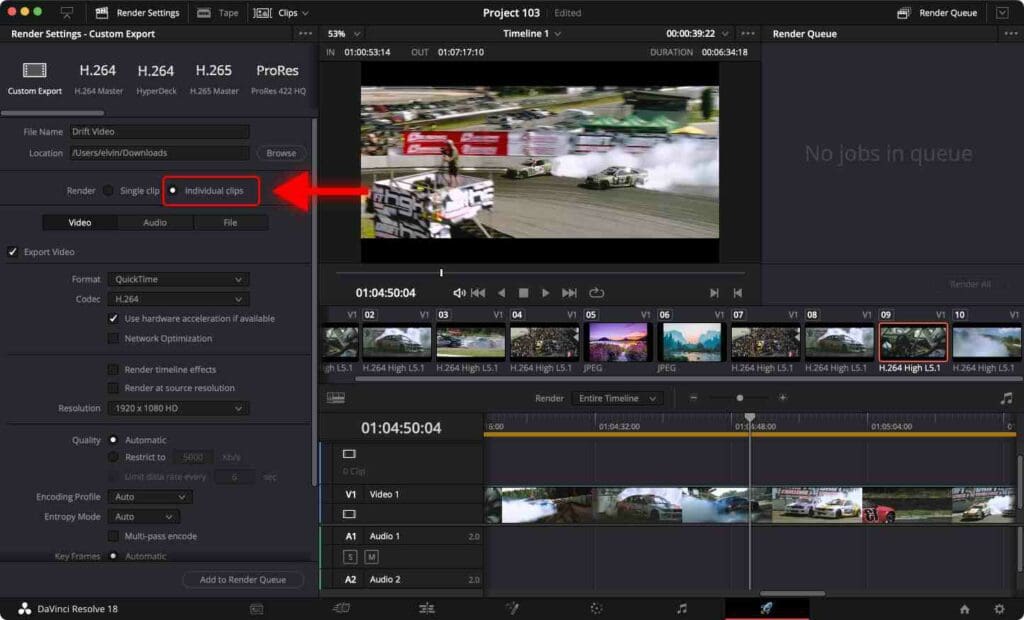
Step 2: Click Individual Clips
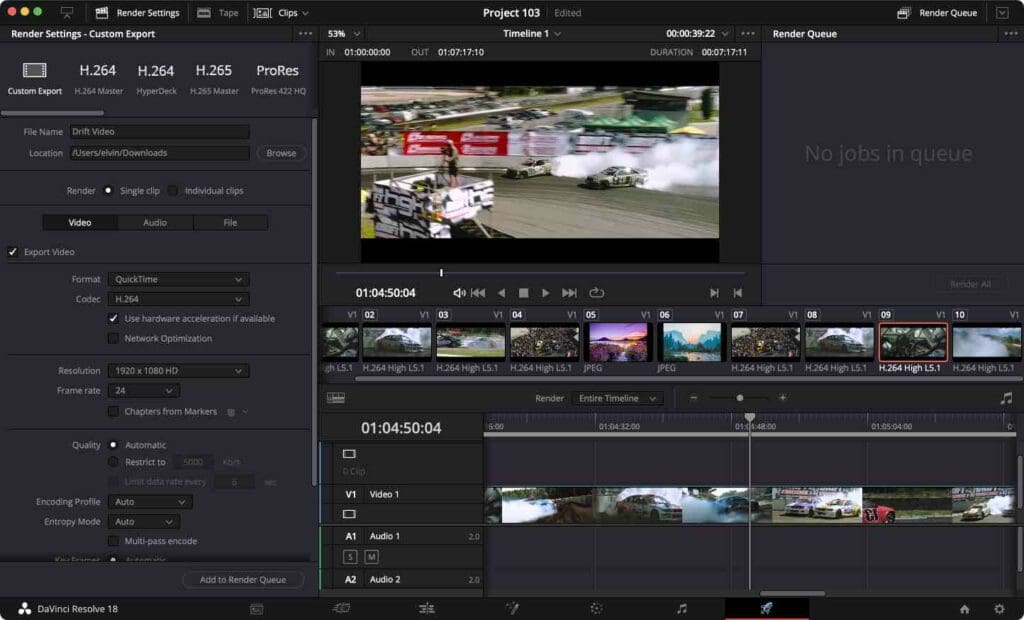
Step 3: In the export settings, make sure the format, resolution, and frame rate match your project settings.
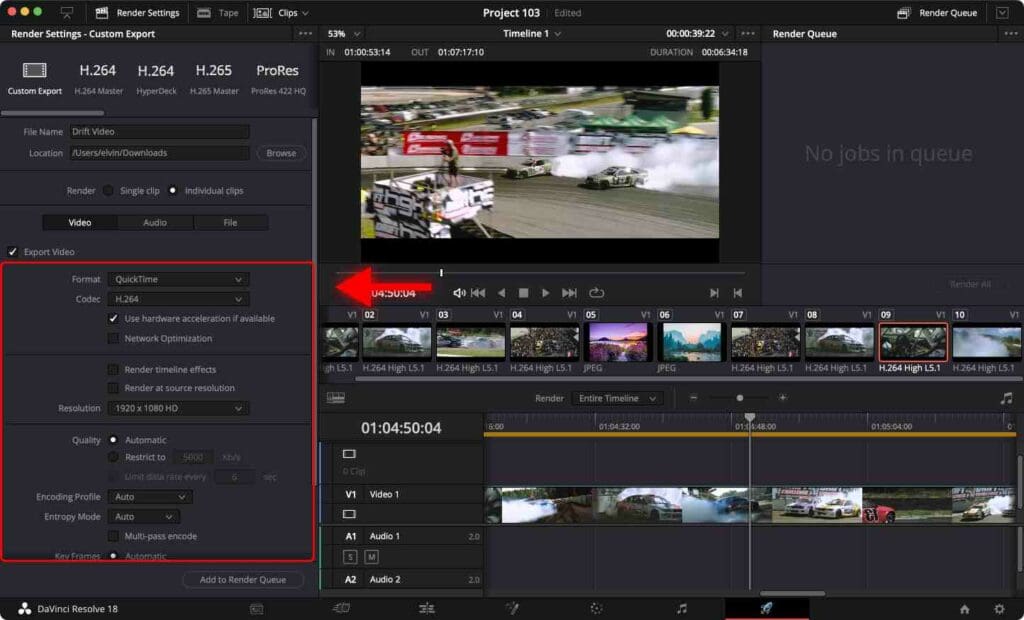
When selecting individual clips, DaVinci Resolve will render each video clip that is placed on the timeline instead of one large video file.
Step 4: Go to the Audio tab and check Export Audio.
It ensures that each clip will be rendered with audio.
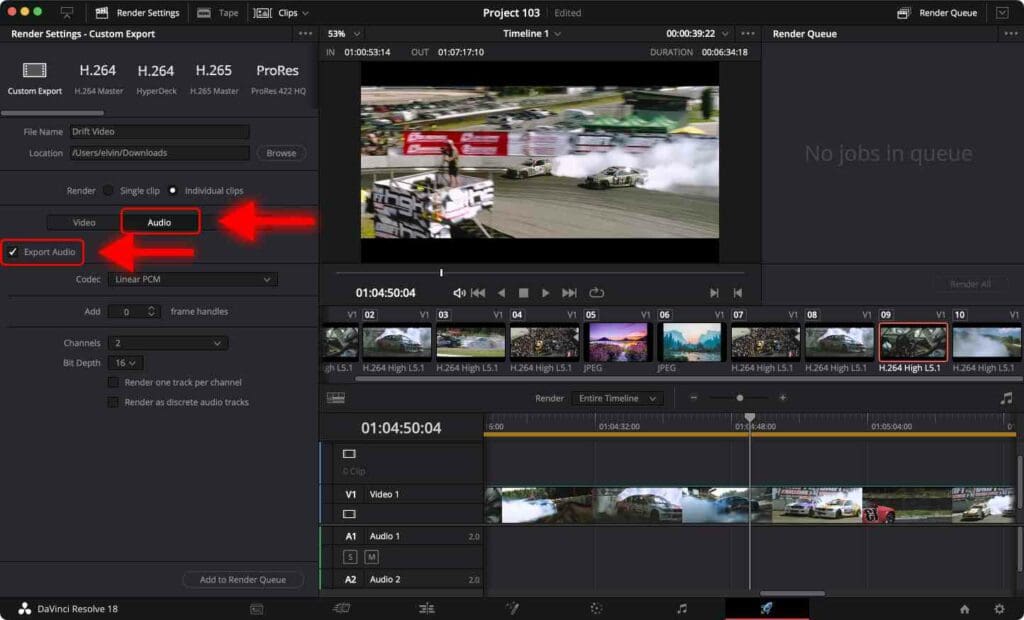
If you don’t want your rendered clips to have audio – uncheck Export Audio.
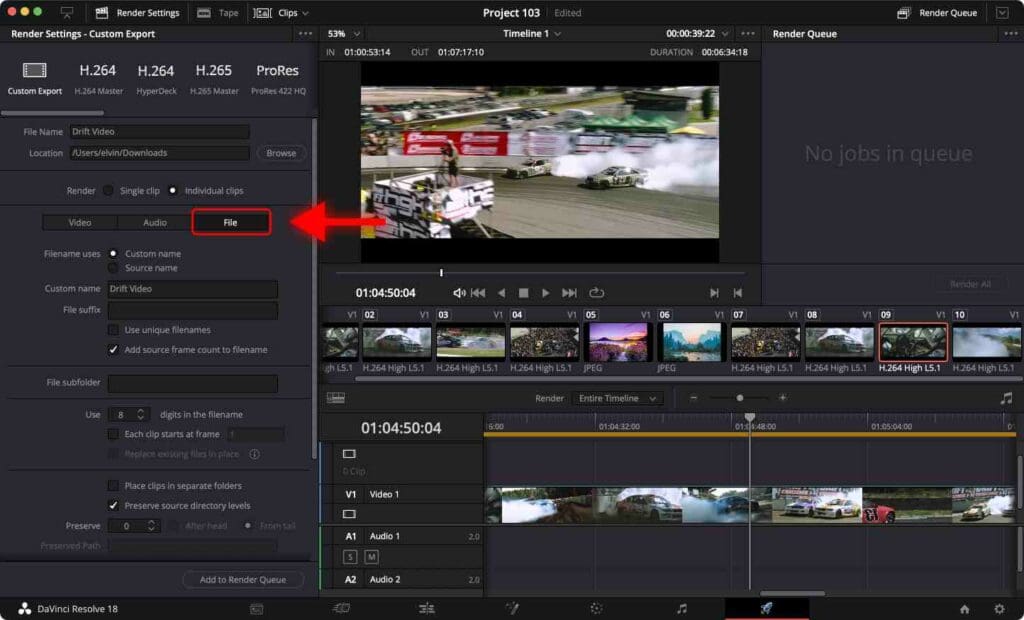
Step 5: Go to the File tab
Step 6: For Filename Uses, choose Source Name.
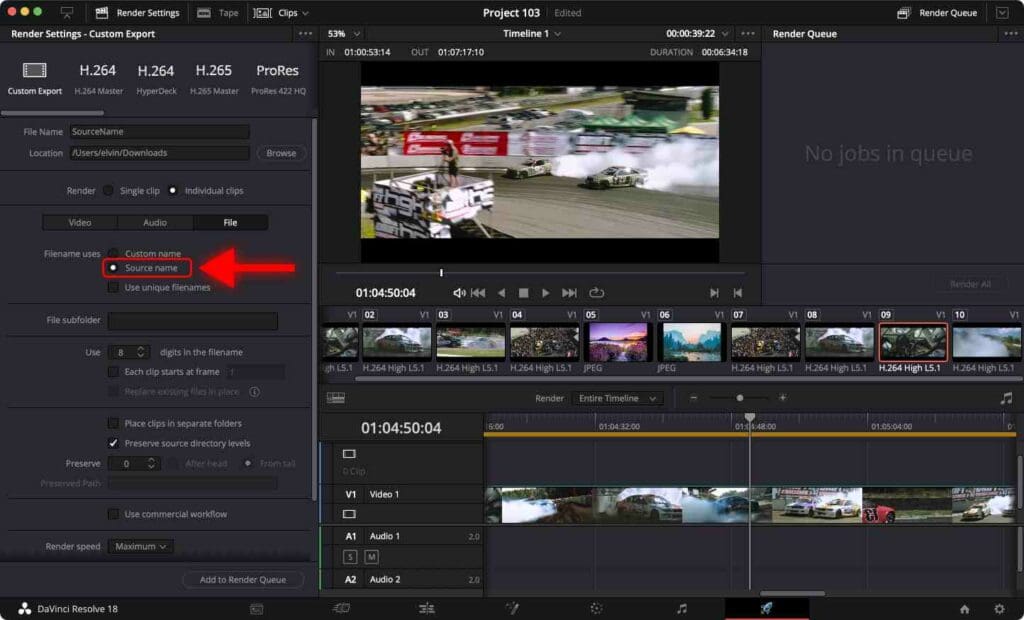
It will make sure that each clip gets it’s own original filename.
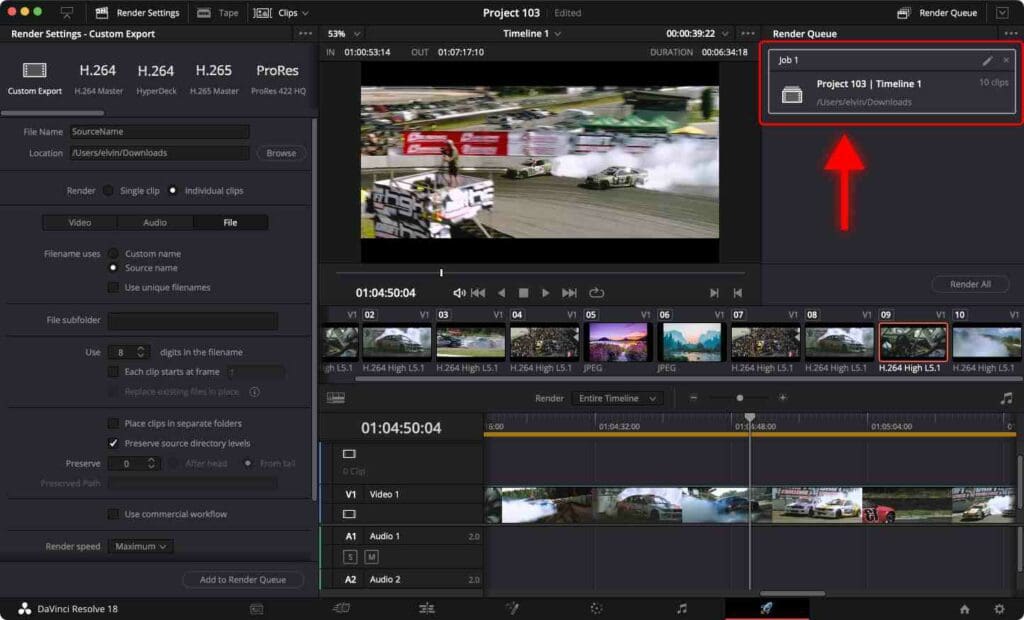
Step 7: Click Add to Render Queue
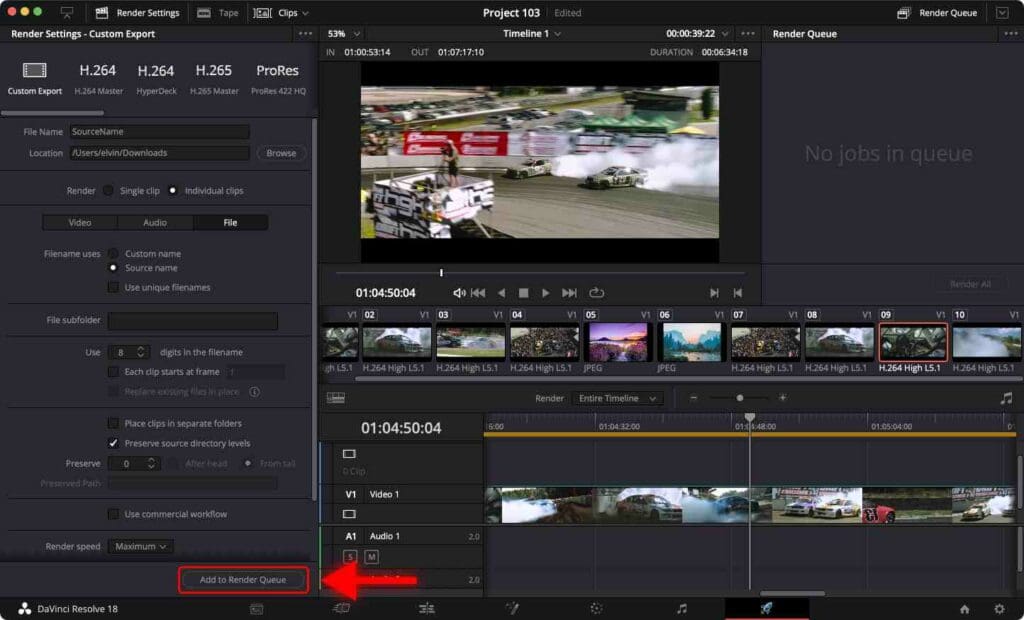
A new job will appear in the Render Queue.
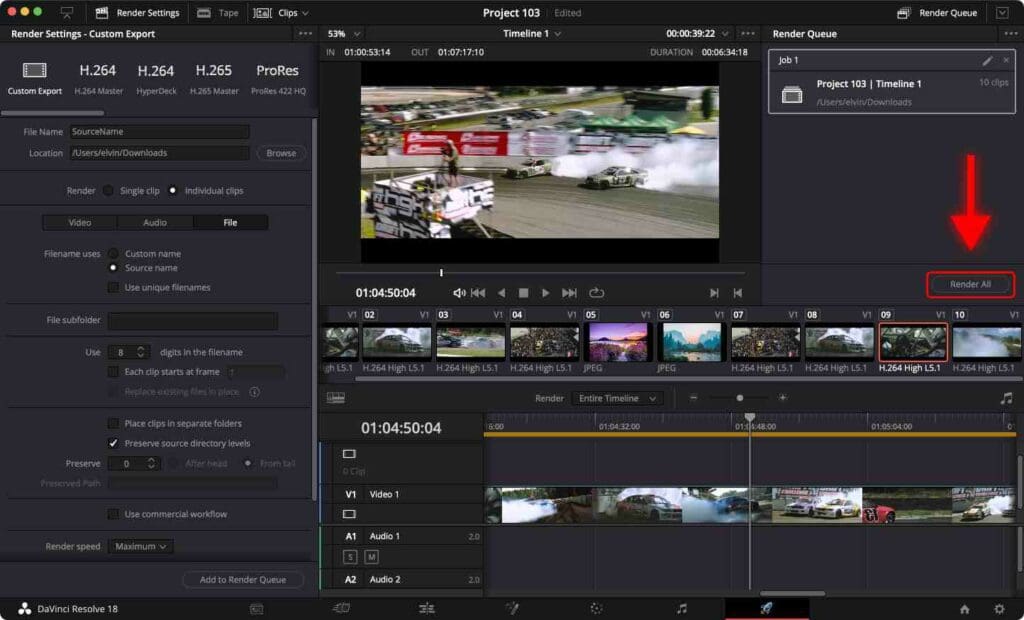
Step 8: Click Render All
After completing the render, right-click on the Rendered Job and select Reveal in Finder.
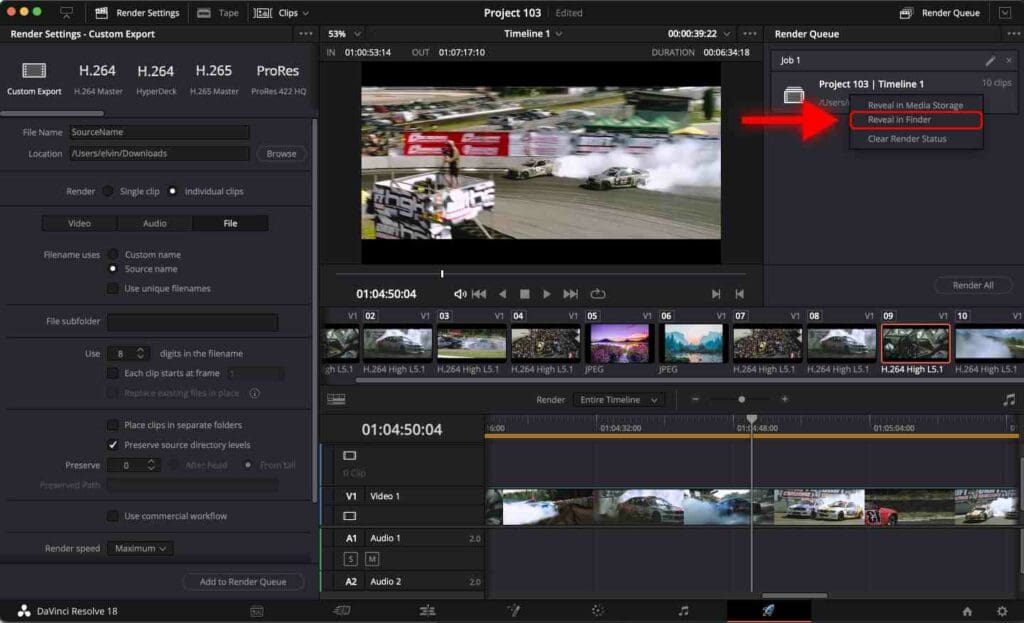
Now the folder with the individual clips will be opened.
Conclusion
Following the steps outlined in the tutorial, you can export individual clips from your timeline in DaVinci Resolve. I covered specific settings available when exporting individual clips.
A potential problem that may arise is a difference in color between the rendered video and the video in the timeline.
You can fix this issue with 2 Export Settings to Match Colors in DaVinci Resolve Timeline.
Also, check out Best DaVinci Resolve Render Settings For Youtube.
Frequently Asked Questions
How to export multiple clips at once in DaVinci Resolve?
Go to the Delivery page. Click Individual Clips. When selecting individual clips, DaVinci Resolve will render each video clip that is placed on the timeline instead of one large video file. Click Add to Render Queue. Click Render All.
How to export multiple clips at once without audio in DaVinci Resolve?
Go to the Delivery page. Click Individual Clips. When selecting individual clips, DaVinci Resolve will render each video clip that is placed on the timeline instead of one large video file. Go to the Audio tab and uncheck Export Audio. Click Add to Render Queue. Click Render All.
What are the recommended export settings in DaVinci Resolve?
It’s recommended to export your videos using the H.264 codec. The bitrate depends on the resolution and frames per second of the video. For 4K video with 25 fps, it’s recommended to set the bitrate to 150000 kb/s. For a 1080p video with 25 fps, it’s recommended to set the bitrate to 5000 kb/s.


