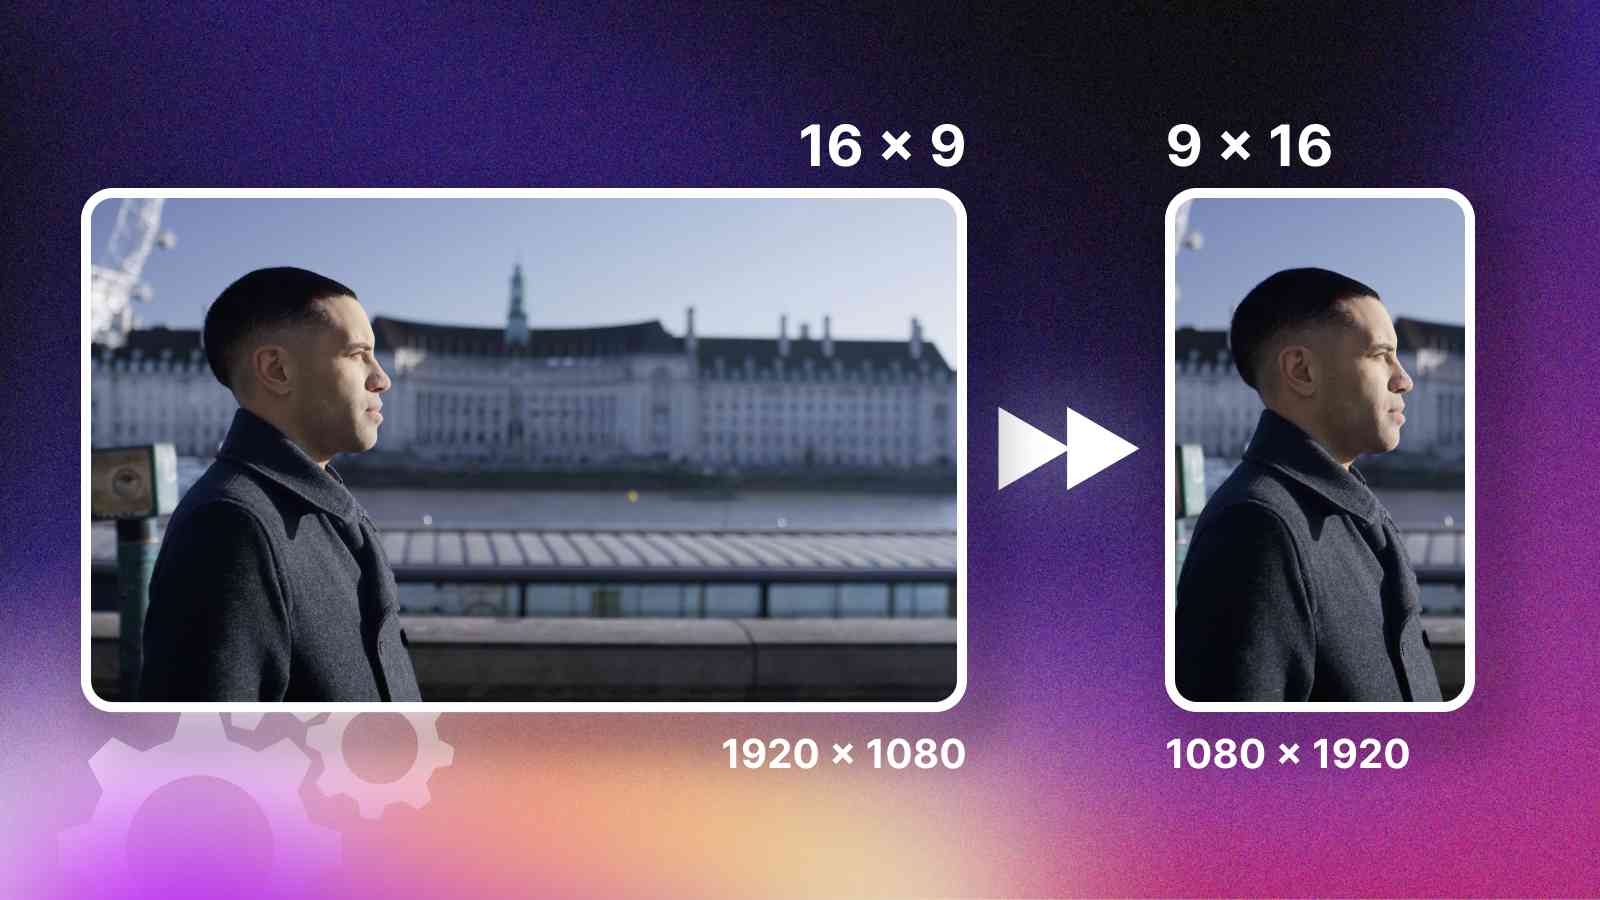
If you want to publish your 16:9 aspect ratio video to vertical content platforms like TikTok, Instagram Reels, or YouTube Shorts, you will have to reframe it somehow.
Luckily, DaVinci Resolve Studio has the Smart Reframe feature that allows you to reframe standard 16:9 videos into 9:16 vertical videos – perfect for social media use.
Additionally, rather than manually positioning each clip to have the subject in the center of the frame (e.g. a vlog or human subject), Smart Reframe does this for you in about 10 seconds.
Sounds pretty neat, right? Imagine all the time it could save you (it’s already saved me about 40 hours of work).
DaVinci Resolve Studio accomplishes this by using built-in AI to automatically choose the main subject in a video and follow it around to keep it in the frame.
In this step-by-step tutorial, I will show you how to use Smart Reframe in DaVinci Resolve. Additionally, I will address potential issues you may encounter along the way.
By the way, you will need the Studio version of DaVinci Resolve for this feature to work properly.
1. Create a New Timeline
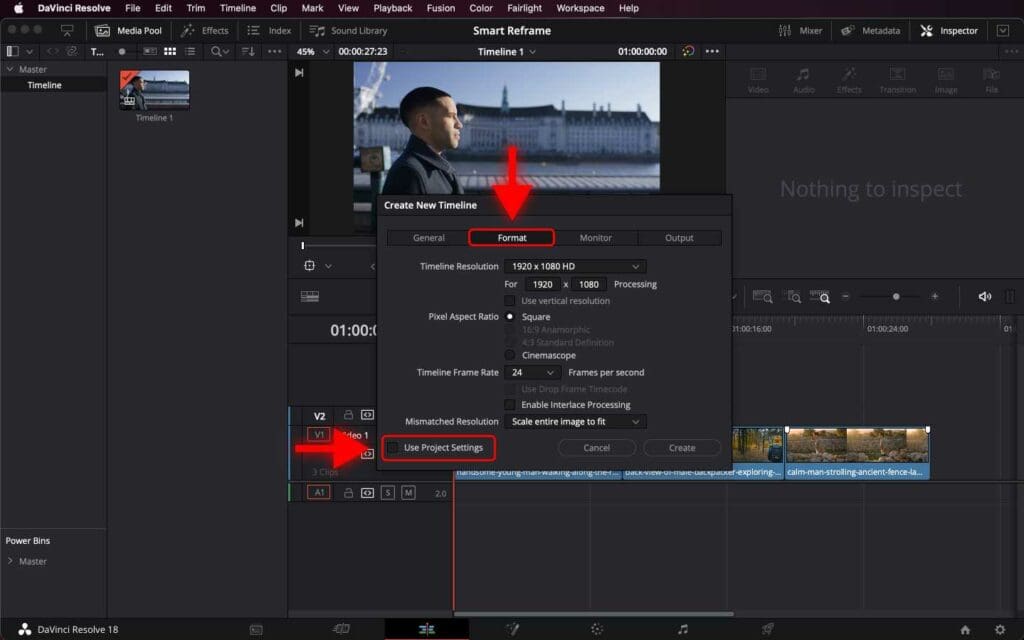
First, you need to create a new timeline (or duplicate the original project timeline if you have it) and specify a resolution that matches the aspect ratio of the platform on which you want to deliver your video.
Step 1: Go to “File” and select “New Timeline”.

Note: If you’ve opened the original video project edited in DaVinci Resolve, you can just duplicate this rather than start with a brand new timeline.
To do this, right-click on the timeline and select “Duplicate Timeline”. Then, right-click on the duplicated timeline and select “Timeline” > “Timeline Settings”.
Step 2: In the pop-up window open the “Format” tab and uncheck “Use Project Settings”.
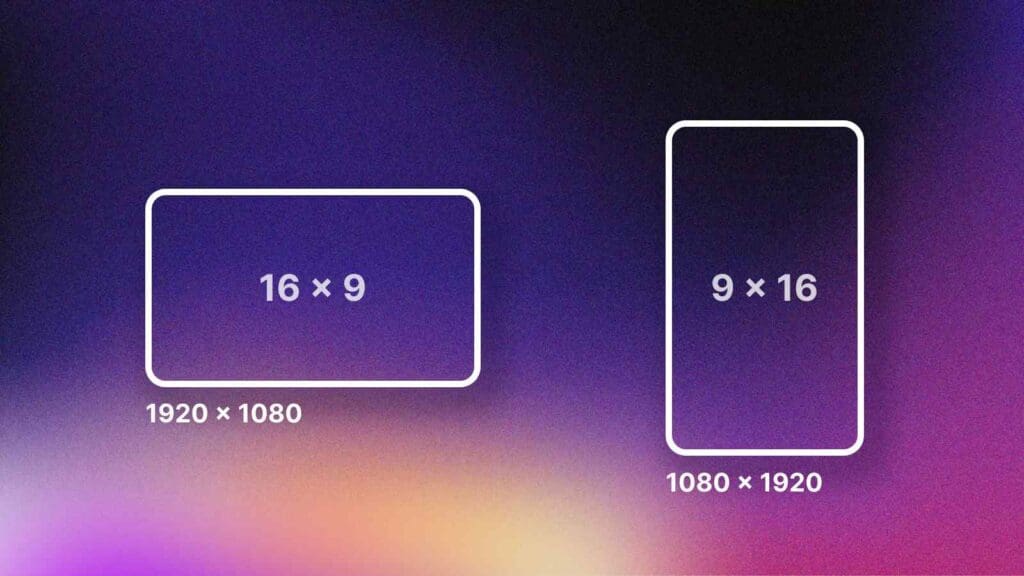
Step 3: Select the appropriate resolution and aspect ratio for the platform you want to deliver your video on. If you post the video on TikTok, Instagram Reels, or YouTube Shorts, you can set the resolution to “1080 by 1920” (this is the most popular resolution for those platforms).
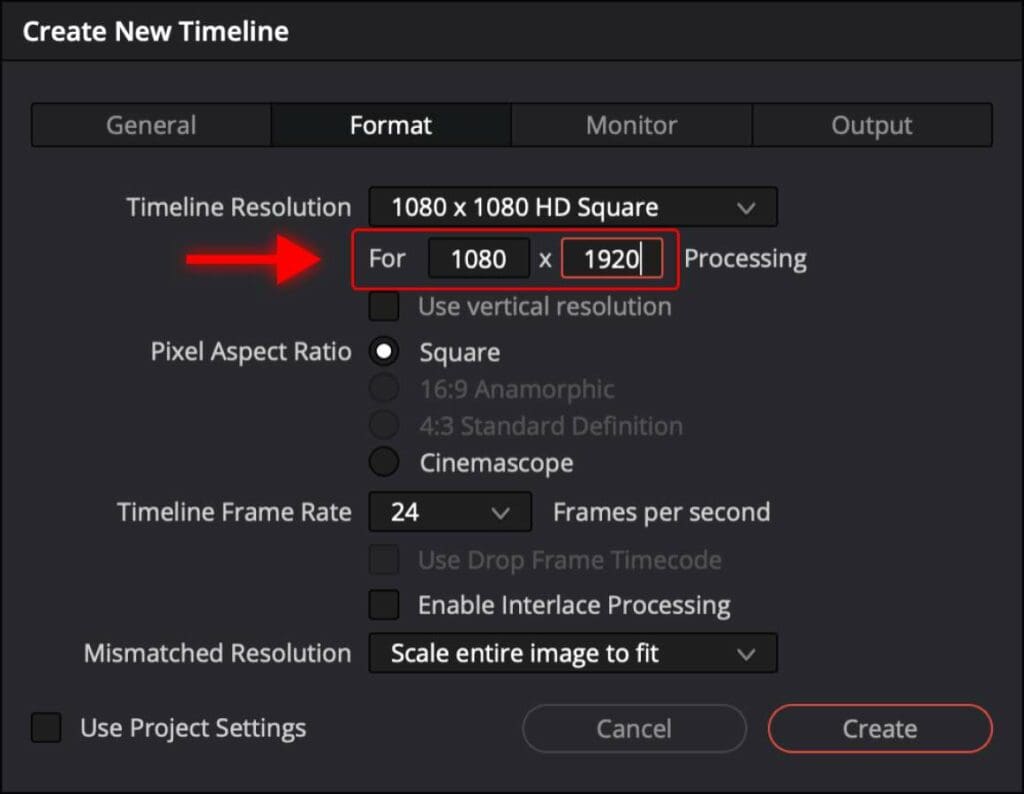
Step 4: For “Mismatched Resolution” select “Scale full frame with crop”.
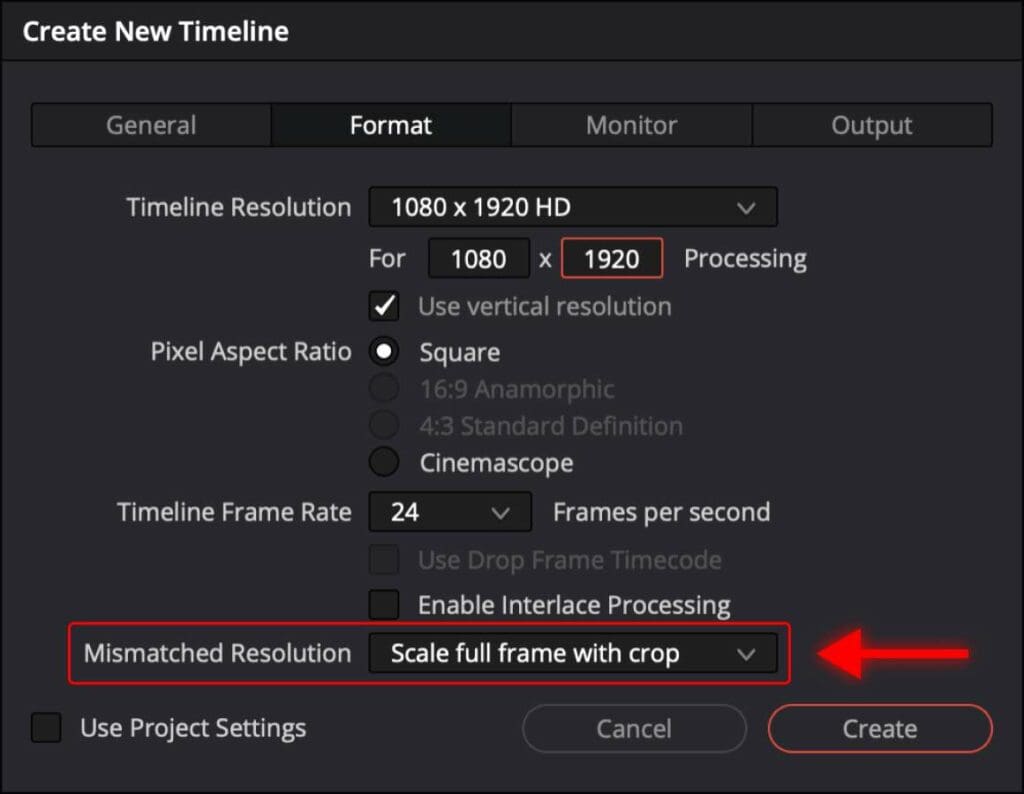
Step 5: Click “Create” to create the new timeline.

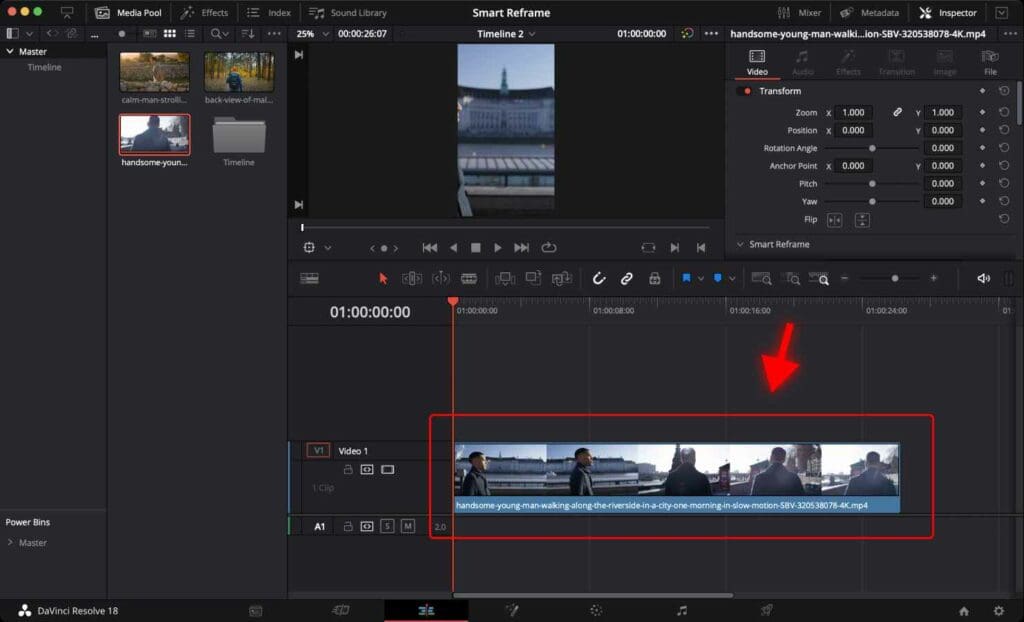
2. Add your video to the timeline
If you’re starting from scratch, drag and drop your video clips onto the timeline and trim/cut them (if you duplicated your timeline in the previous steps, your clips will already be here, so ignore this step).
3. Enable Smart Reframe in DaVinci Resolve
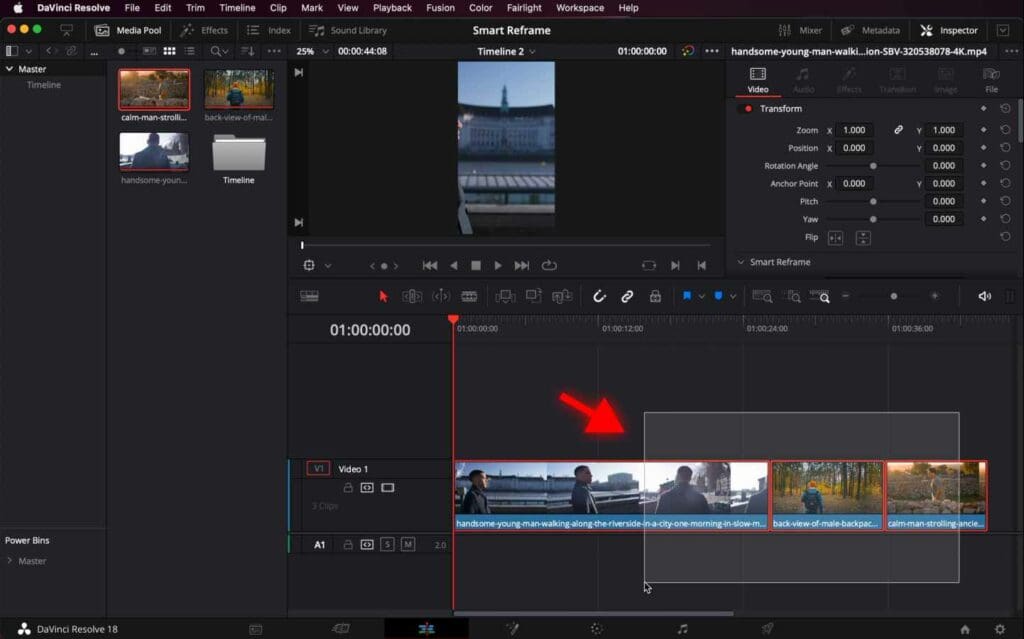
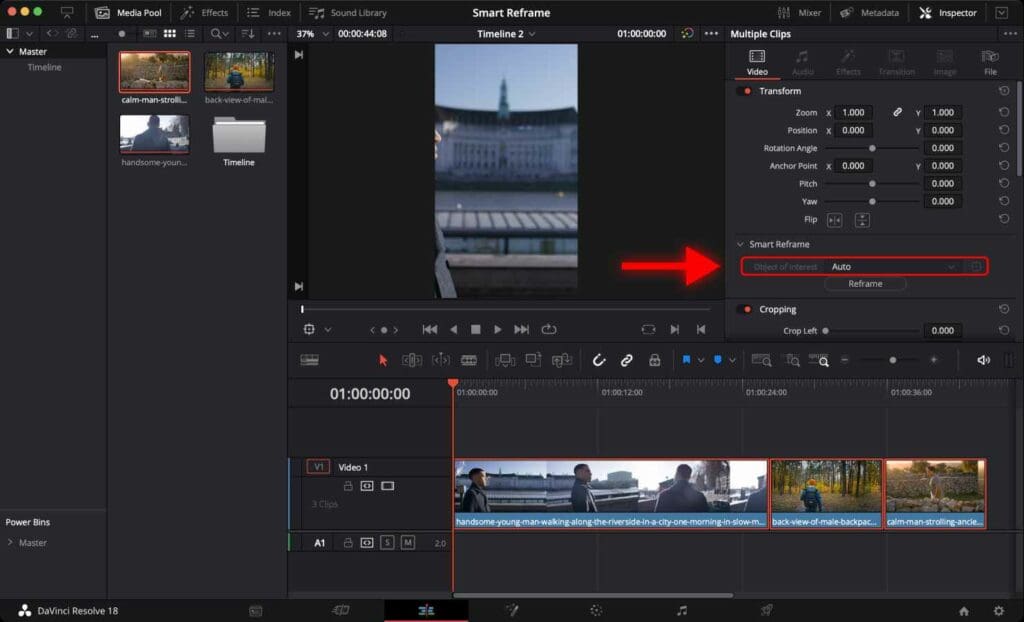
Step 1: Select each clip in the timeline that needs to be adjusted by the “Smart Reframe” feature.
Step 2: Go to the “Inspector” tab.
Step 3: Locate “Smart Reframe” in the “Transform” section.
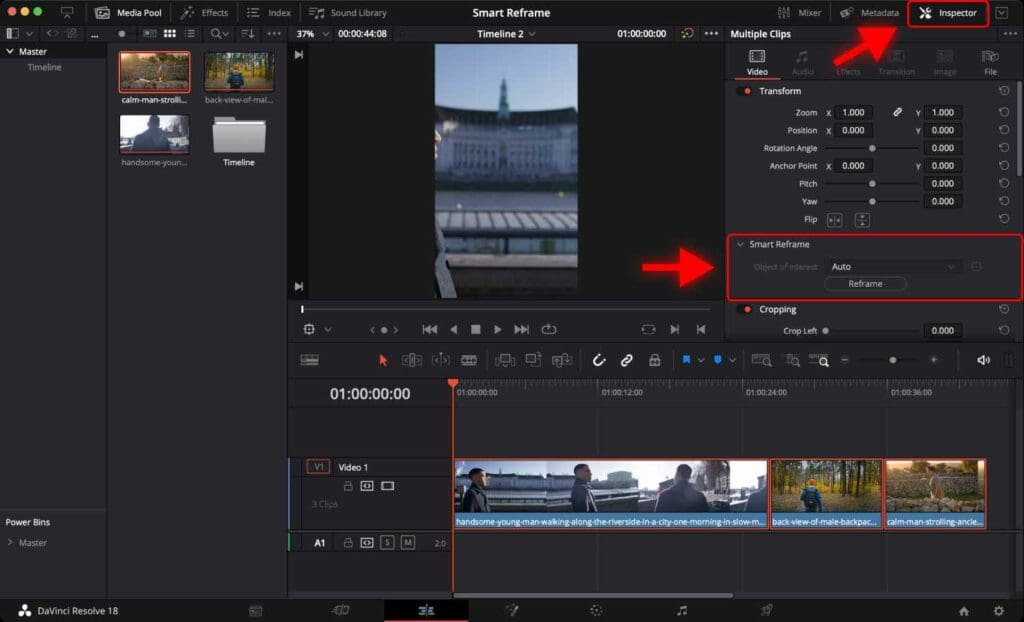
Step 4: Set the “Object of Interest” to “Auto”.
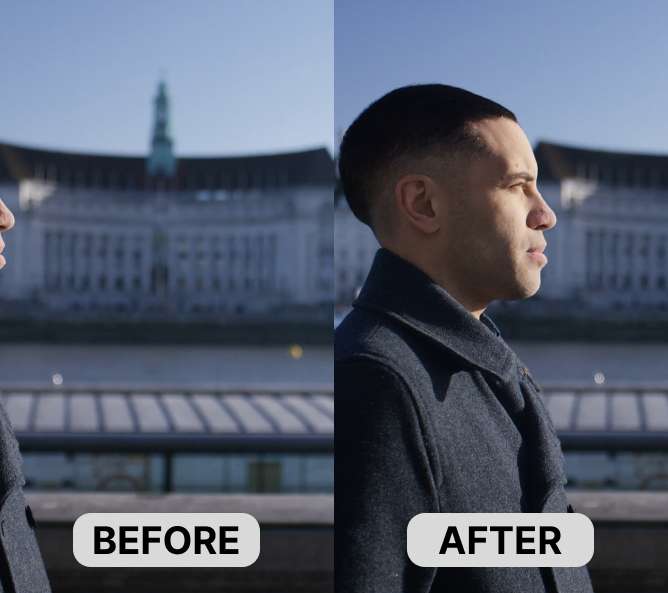
DaVinci Resolve will now automatically identify the main subject in each video clip and follow it around to keep it in the frame.
Instead of “Auto” you can select “Reference Point”. The reference point can be adjusted by clicking and dragging the crosshair over the desired object in the video. DaVinci will try to keep that object in the frame.
This allows for more control over the reframing process and ensures that the main subject in the video remains in the same position.
Note that the “Reference Point” will have to be set for each clip individually.
In most cases, “Auto” works pretty well.
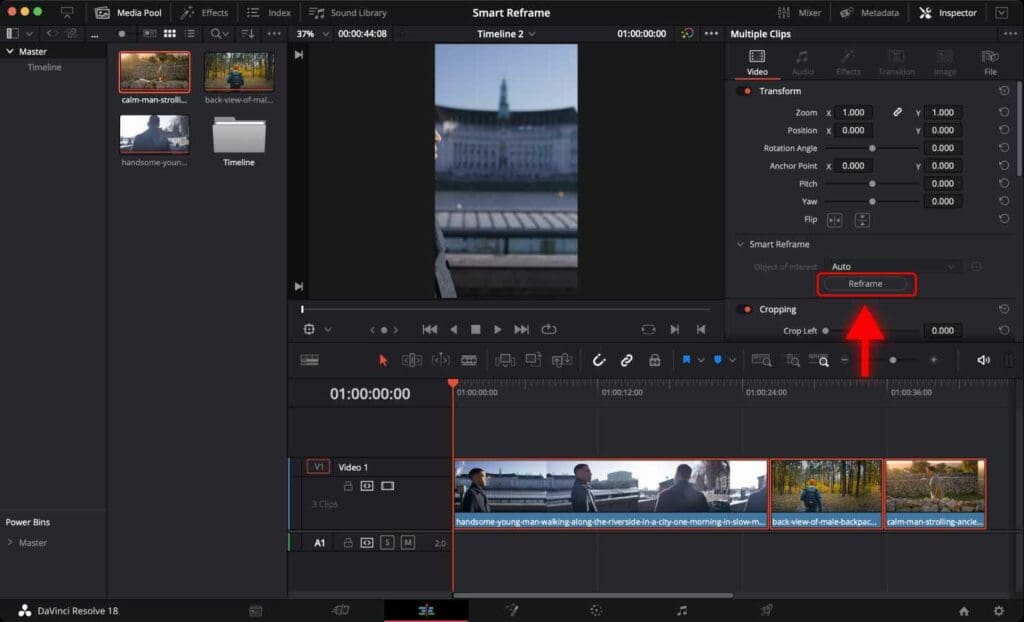
Step 5: Click “Reframe”.
4. Results
Now, play your video (if it doesn’t play smoothly you can optimize playback) and check that the main subject is automatically placed in the center of the frame, and it’s position adjusts throughout the whole clip.
5. Render the Video in DaVinci Resolve
Once you have adjusted the Smart Reframe settings, you can render the video.
Step 1: Go to the “Deliver” page.
Alternatively, you can use the shortcut “Shift + 8” to open the “Deliver” page.
To learn some of the most frequently used DaVinci Resolve shortcuts for macOS and Windows, check out 70 Easy DaVinci Resolve Shortcuts for Mac and PC.
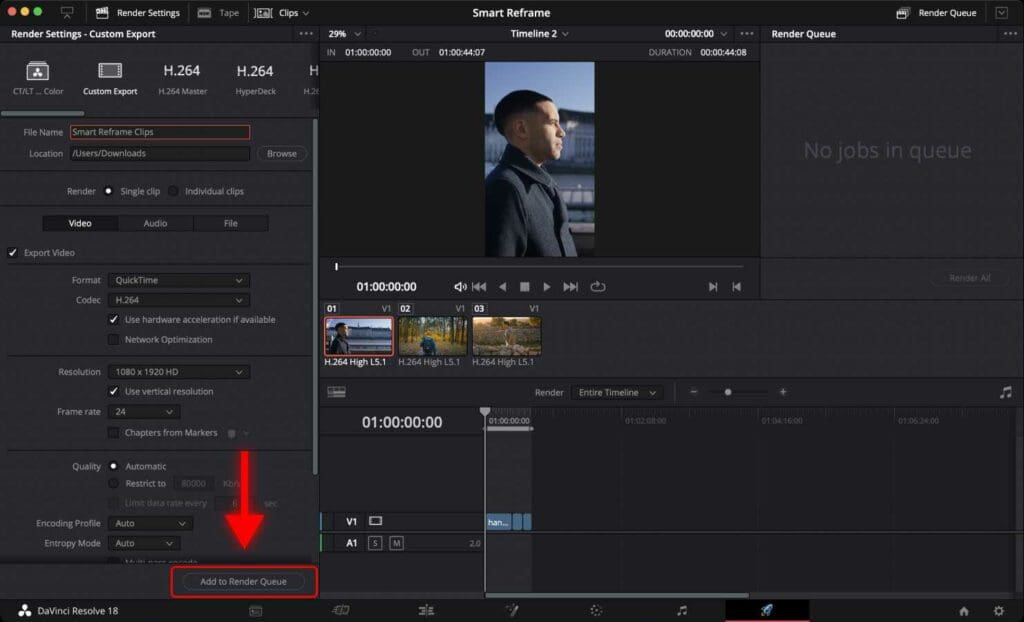
Step 2: Name your video and select the destination folder on your computer to save the video.

Step 3: Click “Add to Render Queue”.
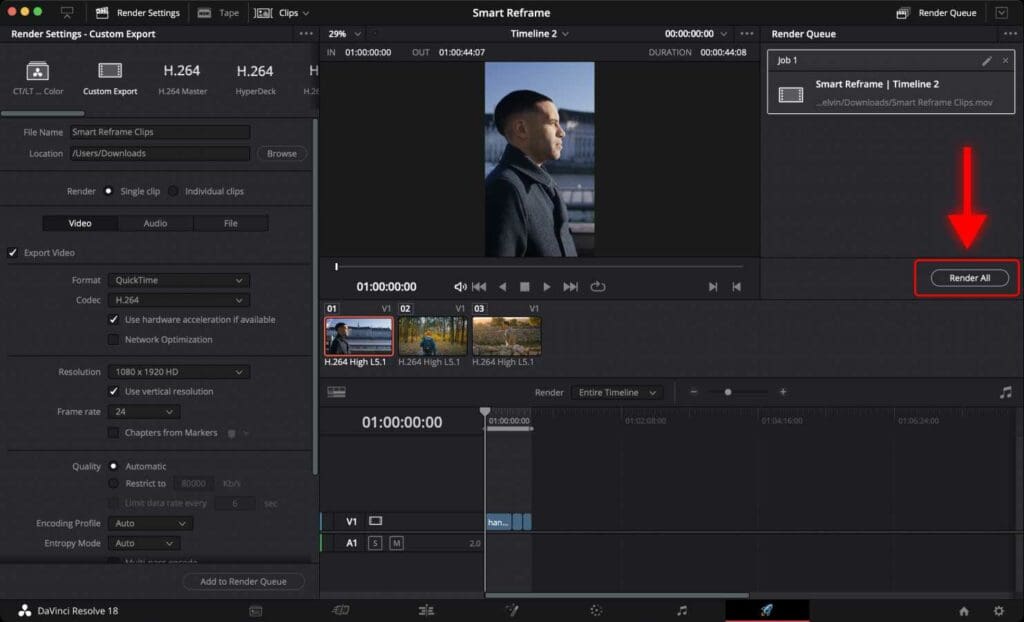
Step 4: Click “Render”.
If you plan to upload 9:16 (vertical) videos to social media, check out the best video export settings for TikTok, Instagram Reels, and YouTube Shorts.
Smart Reframe makes it easy to reframe standard videos into short-form vertical videos for platforms like TikTok. Now you know how to use it properly!
Frequently Asked Questions
Why is the main subject not centered when using Smart Reframe in DaVinci Resolve?
If your main subject is not in the center of the frame, you may need to adjust the framing of your video by changing the “Object of Interest” setting to “Reference Point” instead of “Auto“. You can do this in the “Smart Reframe” panel. If this does not work, you can manually adjust the framing via the “Transform” panel, or use a different aspect ratio.
Can I use Smart Reframe on multiple clips at once?
Yes, you can apply Smart Reframe to multiple clips at once by selecting the clips in the timeline and then enabling Smart Reframe. However, it only works when “Object of Interest” in the Smart Reframe panel is set to “Auto”. When “Object of Interest” is set to “Reference Point”, you will have to enable Smart Reframe for each clip individually (and set a “Reference Point” for each of them).
What if I’m not sure what aspect ratio to choose for DaVinci Resolve?
If you’re not sure what aspect ratio to choose, you can check the requirements for TikTok, Instagram Reels, and YouTube Shorts.
What is the aspect ratio for short-form content?
1080 x 1920 is the most commonly used aspect ratio for short-form content on platforms such as Instagram, TikTok, Snapchat, and YouTube Shorts.


