In DaVinci Resolve, you can use built-in tracking features to allow you to track objects in your footage.
Object tracking is a powerful video editing technique that allows you to precisely follow specific objects within your footage. It can be a human, a car, or any other object you can think of.
In this step-by-step tutorial, I will show you how to track any object in DaVinci Resolve. At the end of this tutorial, I will also show you how to stick text to a moving object.
How Object Tracking Works
Let’s first understand the fundamental concept of object tracking.
Object tracking is the process of identifying a particular element within a video frame and automatically following it’s movement throughout the sequence. That way, if you stick text to a tracked object, the text will follow the object, creating an interesting visual effect.
Part 1: Select the Clip
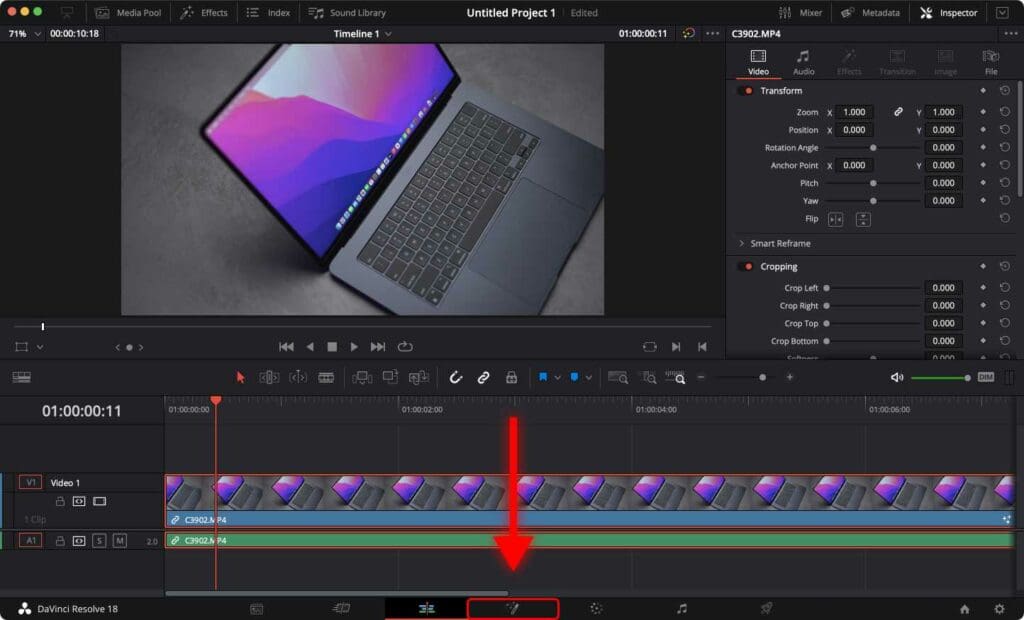
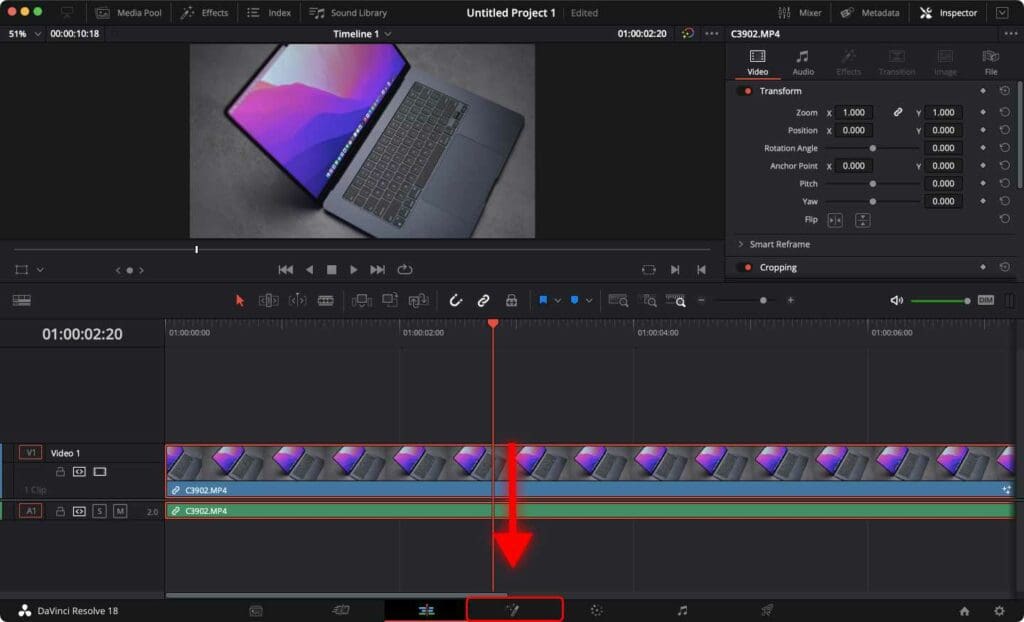
First, add your footage to the timeline in DaVinci Resolve.
If you want the object tracking effect to last for a few seconds, but your footage is much longer, it is recommended to cut out the section of the clip where you want the object tracking to take effect.
You can zoom in or zoom out of the timeline to make this easier.
If you don’t trim a long clip, the actual tracking process might take a while because it requires significant computing resources.
Before tracking, it’s recommended to stabilize the footage. It will make it easier for the software to track objects in the video.
Part 2: Add the Tracker
Once you’ve trimmed the clip, click on the clip and open the Fusion page.
Alternatively, you can open the Fusion page by using the shortcut “Shift + 5“.
While you’re at it, check out 70 Easy DaVinci Resolve Shortcuts You Can’t Afford to Miss.
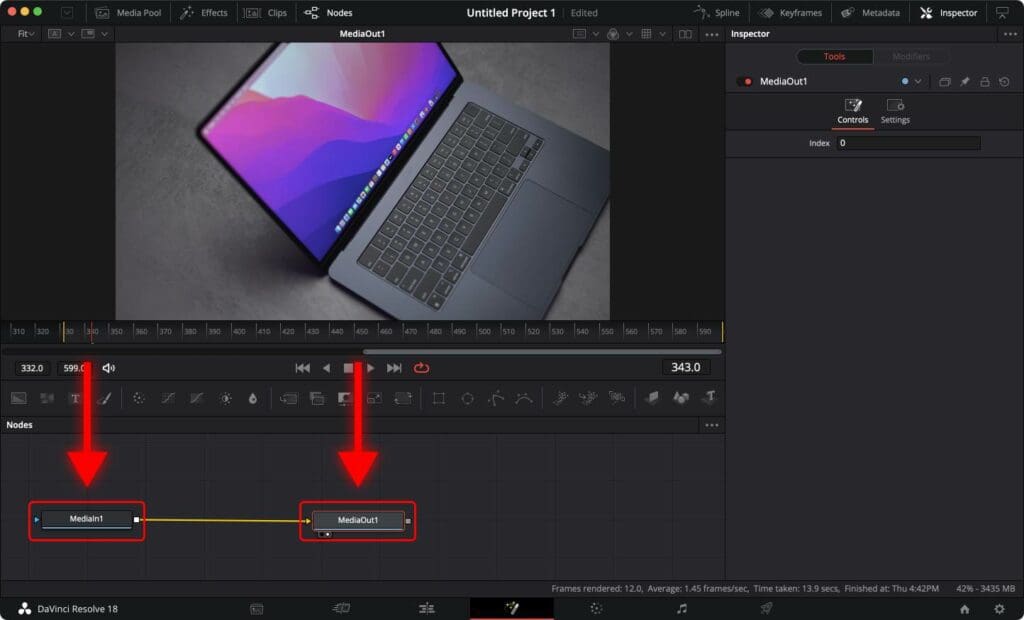
In the Fusion page, you see two nodes: MediaIn1 and MediaOut1.
Now it’s time to add the tracker to your footage.
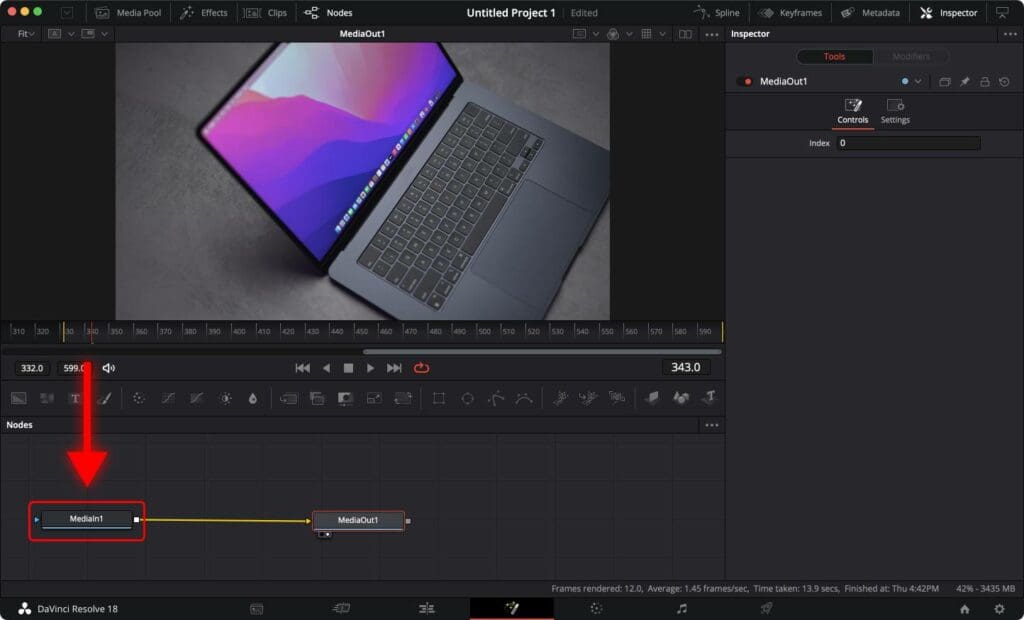
Step 1: Click on MediaIn1 and use the keyboard shortcut “Shift + Spacebar”.
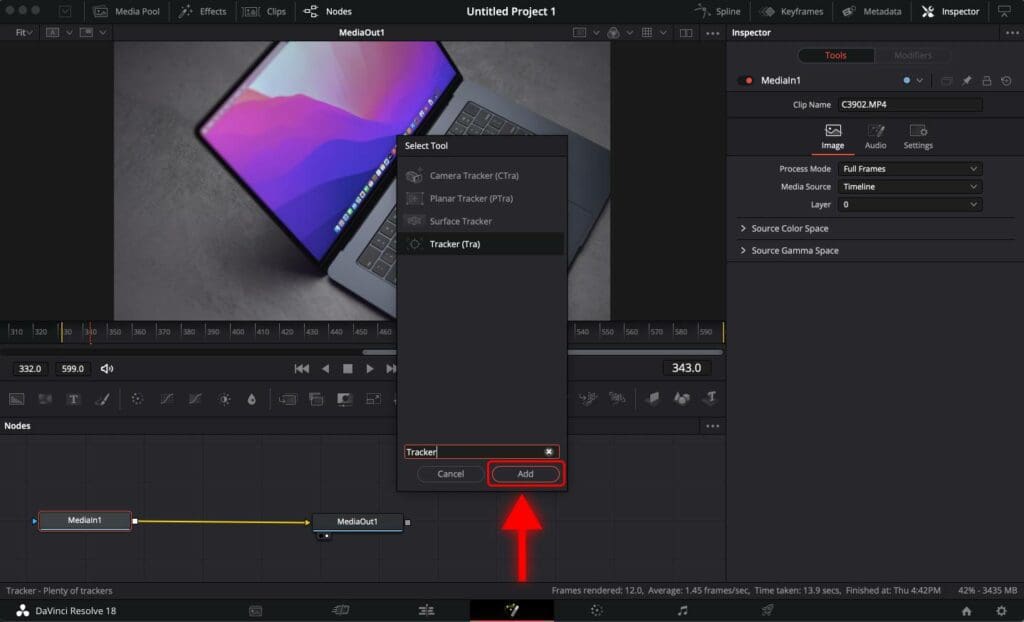
Step 2: A dialog box pops up. Write “Tracker (Tra)” in the search box.
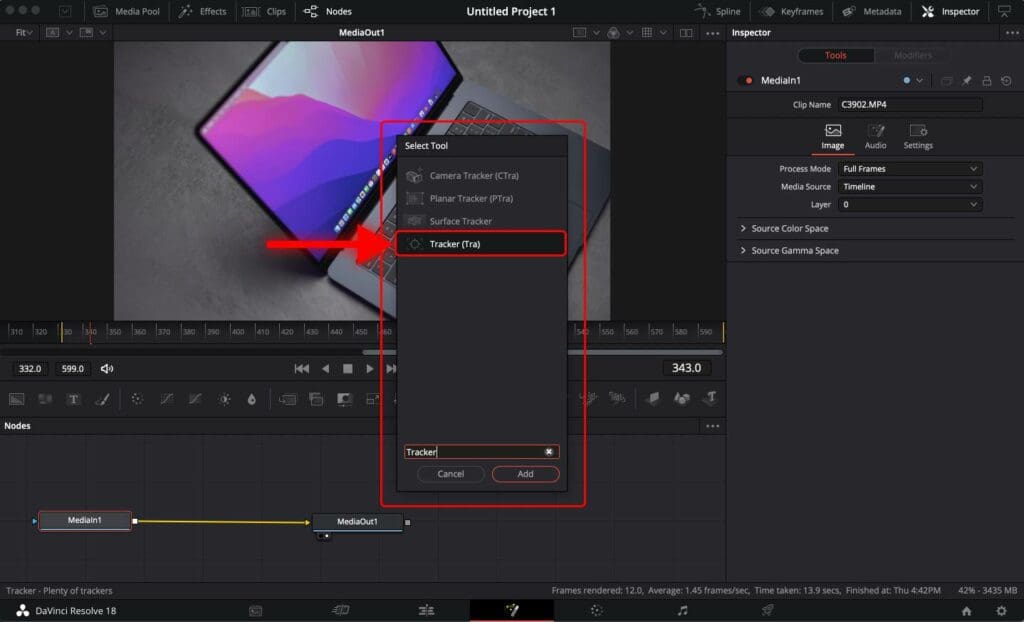
Step 3: Click “Add”.
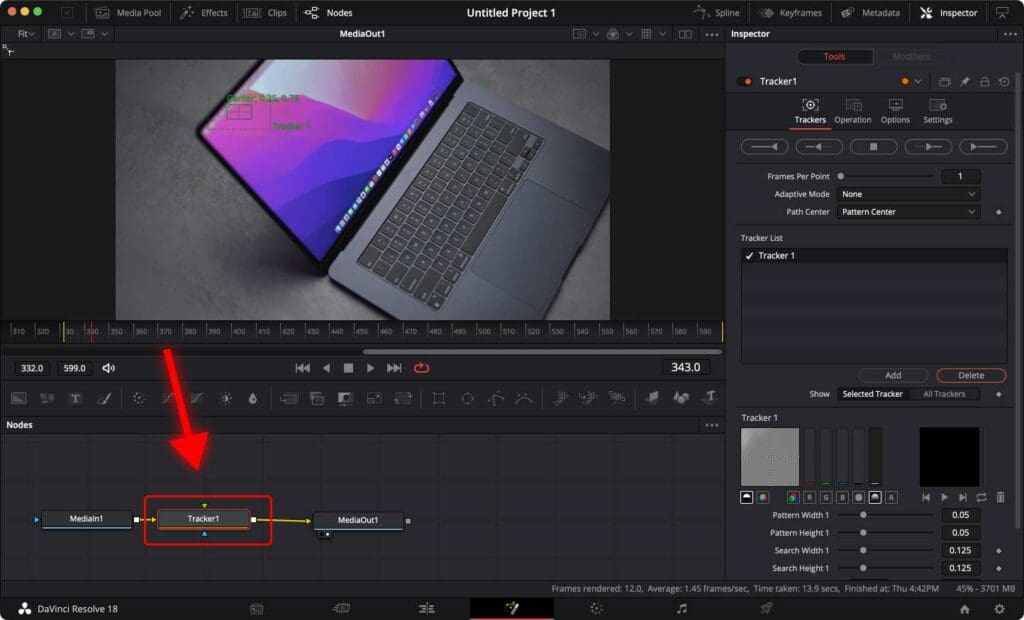
Now you can see that a tracker node “Tracker1” has been added. Click on it.
Part 3: Start Tracking
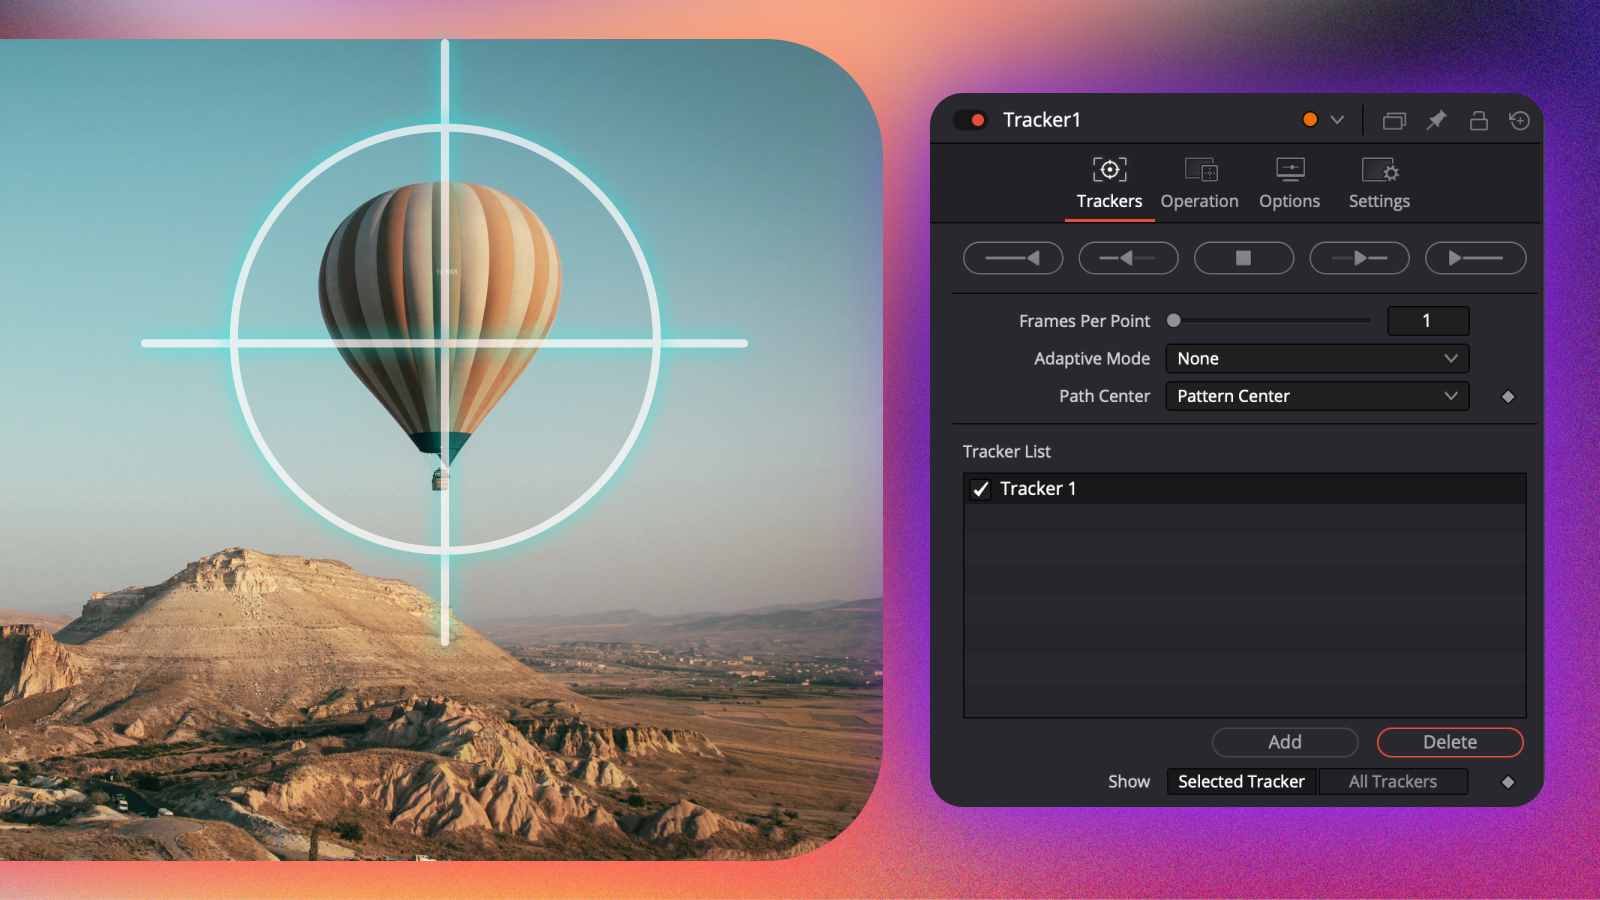
On the right, you can see the tracker controls. If you don’t see it, click on the “Inspector” tab.
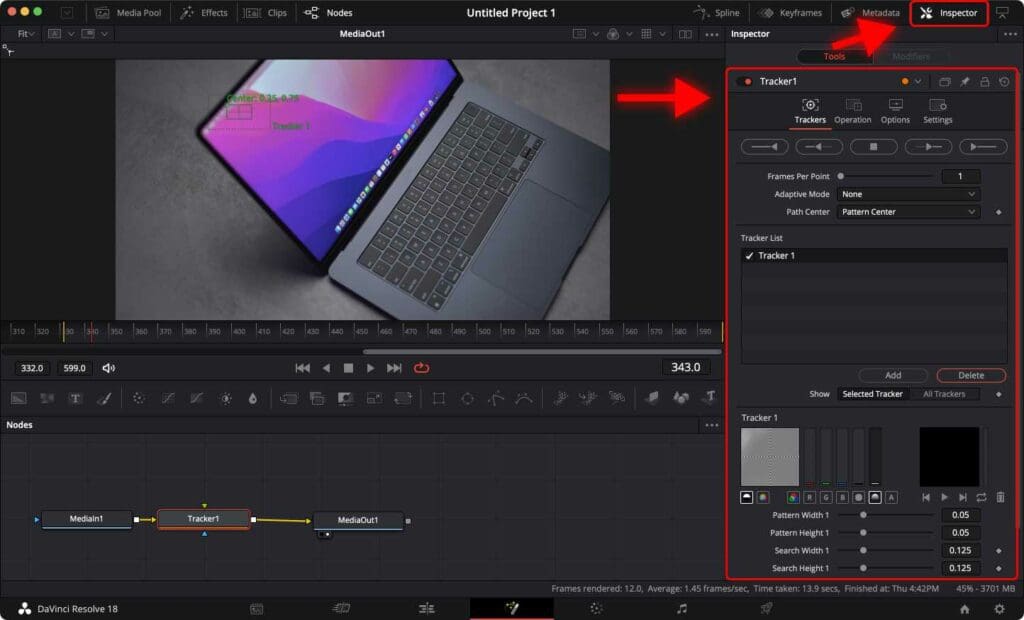
Position and Scale The Tracker
You might notice a green square appearing on your footage. This is the tracker that you need to place on the object you want to track.
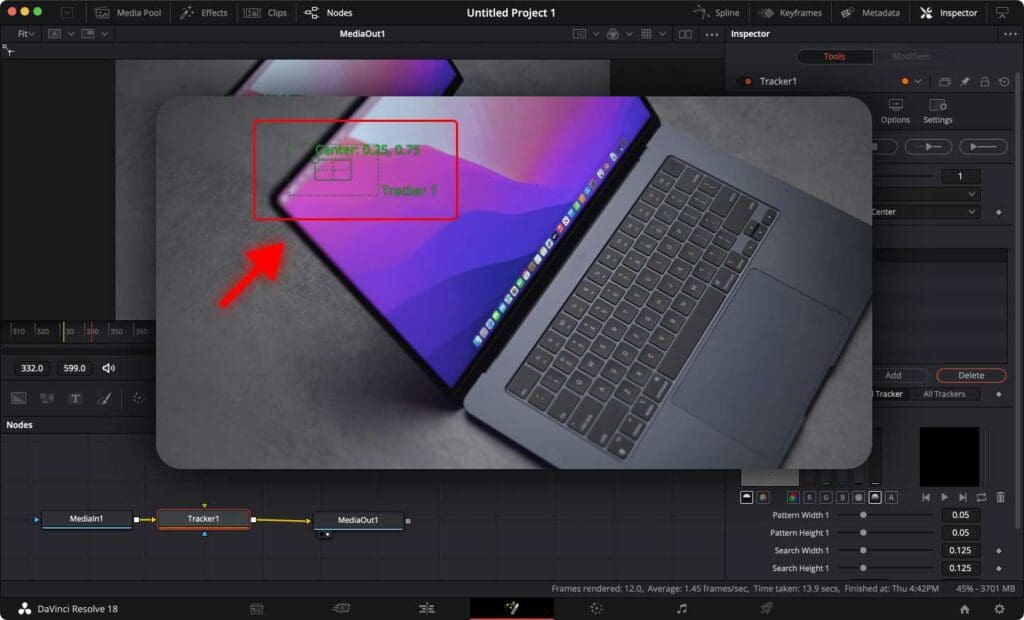
If the square is smaller than the object you want to track, you can resize the tracker by clicking and dragging the tracker’s edges.
Select the Object
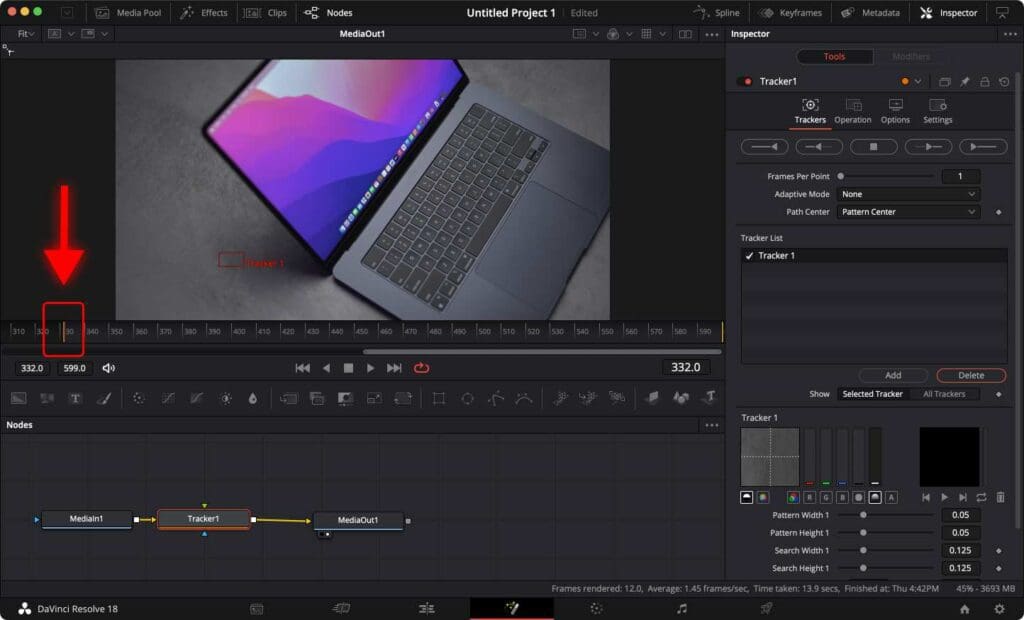
First, move the red playhead at the start of the clip.
To move the tracker, click on the square in the upper left corner of the tracker and move it over the object.

If possible, choose an object to track that has good contrast and texture. Objects with distinct edges, patterns, or textures are easier to track because they provide clear visual features for the tracking algorithm to follow.
Select an object that is of sufficient size in the frame. Smaller objects may be harder to track accurately, especially if they are too small to contain enough visual details for the tracker to attach to.
Using the example clip above, it would be best to track the corner of the laptop or an icon on the screen dock.
Click “Track Forward”. Now DaVinci Resolve will start tracking the object in this clip. Depending on the clip duration and your computer resources, it can take a few seconds to a few minutes.

Part 4: How to Stick Text on Moving Objects in DaVinci Resolve
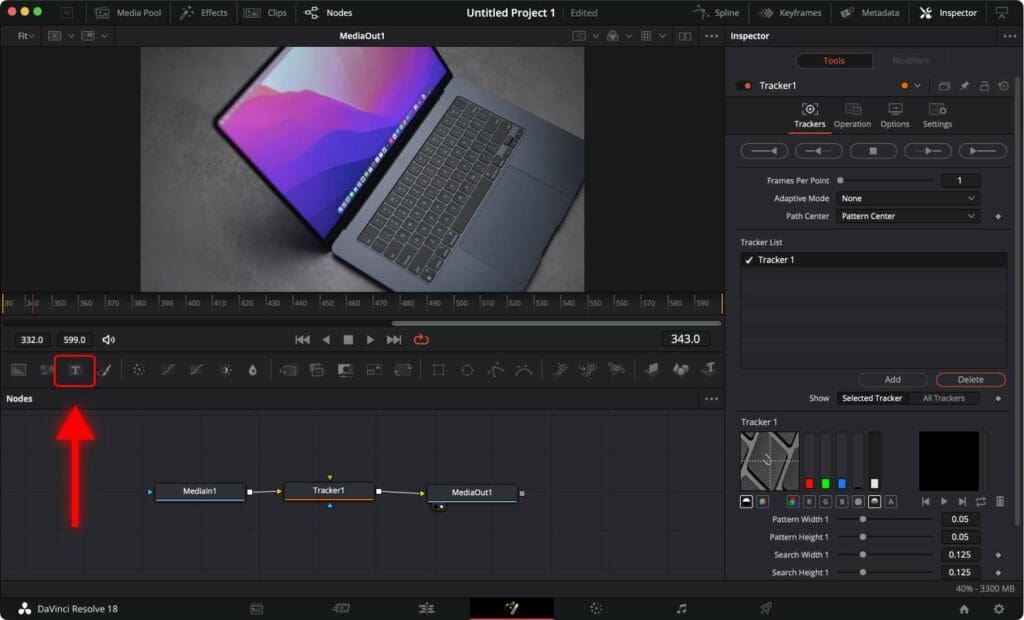
Step 1: Add a text node.
Click on the Text icon and drag it to the Nodes field.

Step 2: Connect the “Text1” node to the “Tracker1” node. Click on the white square next to the “Text1” node and drag it over the “Tracker1” node.
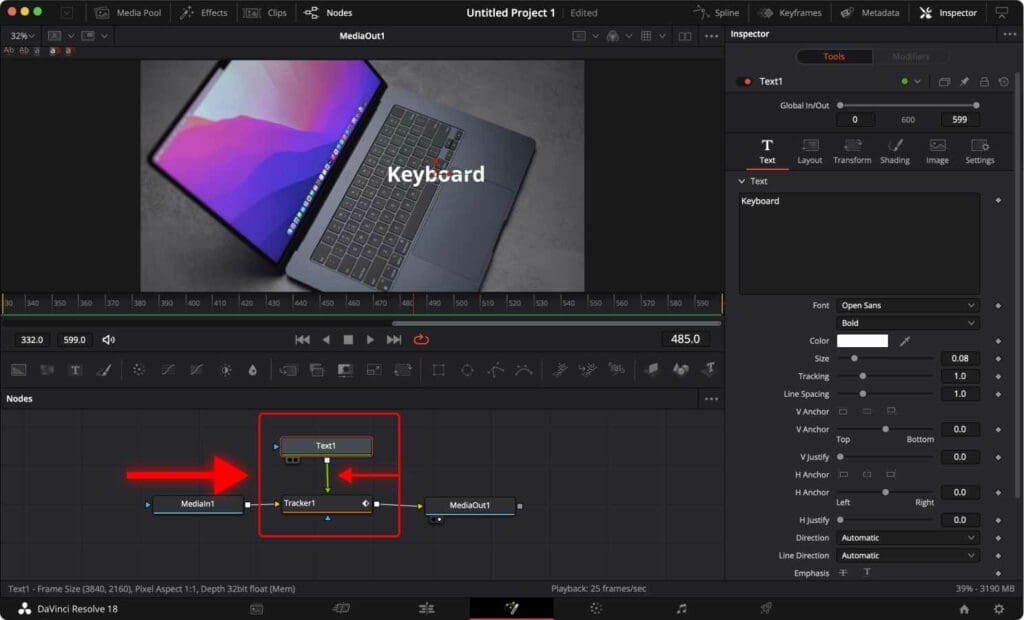
Step 3: Type and customize the text by clicking on the “Text1” node and using the controls on the right side. You can change the font, size, color, and more.
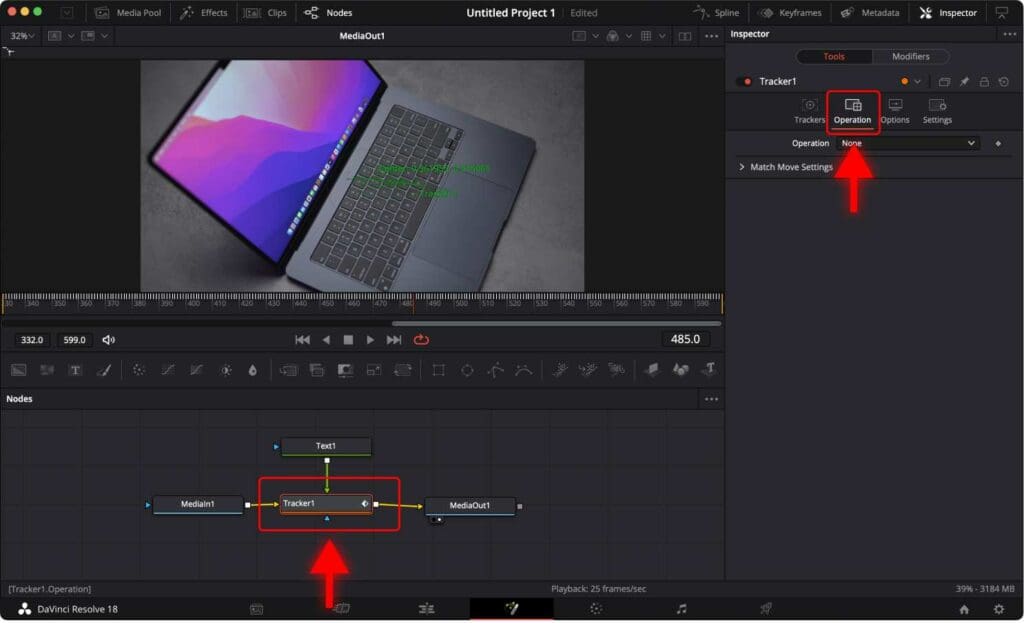
Step 4: Click on the “Tracker1” node.
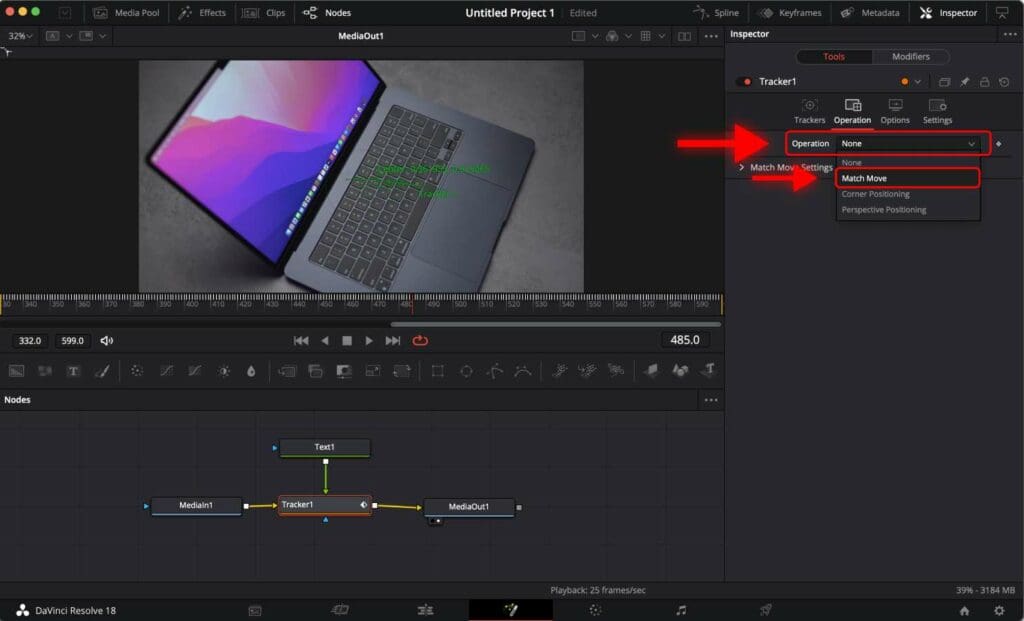
Step 5: Go to the “Operation” tab.

Step 6: For “Operation” choose “Match Move” in the drop-down menu.
All done!
Now you can play the video and see that the text matches the movement of the tracked object.
If your playback is choppy and not smooth, you need to Optimize DaVinci Resolve for Smooth Playback, which can be done in 1 minute.
Part 5: How to Stick Image to a Moving Object in DaVinci Resolve
If you want to track something other than text, let’s say images, it’s not really easy to do.
Once you have set up the tracker as described previously, you need to import the image you want to follow the object that was tracked.
Step 1: Go to the Fusion page.
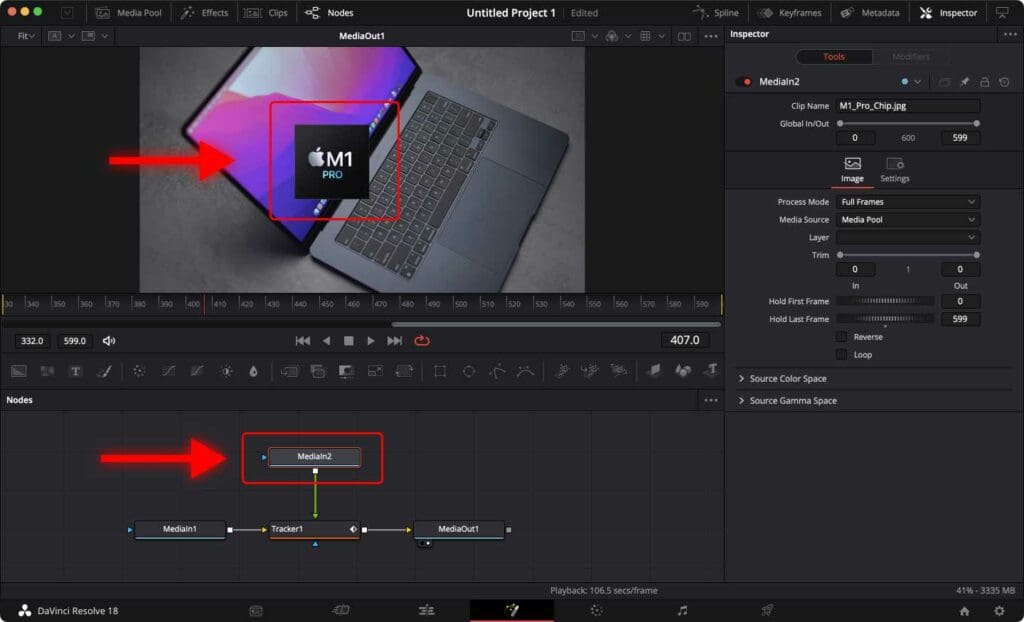
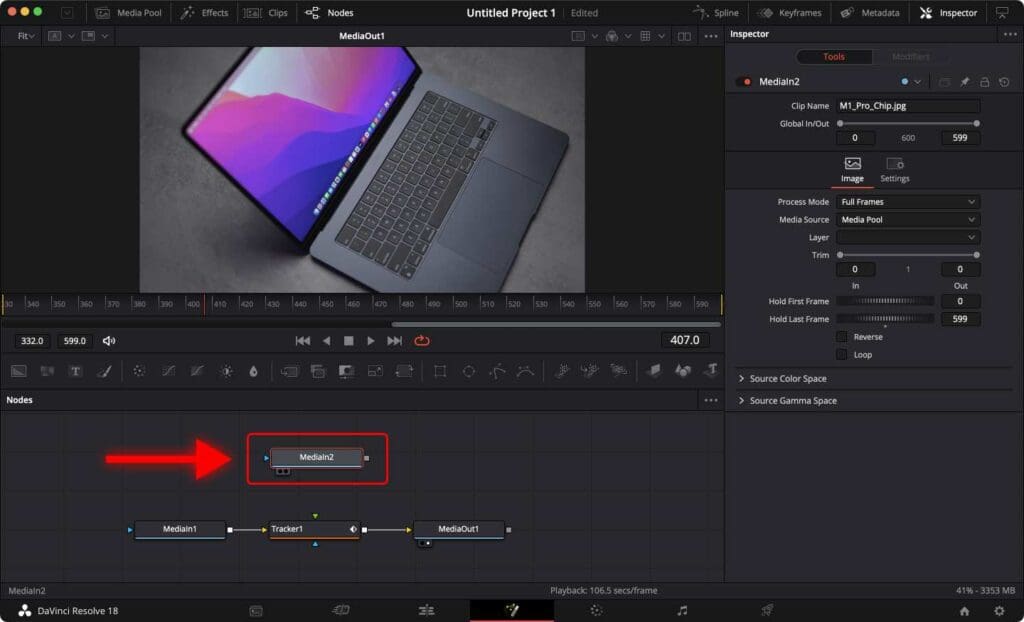
Step 2: Select the image in the file system on your computer and drag it over the node field.
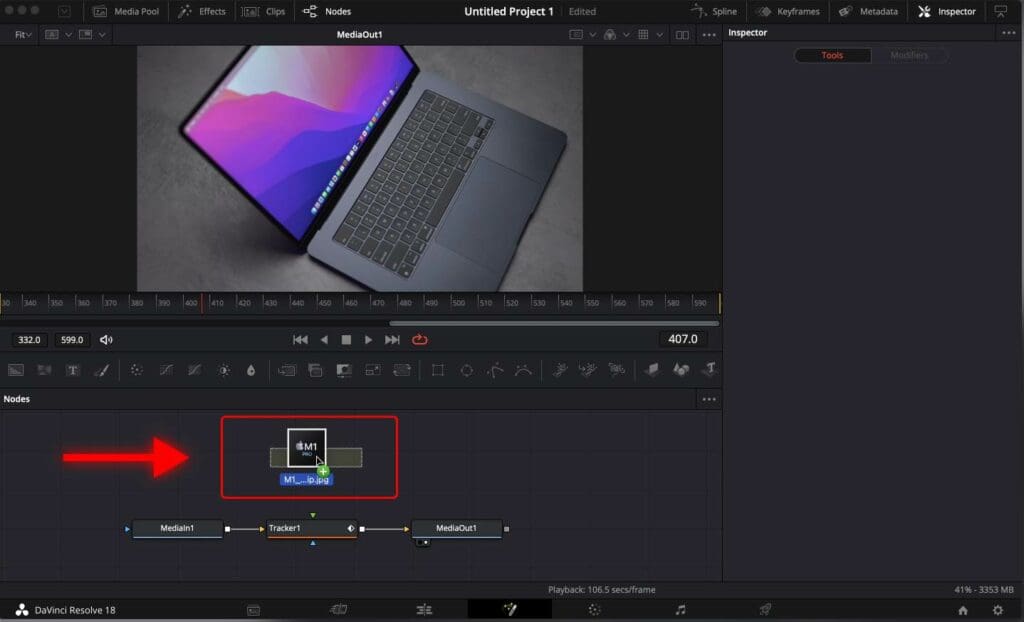
Step 3: Connect the MediaIn2 node (the image) to the Tracker1 node.
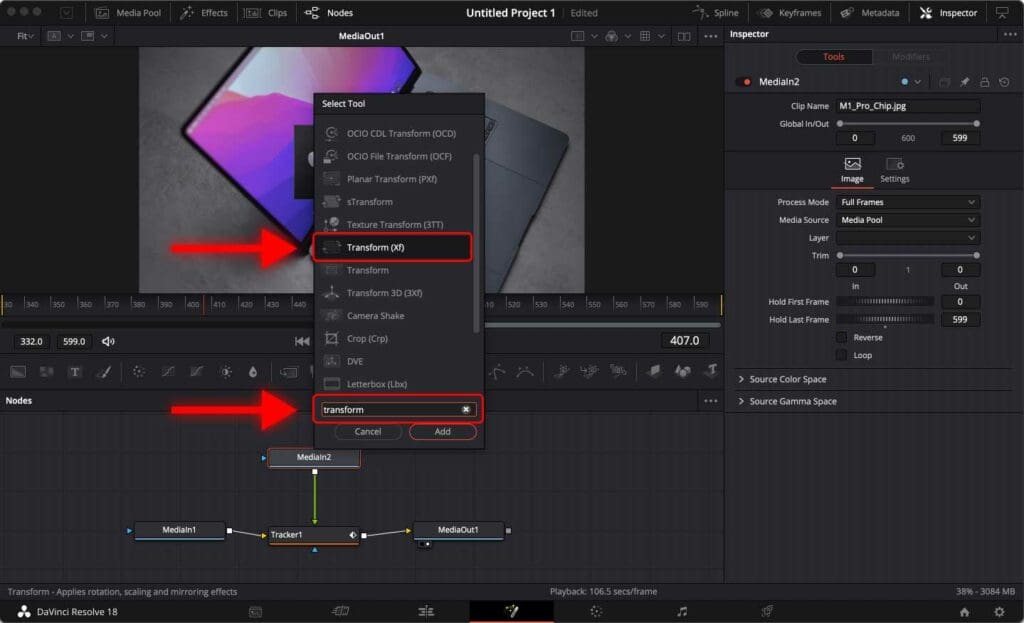
To have more control over the image’s size, position, and angle, you need to add a “Transform” node.
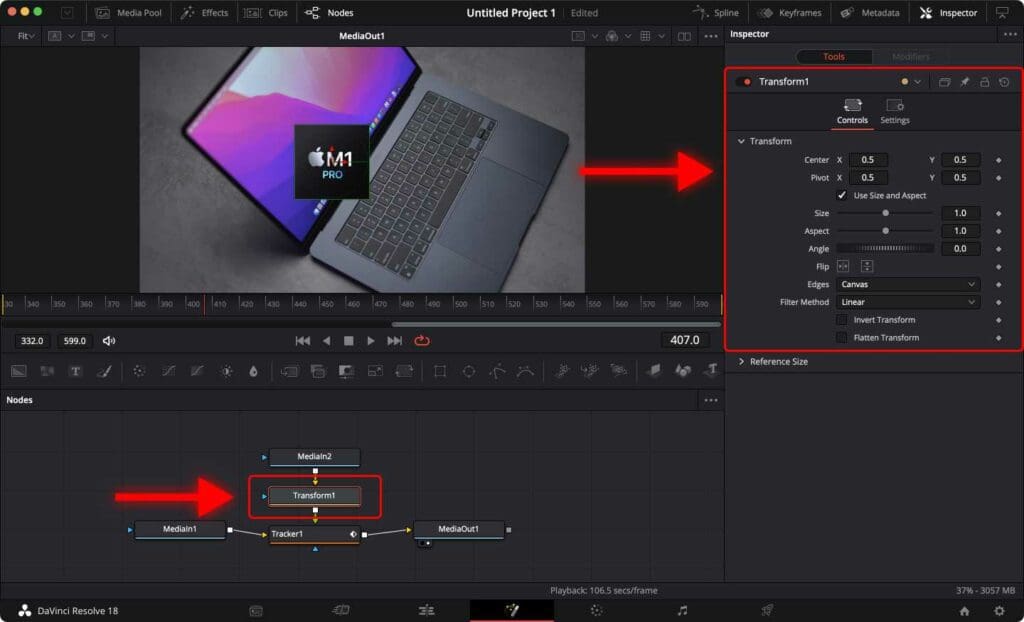
Step 4: Click on the MediaIn2 node and press the “Shift + Space Bar” shortcut to add a Transform node. In the pop-up window, type “Transform (Xf)“.
Now, on the right side, you can find controls that allow you to edit the image’s characteristics, including size and position.
Conclusion
Object tracking is a powerful tool in video editing, allowing you to follow and manipulate objects within your footage.
In this tutorial, I covered the step-by-step process of using object tracking in DaVinci Resolve. By adding a tracker node and positioning it on the desired object, you can track its movement throughout the whole clip.
In addition, I covered how to stick text or images to the tracked object, creating an engaging visual effect.
Once you like the result and your project is completed, check out the 2 Best Ways to Export Videos in DaVinci Resolve.
Frequently Asked Questions
Why does object tracking fail in DaVinci Resolve?
The object tracking in DaVinci Resolve may sometimes give poor results due to several reasons:
1. Insufficient tracking data: If the object being tracked lacks distinctive features or undergoes rapid motion, it can make it challenging for the software to track it accurately. In this case, it’s recommended to stabilize the footage before applying trackers.
2. Low-resolution or blurry footage: When the details are not well-defined or if the image lacks sharpness, it becomes challenging for the software to accurately identify and track the object.
What if I get error message “Warning, Render did not complete!” in DaVinci Resolve?
First, make sure the tracker node is connected to the media node. Connect MediaIn1 to Tracker1 in the node field. This input must always remain connected and valid.
If the error persists, create a copy of the clip you want to use for tracking, rename it, and add it again to DaVinci Resolve. This might solve the issue with the clip.


