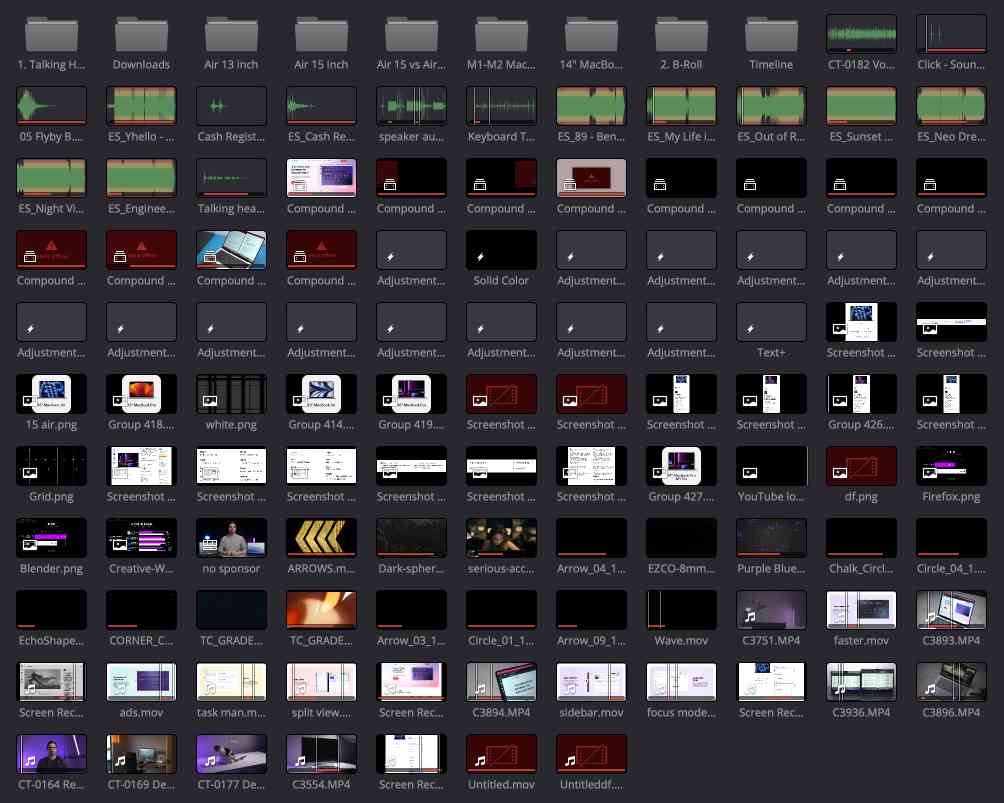
If you’ve ever worked on a complex video project, you may often find your Media Pool looks a little disorganized after a while.
While you may still be able to navigate this mess of files, it reduces your editing efficiency, wastes time, and is a nightmare for any other editors who may work on the same video project.
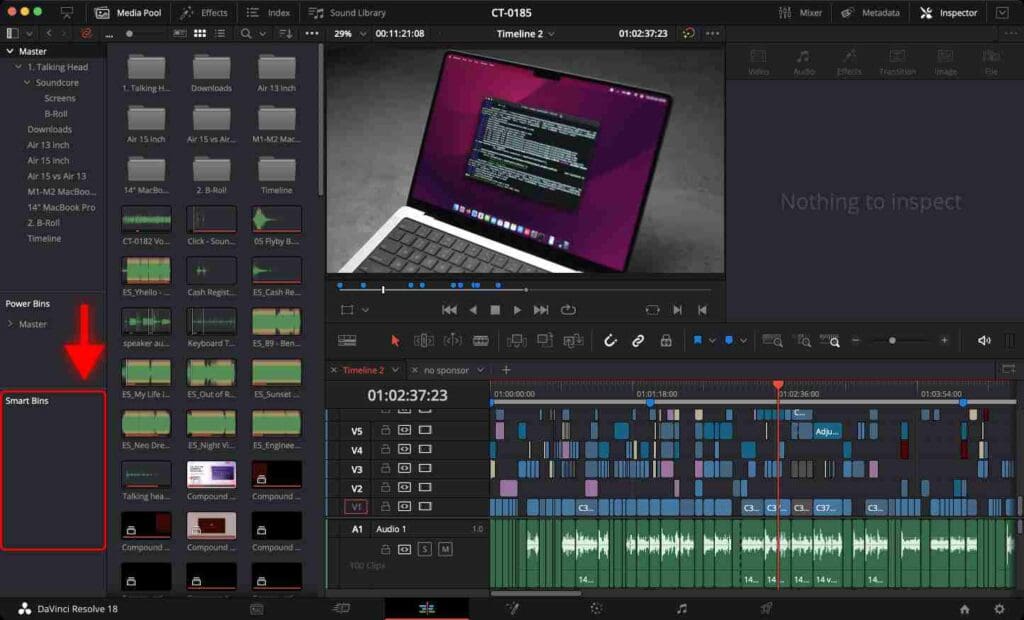
Seriously – imagine trying to find a specific clip or sound effect from the chaos in the example image below.
What Are Smart Bins?
Smart Bins were introduced in DaVinci Resolve as an organizational tool to automatically sort and categorize media based on specific criteria.
Smart Bins can be beneficial for editors dealing with large amounts of media files – such as video clips, images, audio tracks or visual effects.
By the way, don’t confuse Smart Bins with Power Bins.
By using Smart Bins, editors and media professionals can automatically sort media based on metadata, file attributes, or tags, making it easier to find and manage files in a complex project.
In this step-by-step tutorial, I will show you how to enable Smart Bins, create, manage, and use them to improve your editing workflow.
How to enable Smart Bins in DaVinci Resolve?
Go to your Media Pool and click on the three dots in the top right corner.
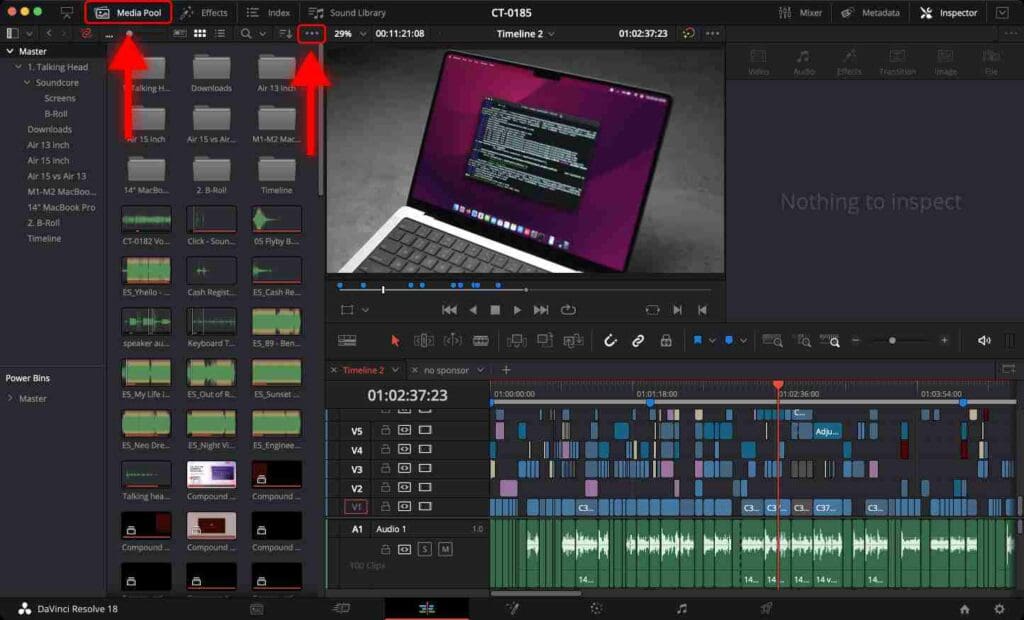
Select “Show Smart Bins” from the drop-down menu.
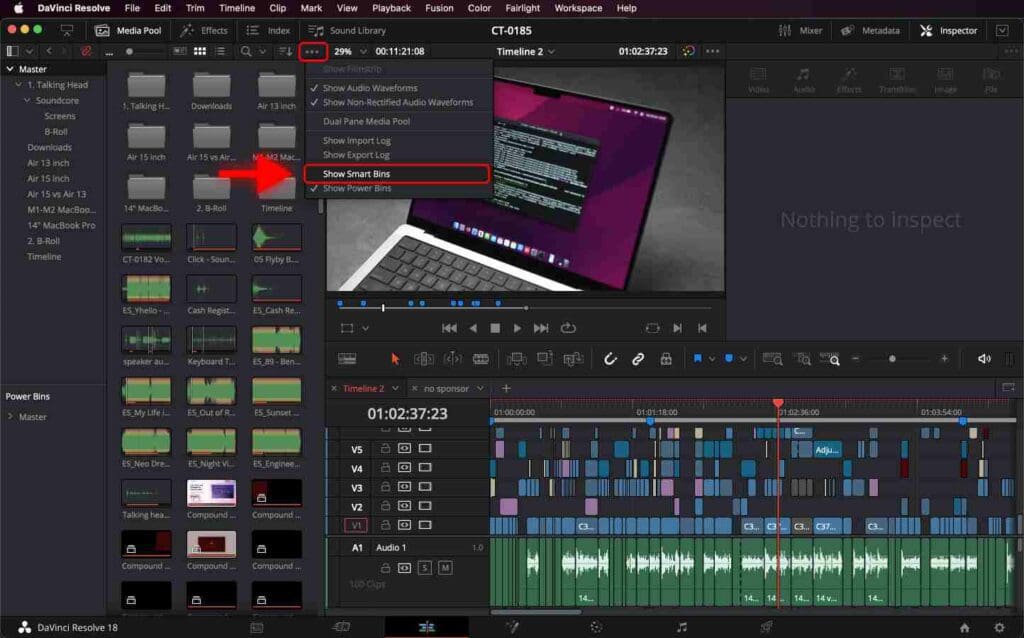
The Smart Bins area will now appear underneath the Master area in the Media Pool.
To learn some of the most frequently used DaVinci Resolve shortcuts for macOS and Windows, check out 70 Easy DaVinci Resolve Shortcuts You Can’t Afford to Miss.
How to Create Smart Bins in DaVinci Resolve?
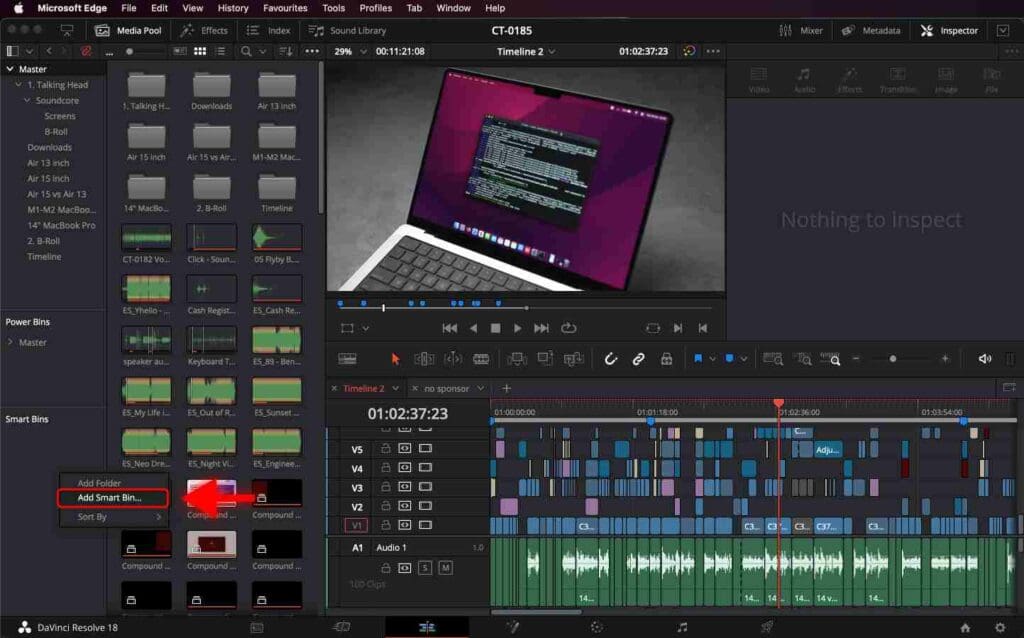
Right-click in the Smart Bins area and select “Add Smart Bin…” from the drop-down menu.
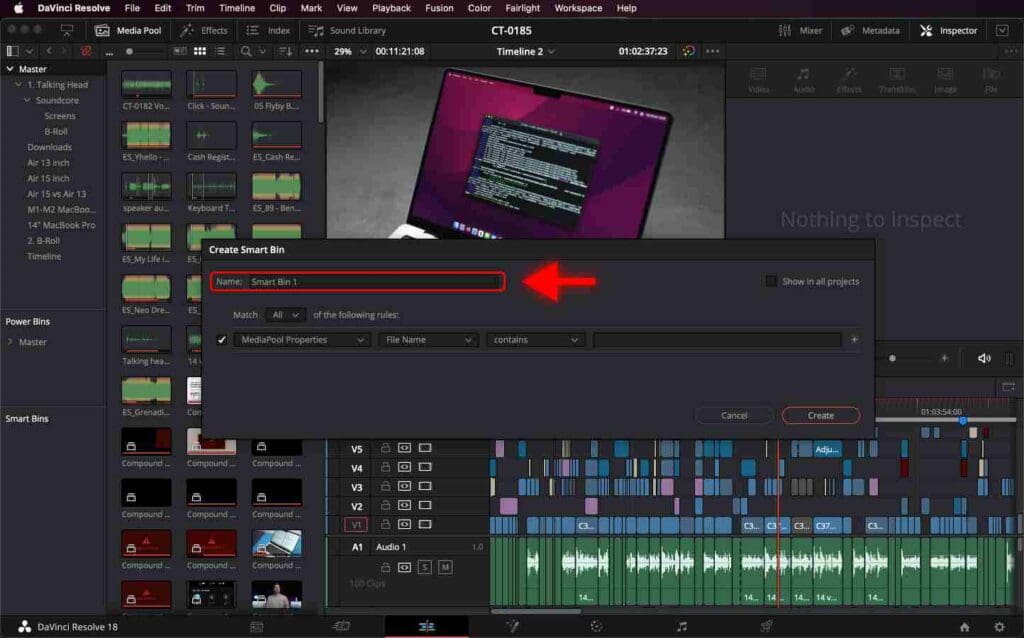
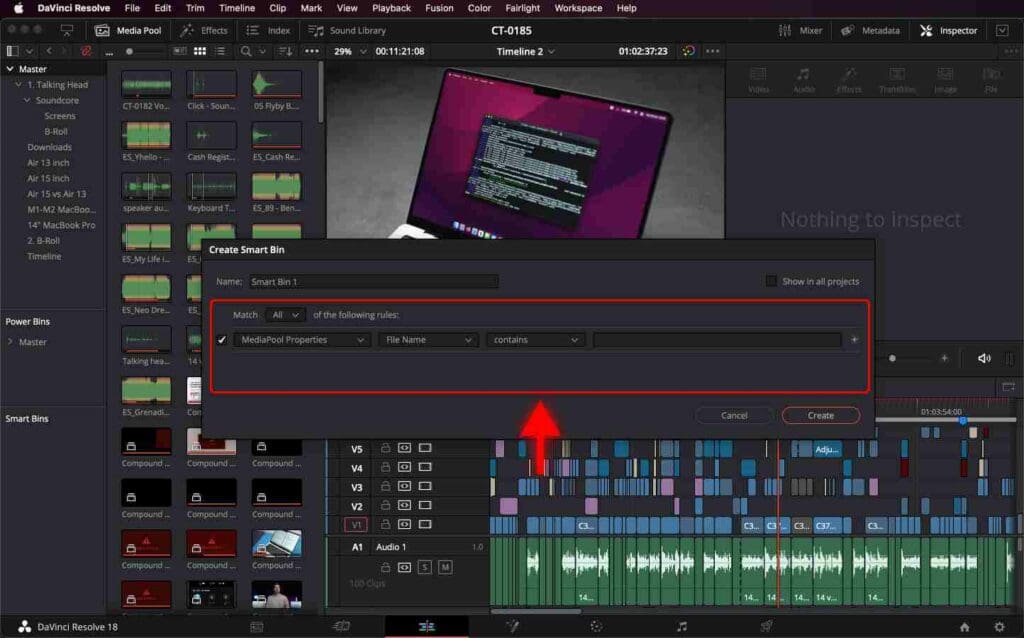
A window will appear.

Here, you can name your Smart Bin.
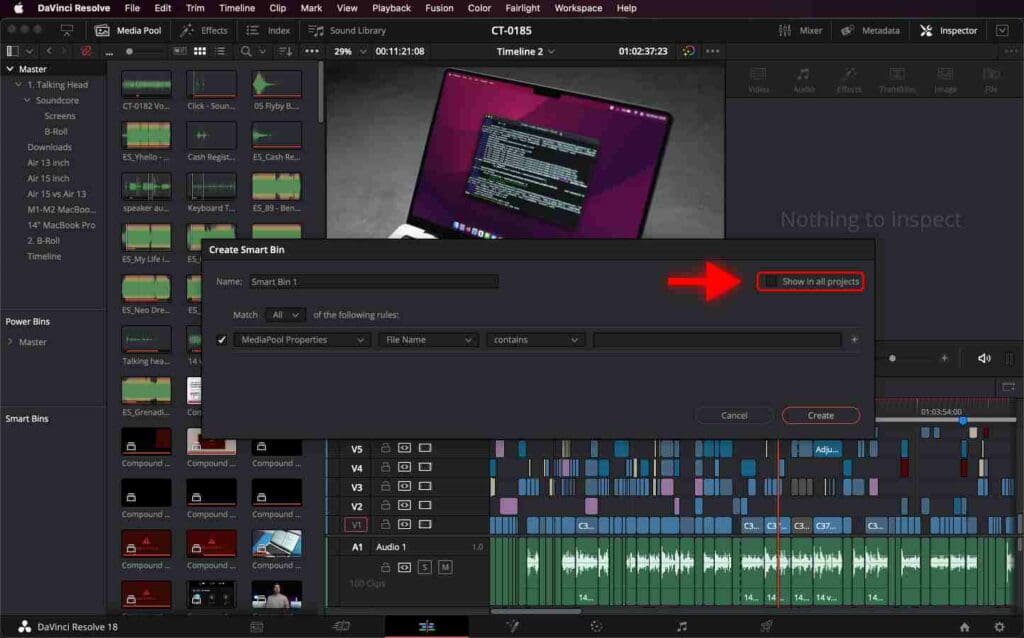
On the right, you can check “Show in all projects” to have this Smart Bin created automatically in existing and new projects.
Below, you can set the criteria for the clips you want to include.
How to Set Criteria for Smart Bins
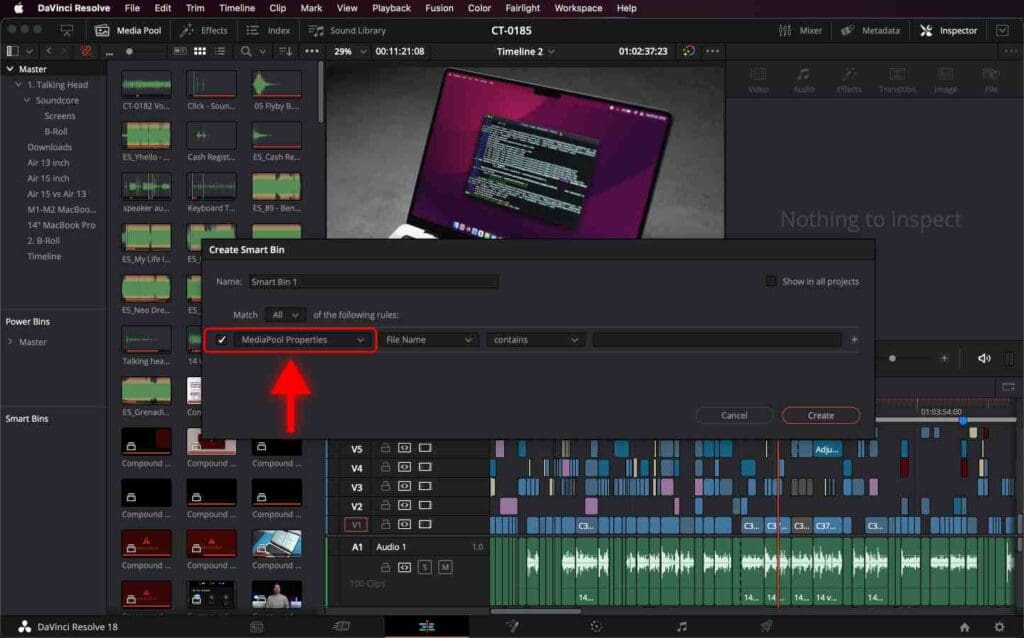
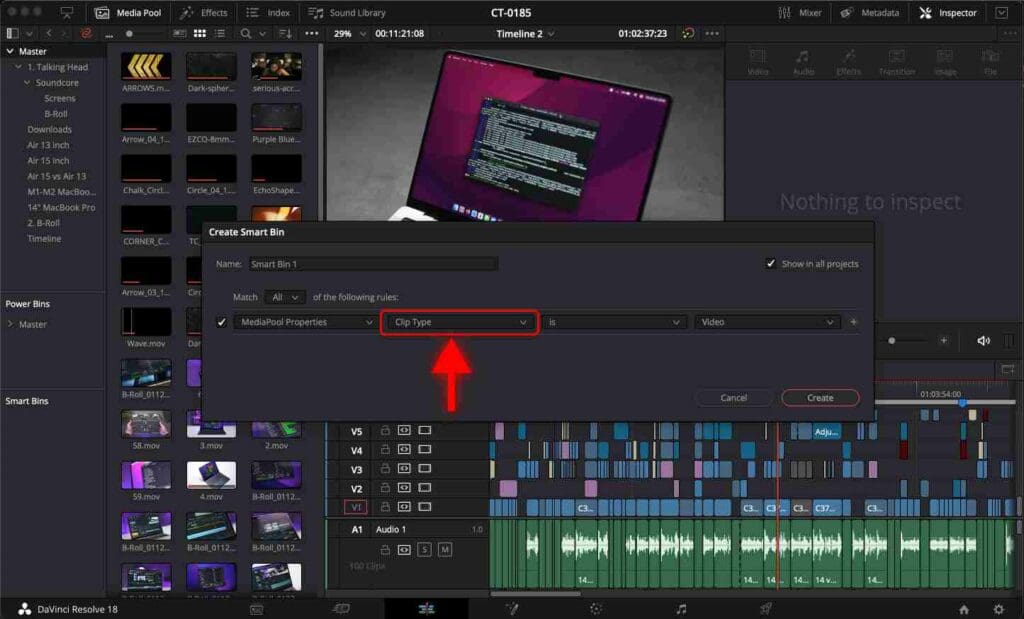
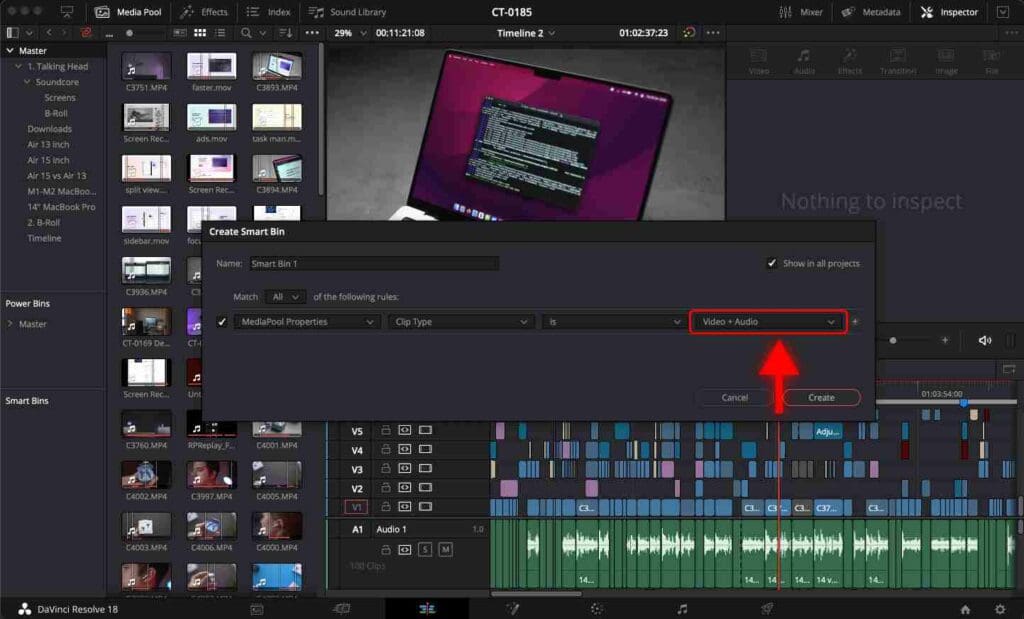
Once you create a Smart Bin, the following window pops up. The first option here should be set to “MediaPool Properties”.
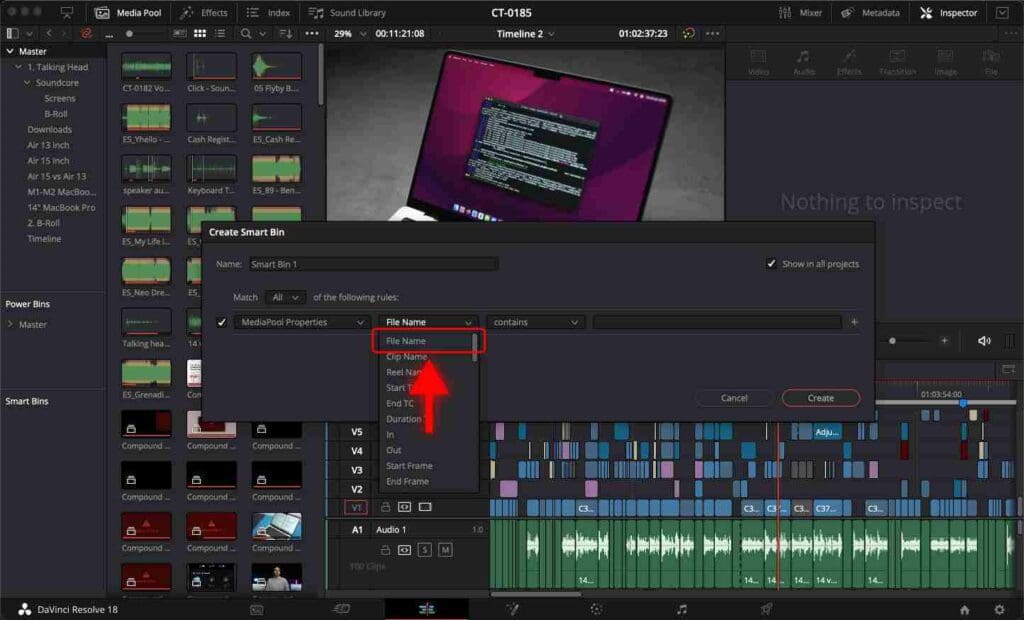
The second option allows you to select media based on File Name, Clip Type (Video, Audio, Still, etc.), Frame Rate, Resolution, and more.
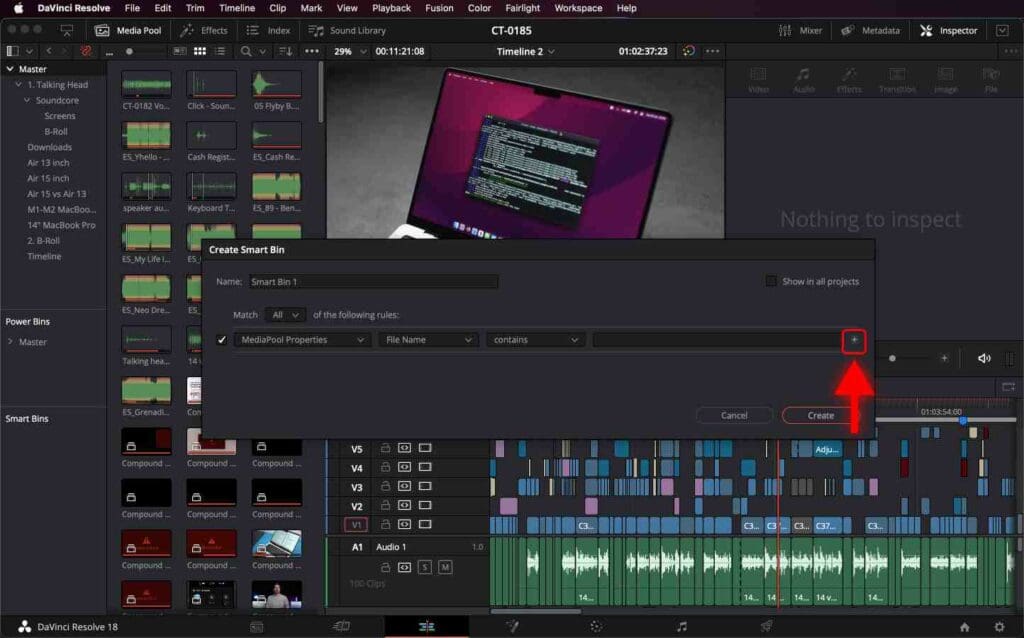
To add more criteria, click on the “+” on the right.
Example 1: Smart Bin to Sort Images
Let’s create a Smart Bin that will sort all the images in the Media Pool that were used in a project.
For the second option, let’s choose “Clip Type”.
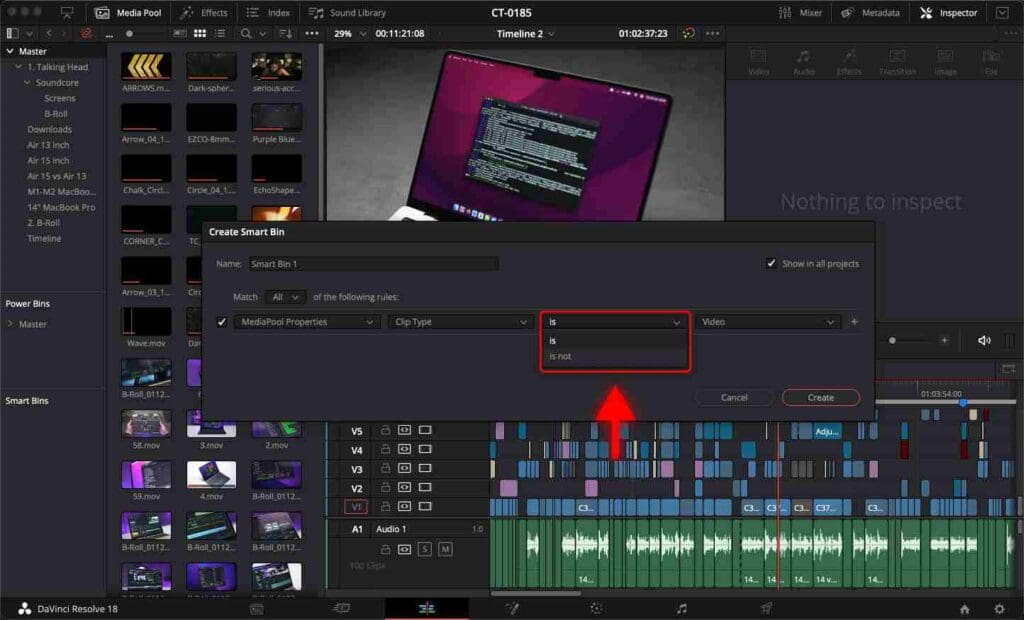
Now we need to choose “is”.
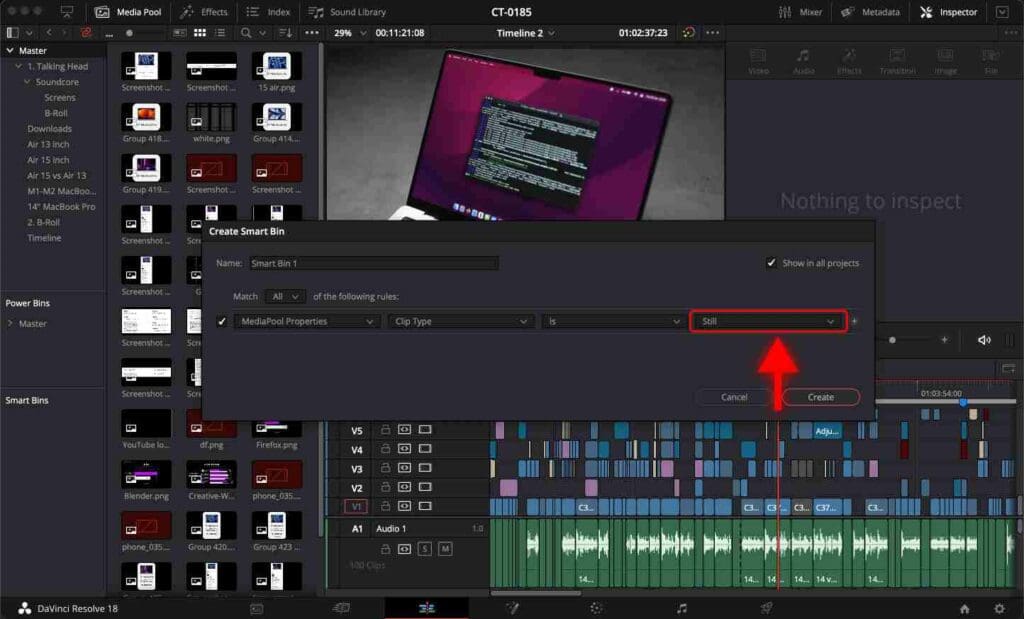
And for the last option, we choose “Still” because we only want images in our Smart Bin.
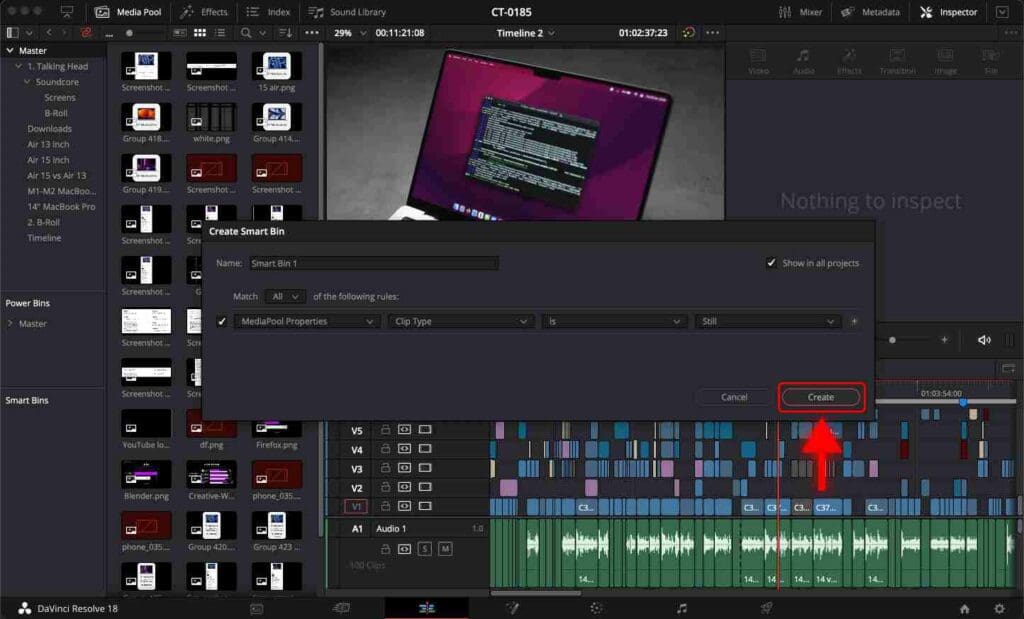
Click “Create” and our Smart Bin will now contain all the images used in this project.
Remember, you can also click “Show in all projects” in the top right corner to have this Smart Bin appear in all existing and future projects automatically.
Example 2: Smart Bin to Sort Videos
For videos, use the same settings except for the last option. Choose “Video + Audio” to select only videos with audio in our Smart Bin.
Click “Create”, and the Smart Bin will now contain all the videos used in this project.
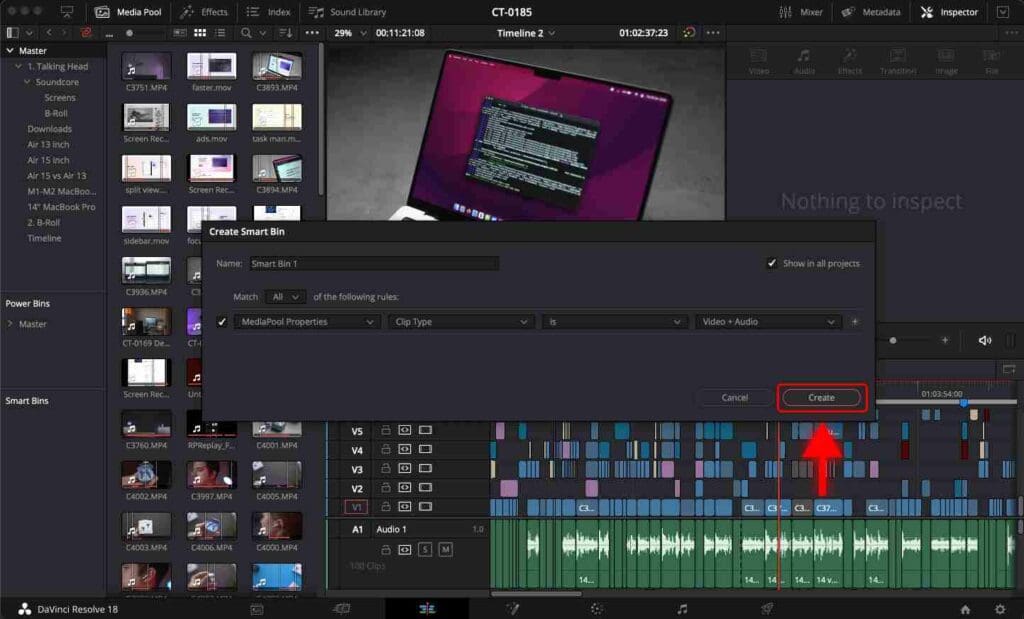
All future projects will have this Smart Bin set up with all the videos used in a particular project.
Pro Tip
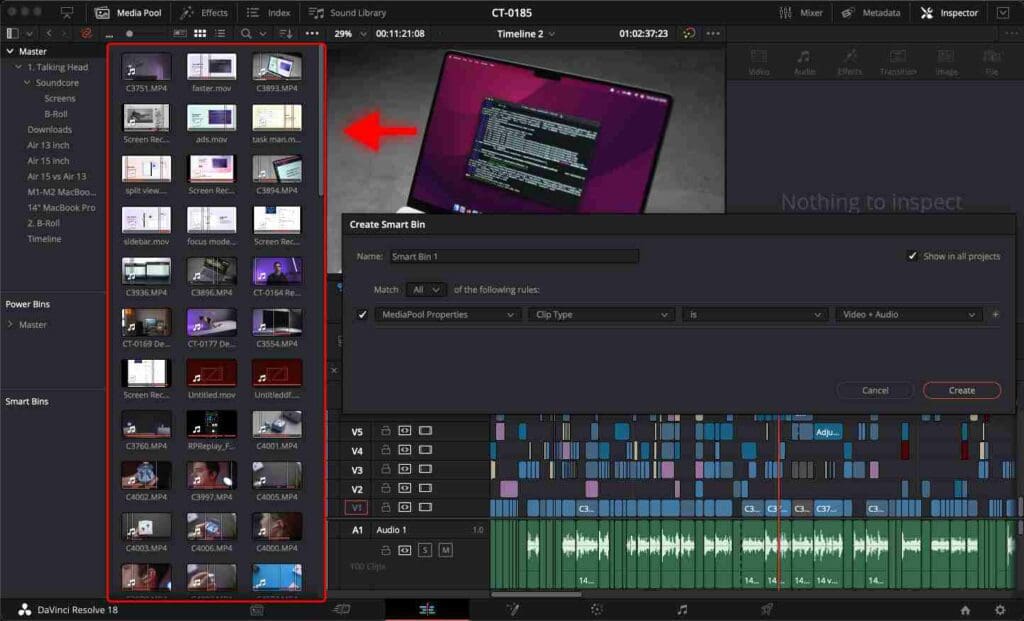
While you are setting criteria, DaVinci automatically sorts and shows what falls under the criteria you are setting on the left in the Media Pool.
Smart Bin With Multiple Criteria
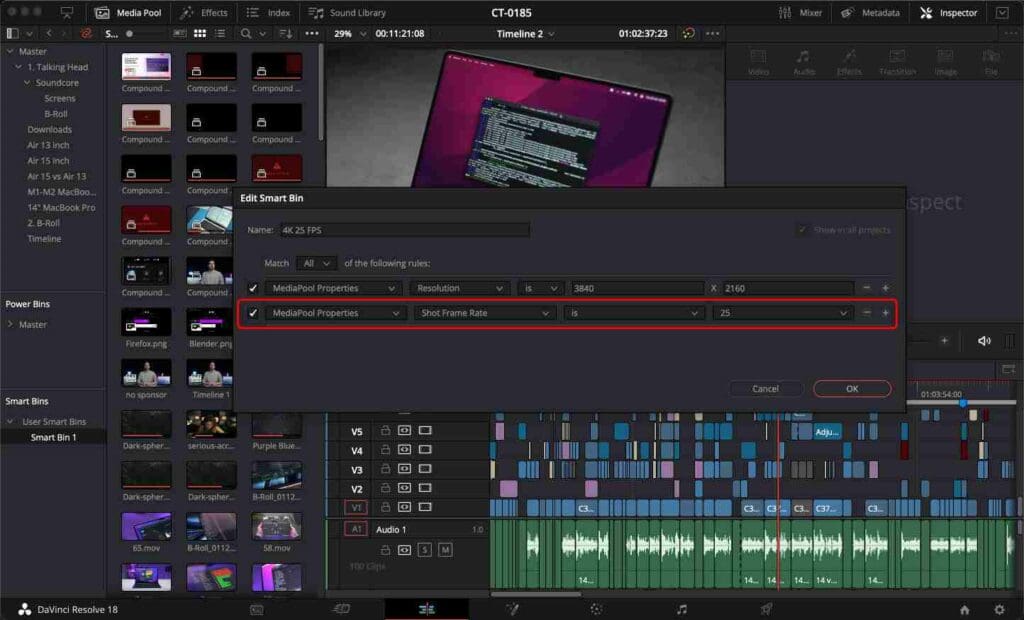
For example, let’s say you want a Smart Bin to contain all 4K footage that was shot in 25 frames per second.
In this case, you need to set two filters.
The first filter is to match 4K videos.
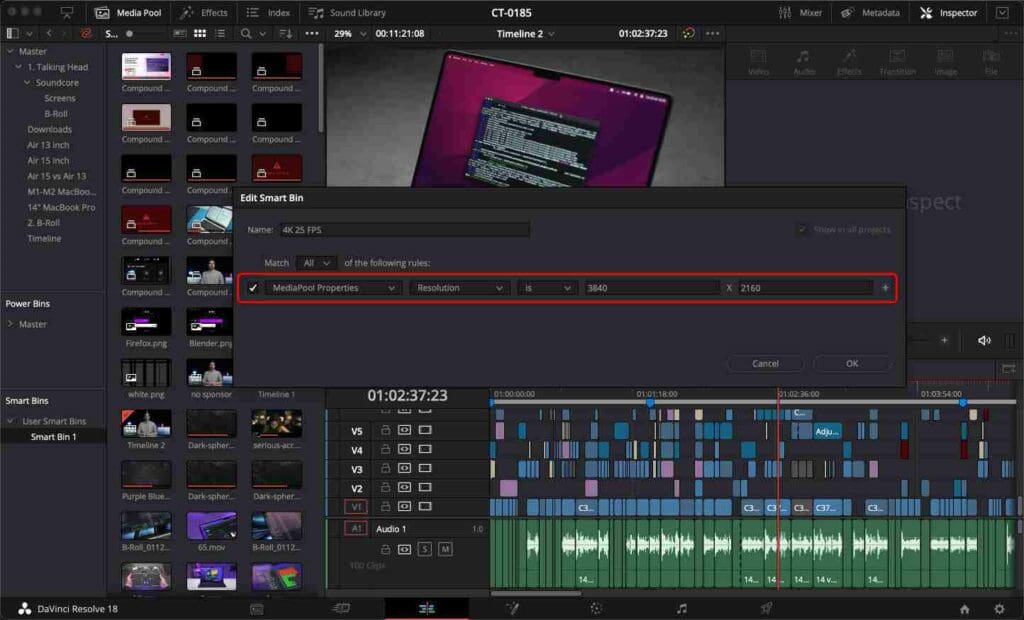
The second filter will additionally include videos with 25 frames per second frame rate. You can add this second option by clicking the little “+” button to the right of the first filter.
If your computer struggles to playback 4K videos, check out How to Use Proxies in DaVinci Resolve For Smooth Playback.
If you want a Smart Bin to select media matching any of the filters set, for “Match ___ of the following rules” set to “Any”.
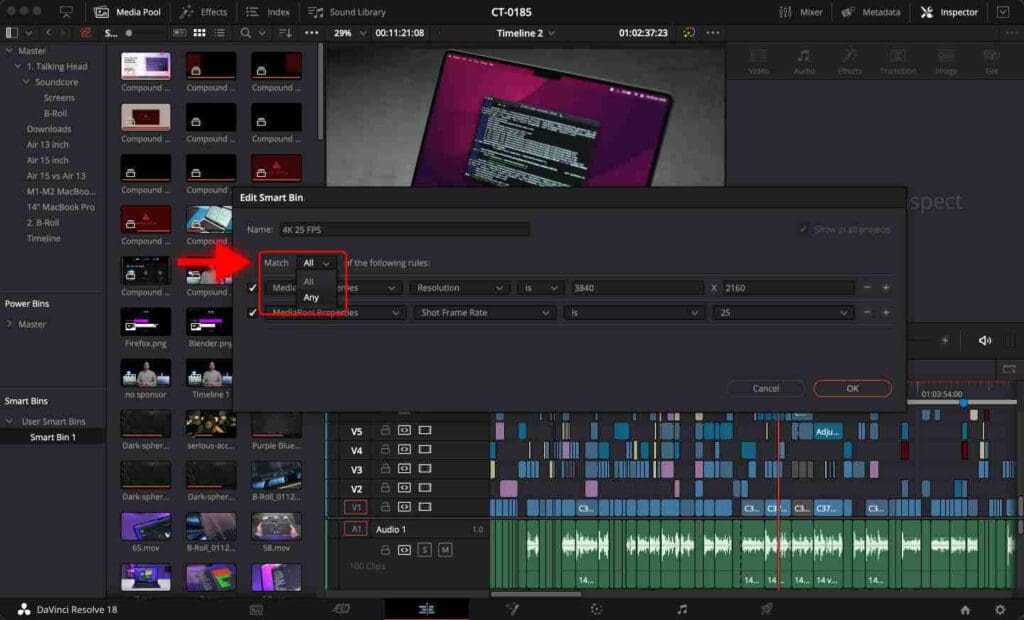
It is easier to think about it in terms of “And” and “Or”.
“All” = And: – media must match all filters of the Smart List.
“Any” = Or: Media must match at least one filter of the Smart Bin.
Before starting the render, check out the 2 Best Ways to Export Videos in DaVinci Resolve.
And if you are looking for more ways to speed up your editing workflow, make sure to check out How I Improve My Editing Workflow in DaVinci Resolve Using Power Bins.
Frequently Asked Questions
How to edit the criteria for a Smart Bin in DaVinci Resolve?
To edit the criteria for a Smart Bin, right-click on the Smart Bin and select “Edit Smart Bin” from the dropdown menu.
Why are clips not showing up in a Smart Bin?
If your clips aren’t showing up in a Smart Bin, make sure that the criteria you’ve set for the Smart Bin match the properties or metadata of your clips.


