A big portion of the video production process consists of rendering, especially if you’re working on a large video project. As a content creator or professional editor, you may often find yourself needing to render multiple videos simultaneously to meet deadlines and maximize productivity.
For example – when you have multiple video projects you want to render, it’s extremely tedious to start the render for each project, wait, and then repeat the process over and over.
Or, you might want to have multiple variations of a single video.
Fortunately, DaVinci Resolve has a solution.
In this step-by-step tutorial, I will guide you through the process of rendering multiple videos at once in DaVinci Resolve, allowing you to save time and streamline your editing workflow.
By the way, if you’re just wanting to export individual clips in DaVinci Resolve, you can do that too.
Where are your videos?
First thing that you need to figure out is where are the videos you want to render. There are usually two cases.
For example, you may have several timelines with different videos that you want to render. That might be useful if you want to render multiple variations of a single video. So you just copy the video to a new timeline and make the required edits to the video. For this case you might find useful the Render Option 1.
Another case is when you want to render different parts of a single video separately in a single timeline. For this case you better go with the Render Option 2
Render Multiple Videos at Once Using Timelines
Before starting the render, check out 2 Best Ways to Export Videos in DaVinci Resolve.
To render multiple videos at once you can add each video to a separate timeline.
Once you add each video to it’s separate timeline, it’s time to render them all.
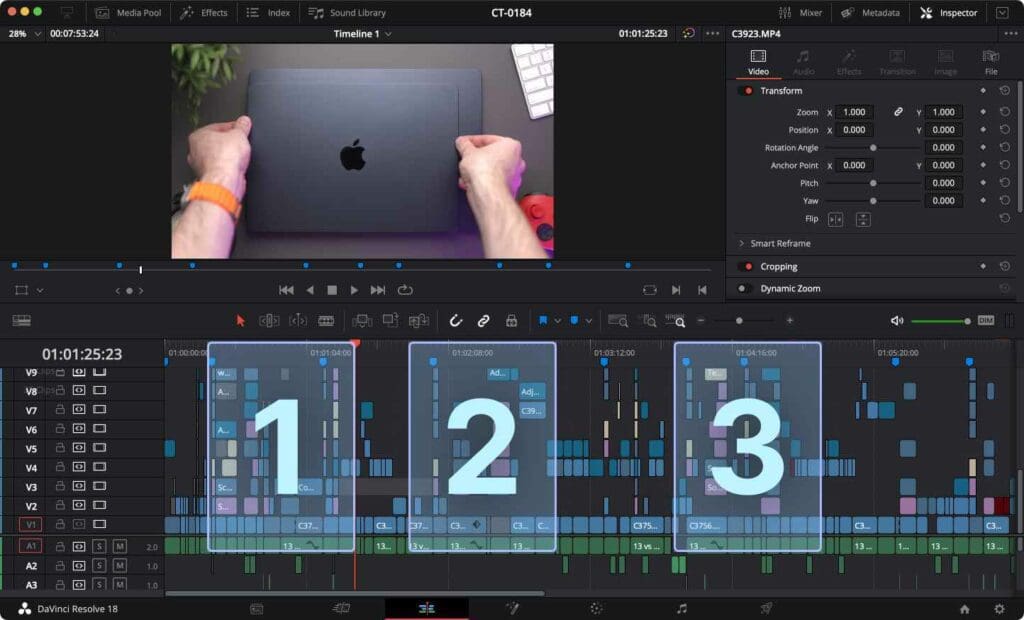
You might see something similar to this.
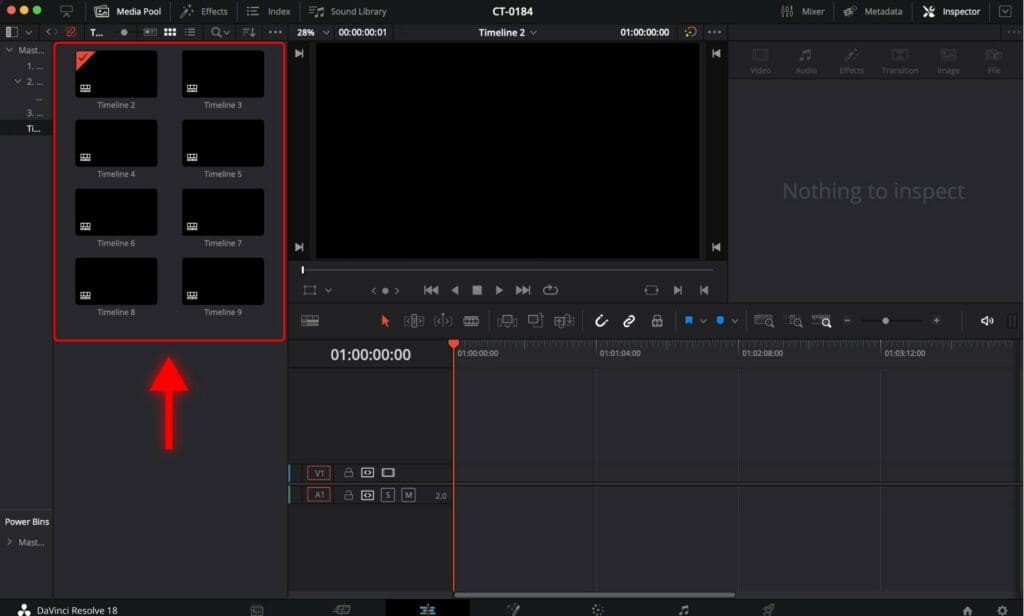
As you can see I added all my timelines into a single folder.
Step 1: Double click on a timeline. You will see that it has been opened.
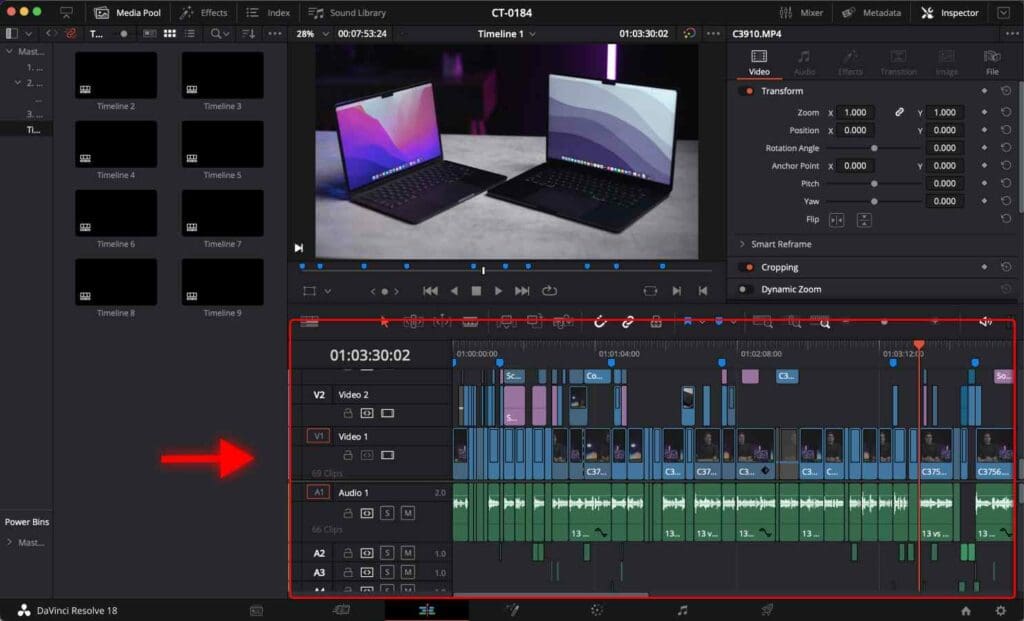
Step 2: Go to the “Deliver” page.

Step 3: Rename the video
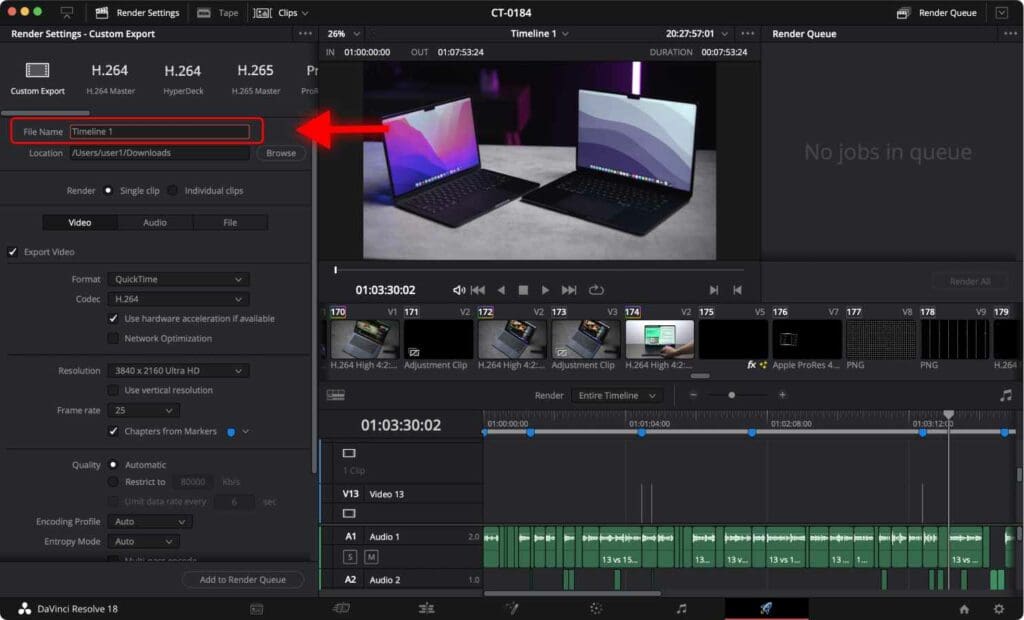
Step 4: Set a location on your computer where you want the video to be saved.
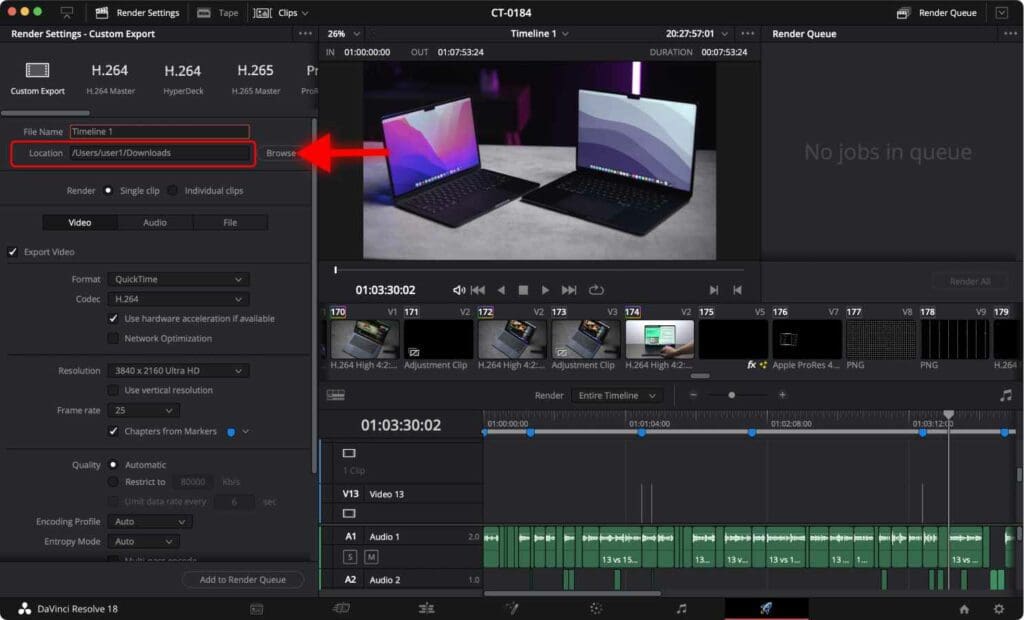
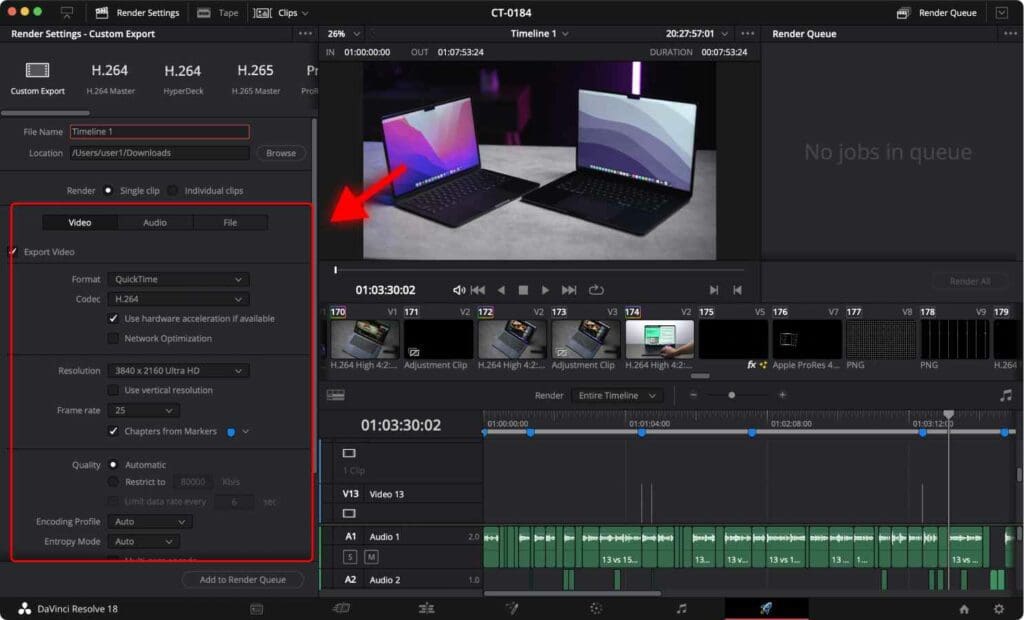
Now you can change the render settings to ensure your rendered video will be high quality. Make sure you check out the Best DaVinci Resolve Render Settings For Youtube.
Step 5: Click “Add to Render Queue”.

You can see on the right that a rendering job has been added.

Now, go back to the edit page, repeat the steps above for each timeline.
Once you’ve added each timeline to the render queue, you should see something similar to what I have in this screenshot. Three timelines are ready to be rendered.
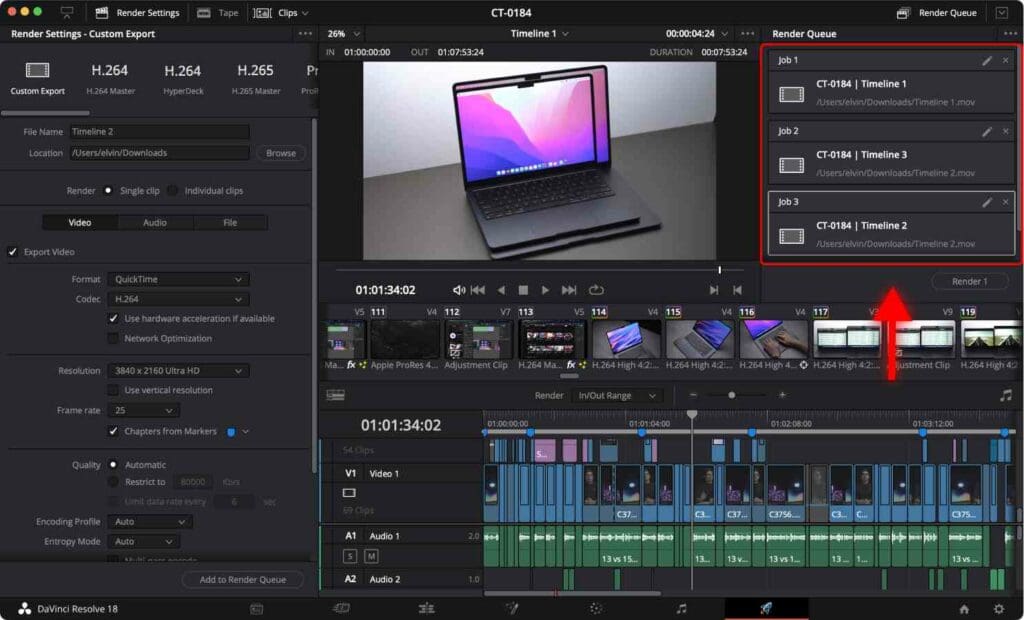
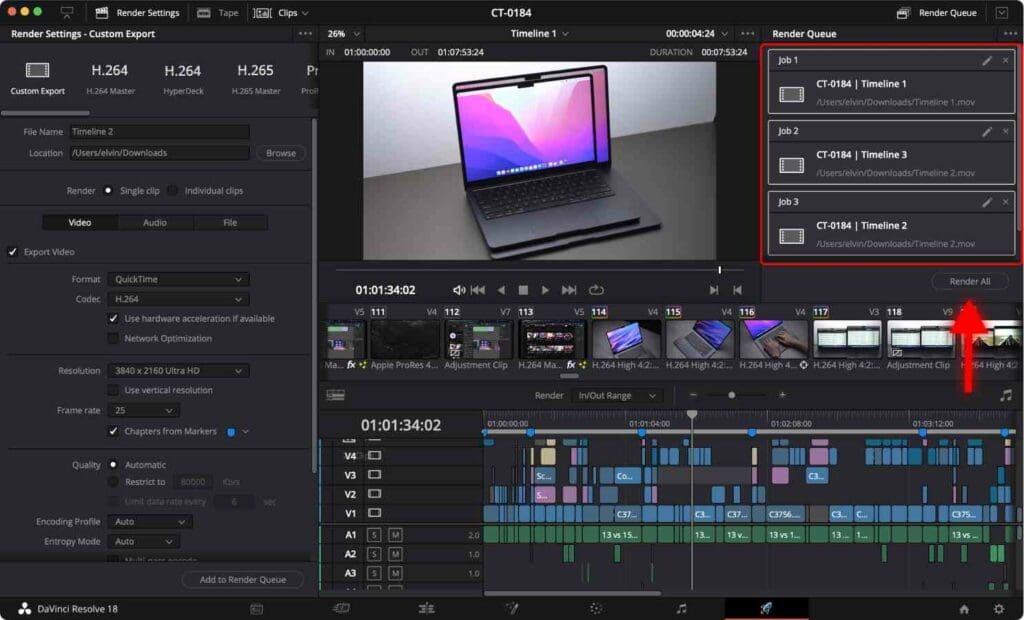
Step 6: Select everything in the Render Queue and click “Render All”. You can select everything by holding the “Command” key and clicking on each entity in render queue.
To learn some of the most frequently used DaVinci Resolve shortcuts for macOS and Windows, check out 70 Easy DaVinci Resolve Shortcuts You Can’t Afford to Miss.
Now DaVinci Resolve will start rendering each timeline into a separate video file.
Render Multiple Videos at Once Using “In” and “Out” Points
Let’s say you want to render several parts of a single video in DaVinci Resolve.
Instead of going through the tedious process of creating new timelines, copying and pasting clips, and potentially losing some clips along the way, there is a simpler way.
Step 1: Use “In” and “Out” points.
In DaVinci Resolve, in and out points are markers used to define specific sections or ranges within a media clip or timeline. These markers help you identify the starting and ending points of a selected portion of your footage, which can be used for various editing purposes such as trimming or exporting specific segments.
In Point: The in point marks the starting position of a selected range within a media clip or timeline. By setting an in point, you specify the exact frame where you want a particular edit to begin. In our case, the “In” point will determine the exact frame on our timeline at which the video will start rendering.
You can set the “In” point by pressing “I” on your keyboard.
You may need to zoom in or zoom out of the timeline to make sure your “In” point is in the correct position.

Out Point: The out point marks the ending frame of a selected range within a media clip or timeline. It indicates the frame or timecode where you want a specific action to finish.
You can set the “Out” point by pressing “O” on your keyboard.
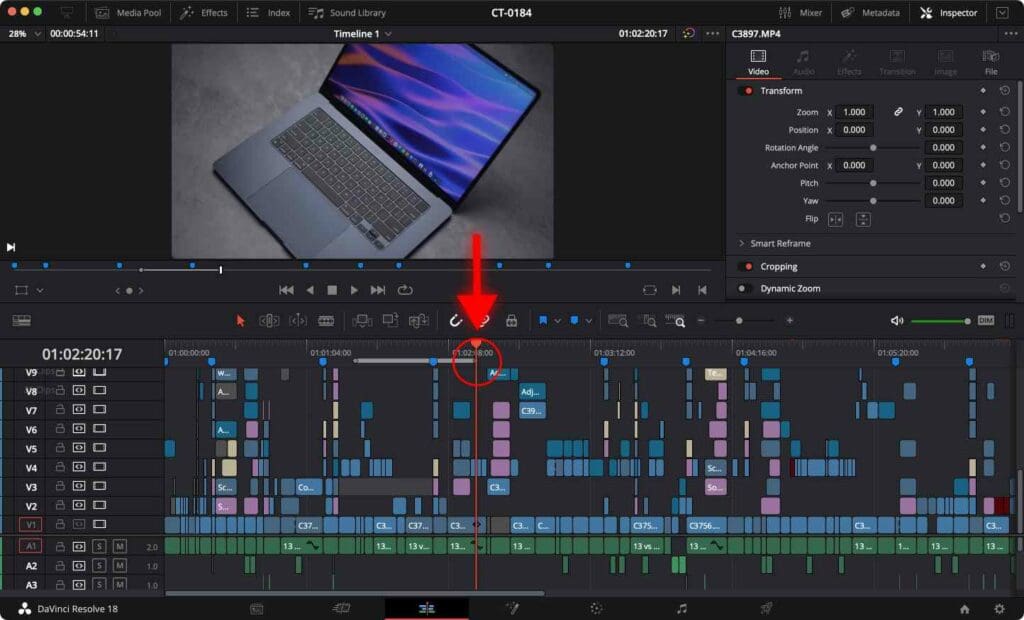
As you can see on the image above I have set the “In” (starting) point and the “Out” (end) point on the timeline.
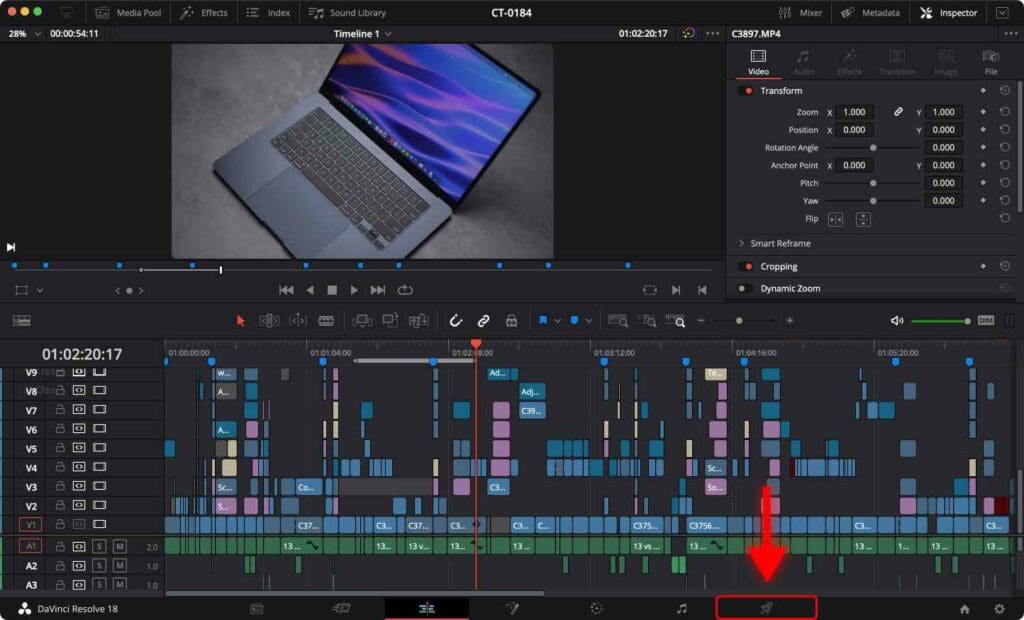
Step 2: Go to “Deliver” page.
You can see that the part between “In” and “Out” points on the timeline is highlighted (the grey bar), showing you what exactly is going to be rendered.

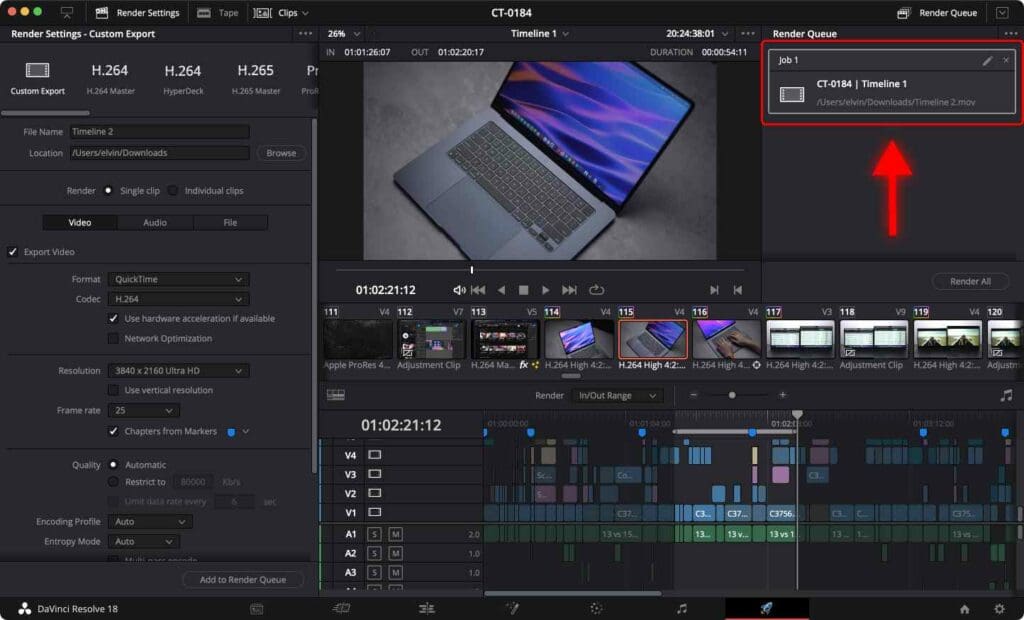
Step 3: Click “Add to Render Queue”.

As you can see on the right, the render job has been added.
You can add another job/video. Go back to the “Edit” page. Set new In and Out point in the timeline.
Go to “Deliver” page.
Click “Add to Render Queue”.
Now you will have two separate videos that are going to render from a single timeline.
Repeat the process.
Step 4: Once you are done, select everything in the Render Queue and click “Render All”.
You can select everything by holding the “Command” key on macOS or “Control” key on Windows and click on each entity in render queue.
Once the render is finished, in this example there are three separate videos rendered at once from a single timeline.

And that is how you can streamline the render process in DaVinci Resolve to save you time and effort. Using these methods, you’ll be able to render multiple videos at once with no input from you, and even render multiple specific sections within videos.
Frequently Asked Questions
How to remove In and Out points in DaVinci Resolve?
In and Out points look like a white line over the top of the timeline. To remove In and Out points, go to “Mark” and select “Clear In and Out” or use the keyboard shortcut “Option + X”.
Is it possible to render a portion of a video in DaVinci Resolve?
You can render a specific part of the video using In and Out points.
Go to the frame where you want your video to start, press “I” to set an “In” point. Then go to the frame in timeline where you want your video to end and click “O”. Go to the “Deliver” page, click “Add to Render Queue” and Click “Render All”
How to render multiple videos at once in DaVinci Resolve?
There are two ways to render several videos in DaVinci Resolve. One way is to create a separate timeline for each video that you want to render, and paste the video into that timeline. Then go to the “Deliver” page and add the timeline to the Render Queue. Once you’ve added each video to the
Render Queue, select all the videos in Render Queue and click “Render All”.
If the video is in one timeline, you can set what parts of the video you want to render using “In” and “Out” points on the timeline to set the starting point and finishing point.


